Sapio Studio Payment Pool Walkthrough
Day 18: Rubin's Bitcoin Advent Calendar
15 Dec 2021Welcome to day 18 of my Bitcoin Advent Calendar. You can see an index of all the posts here or subscribe at judica.org/join to get new posts in your inbox
Today’s post will be a pretty different format that usual, it’s basically going to be a pictorial walk through of the Sapio Studio, the frontend tool for Sapio projects. As an example, we’ll go through a Payment Pool contract to familiarize ourselves.
I wanted to put this post here, before we get into some more applications, because I want you to start thinking past “cool one-off concepts we can implement” and to start thinking about reusable components we can build and ship into a common Bitcoin Smart Contract software (Sapio Studio or its successors).
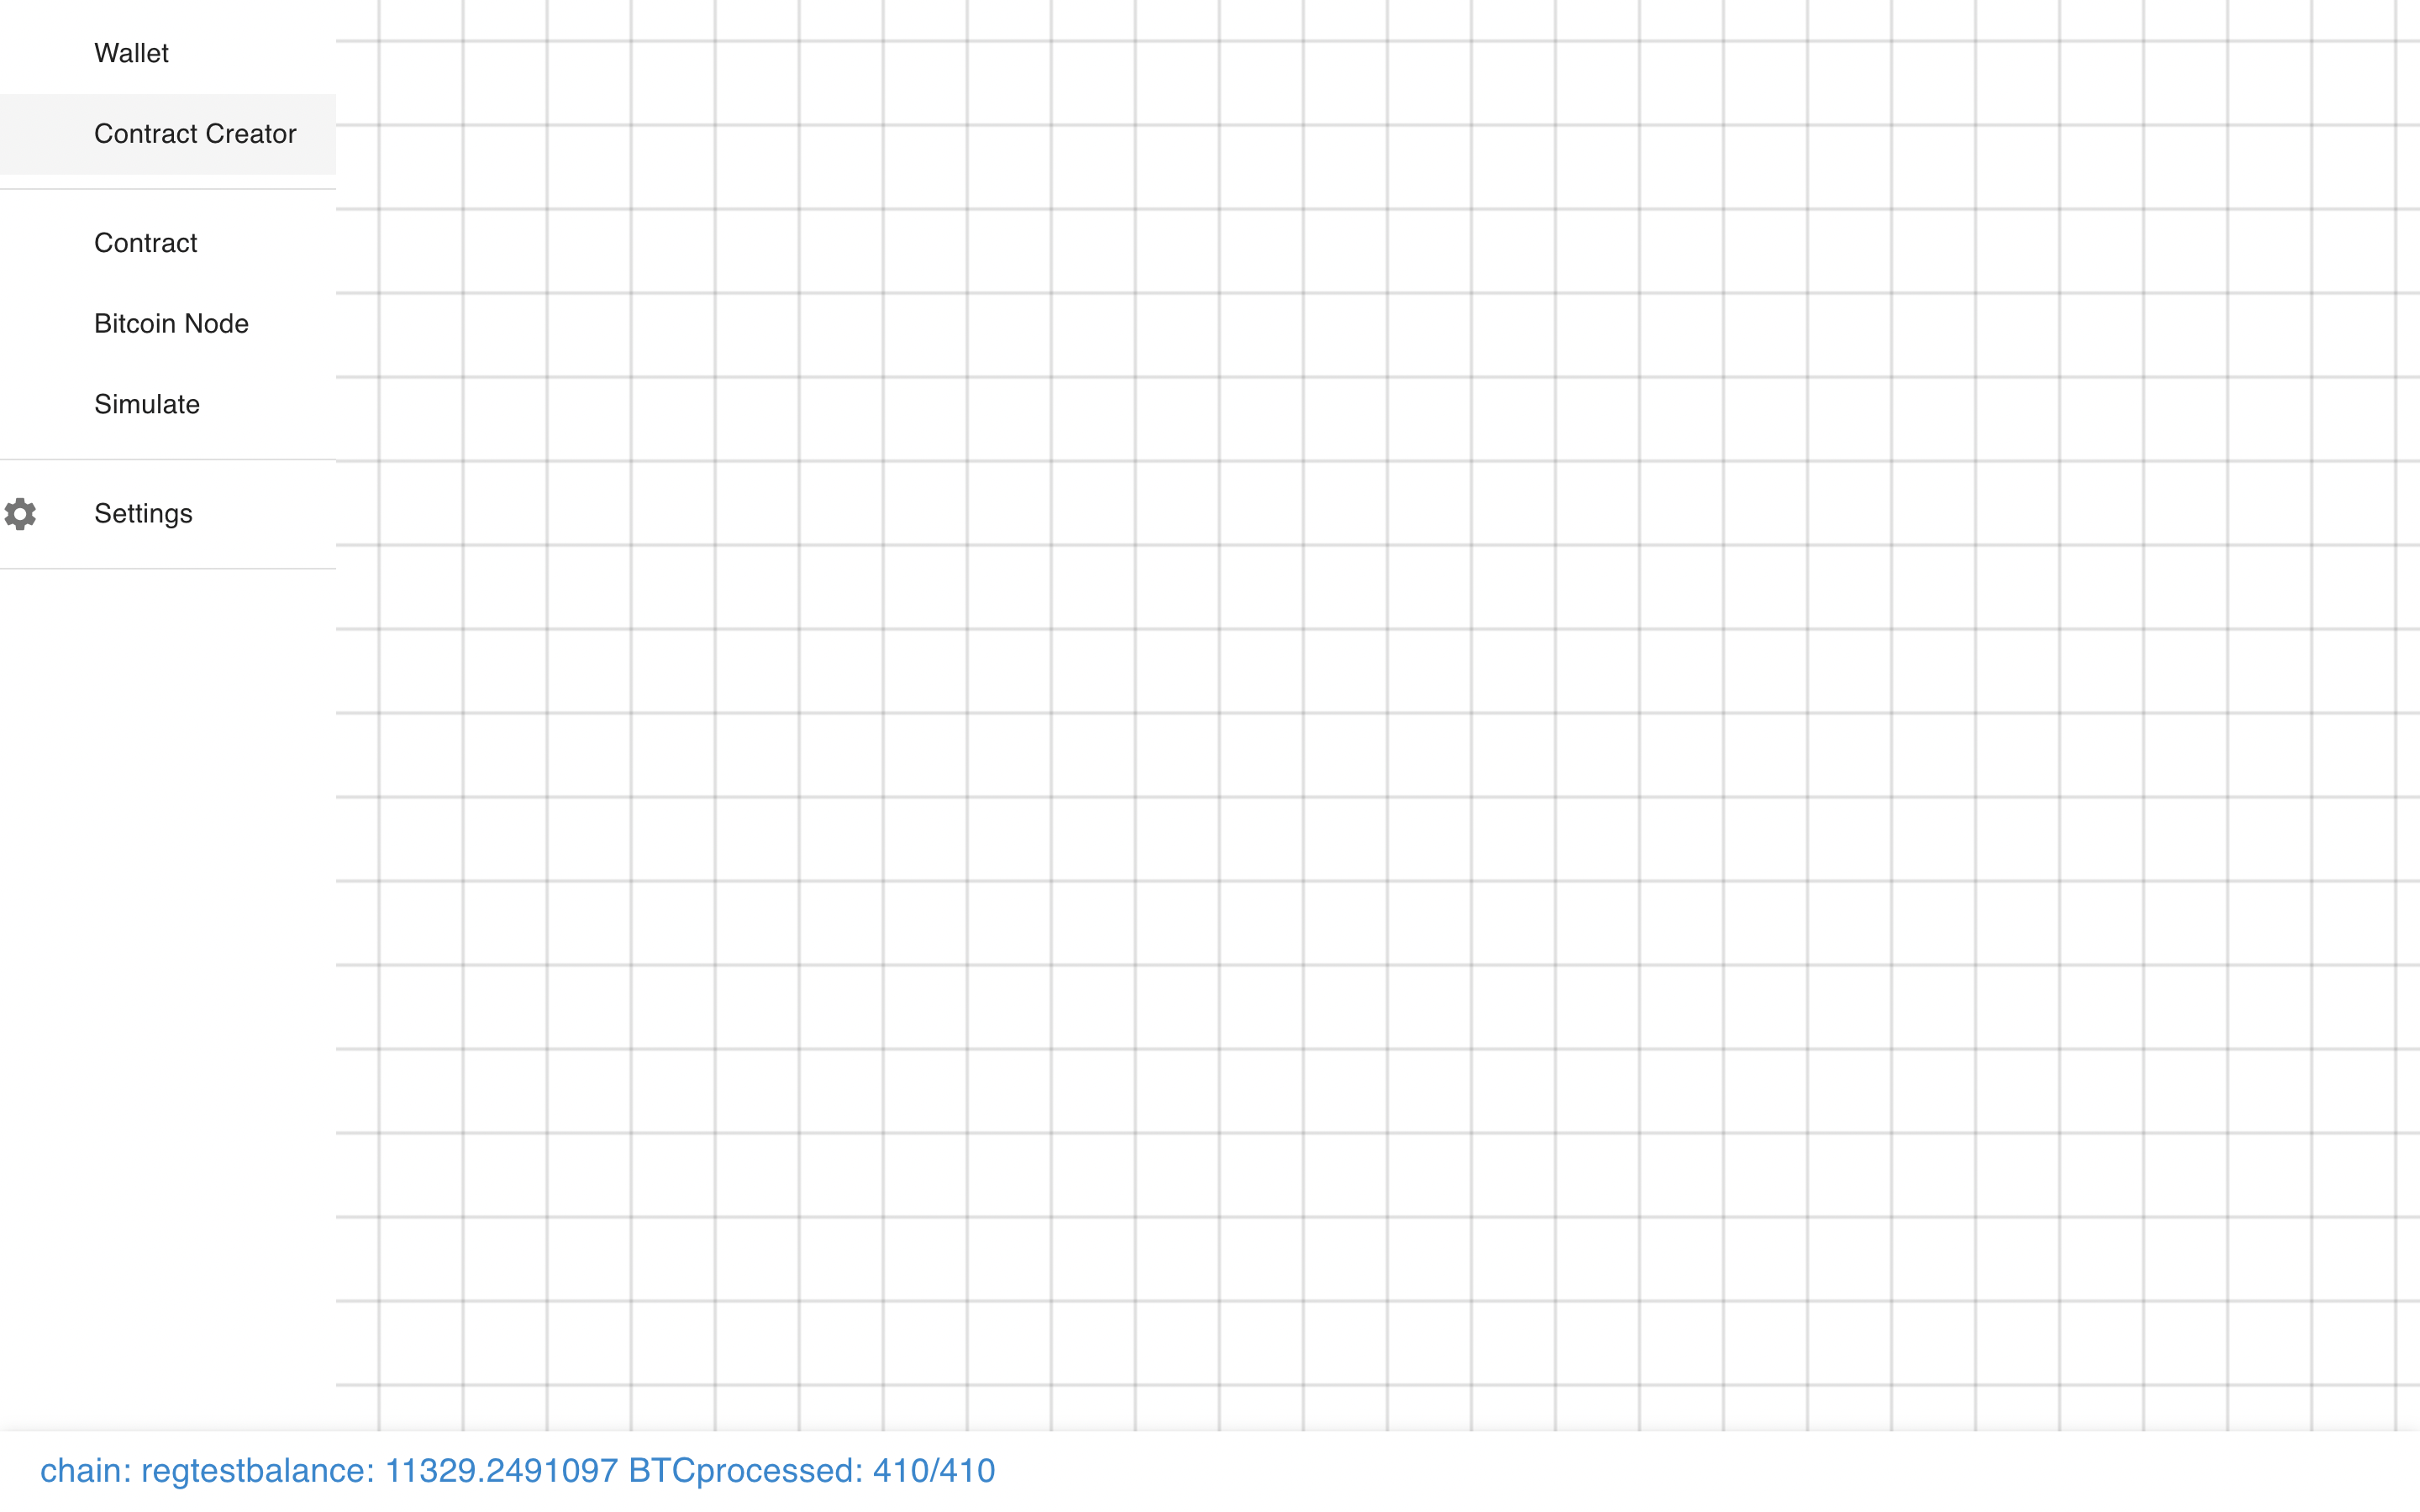
At it’s core, Sapio Studio is just a wallet frontend to Bitcoin Core.
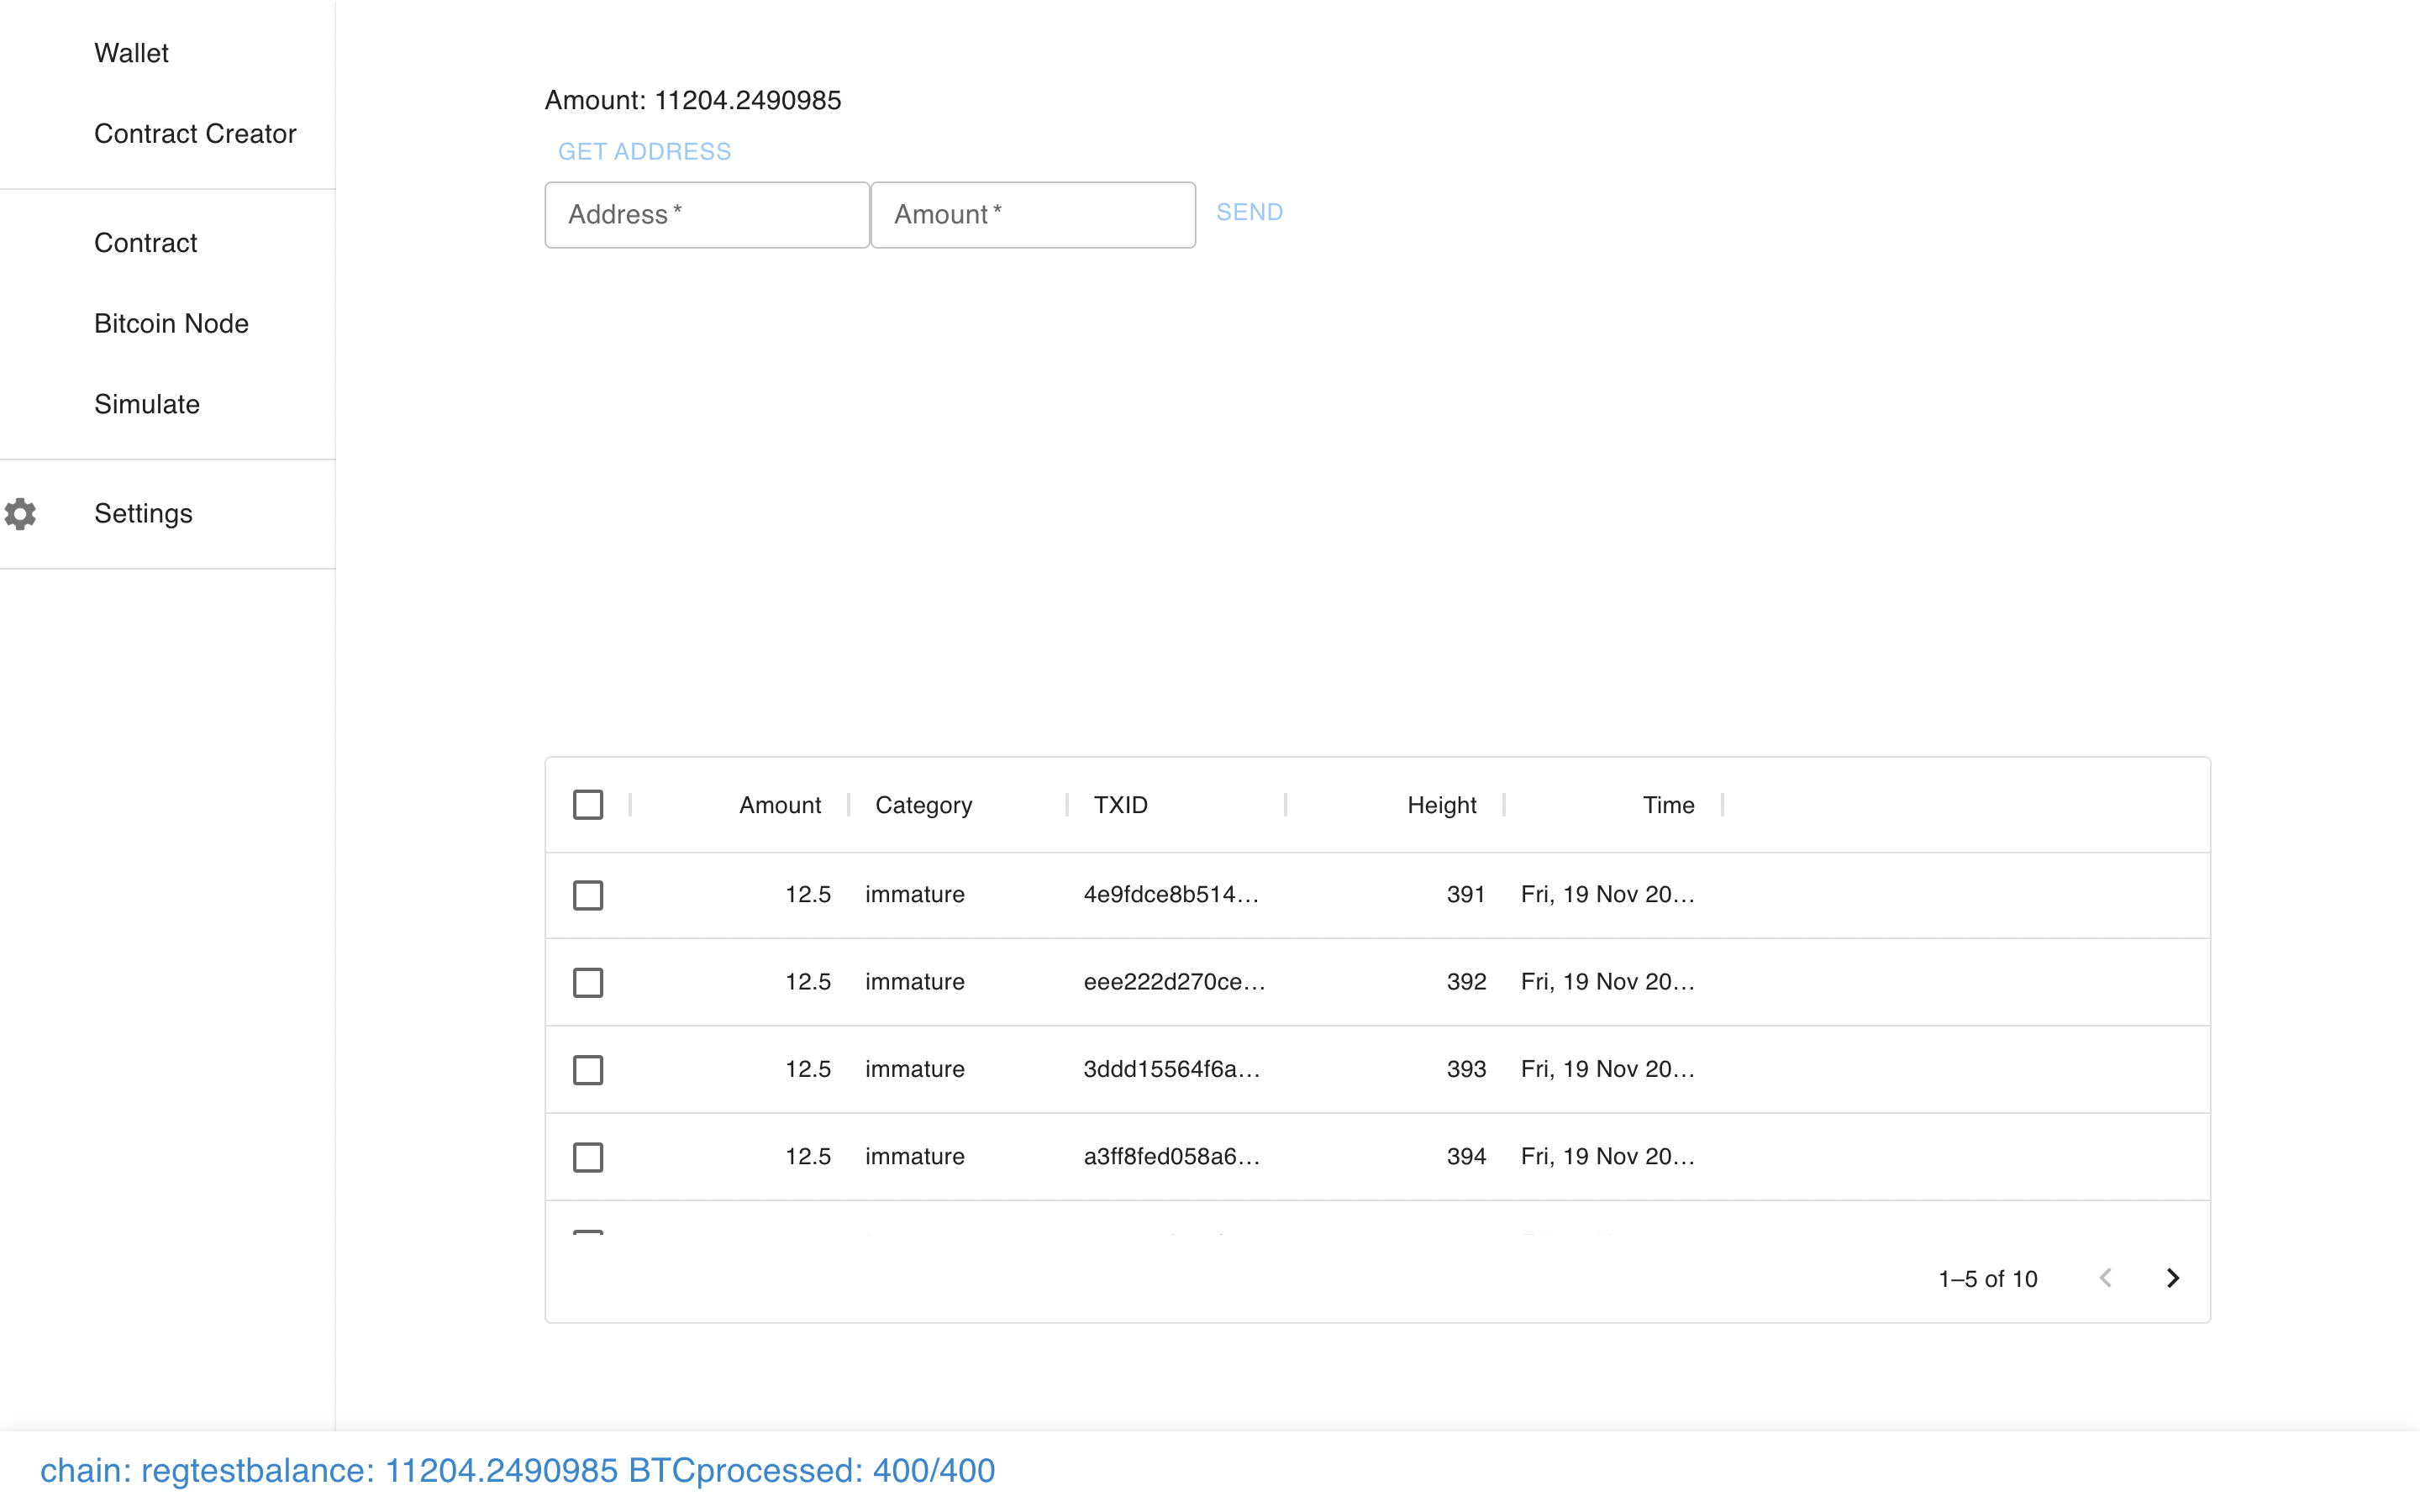
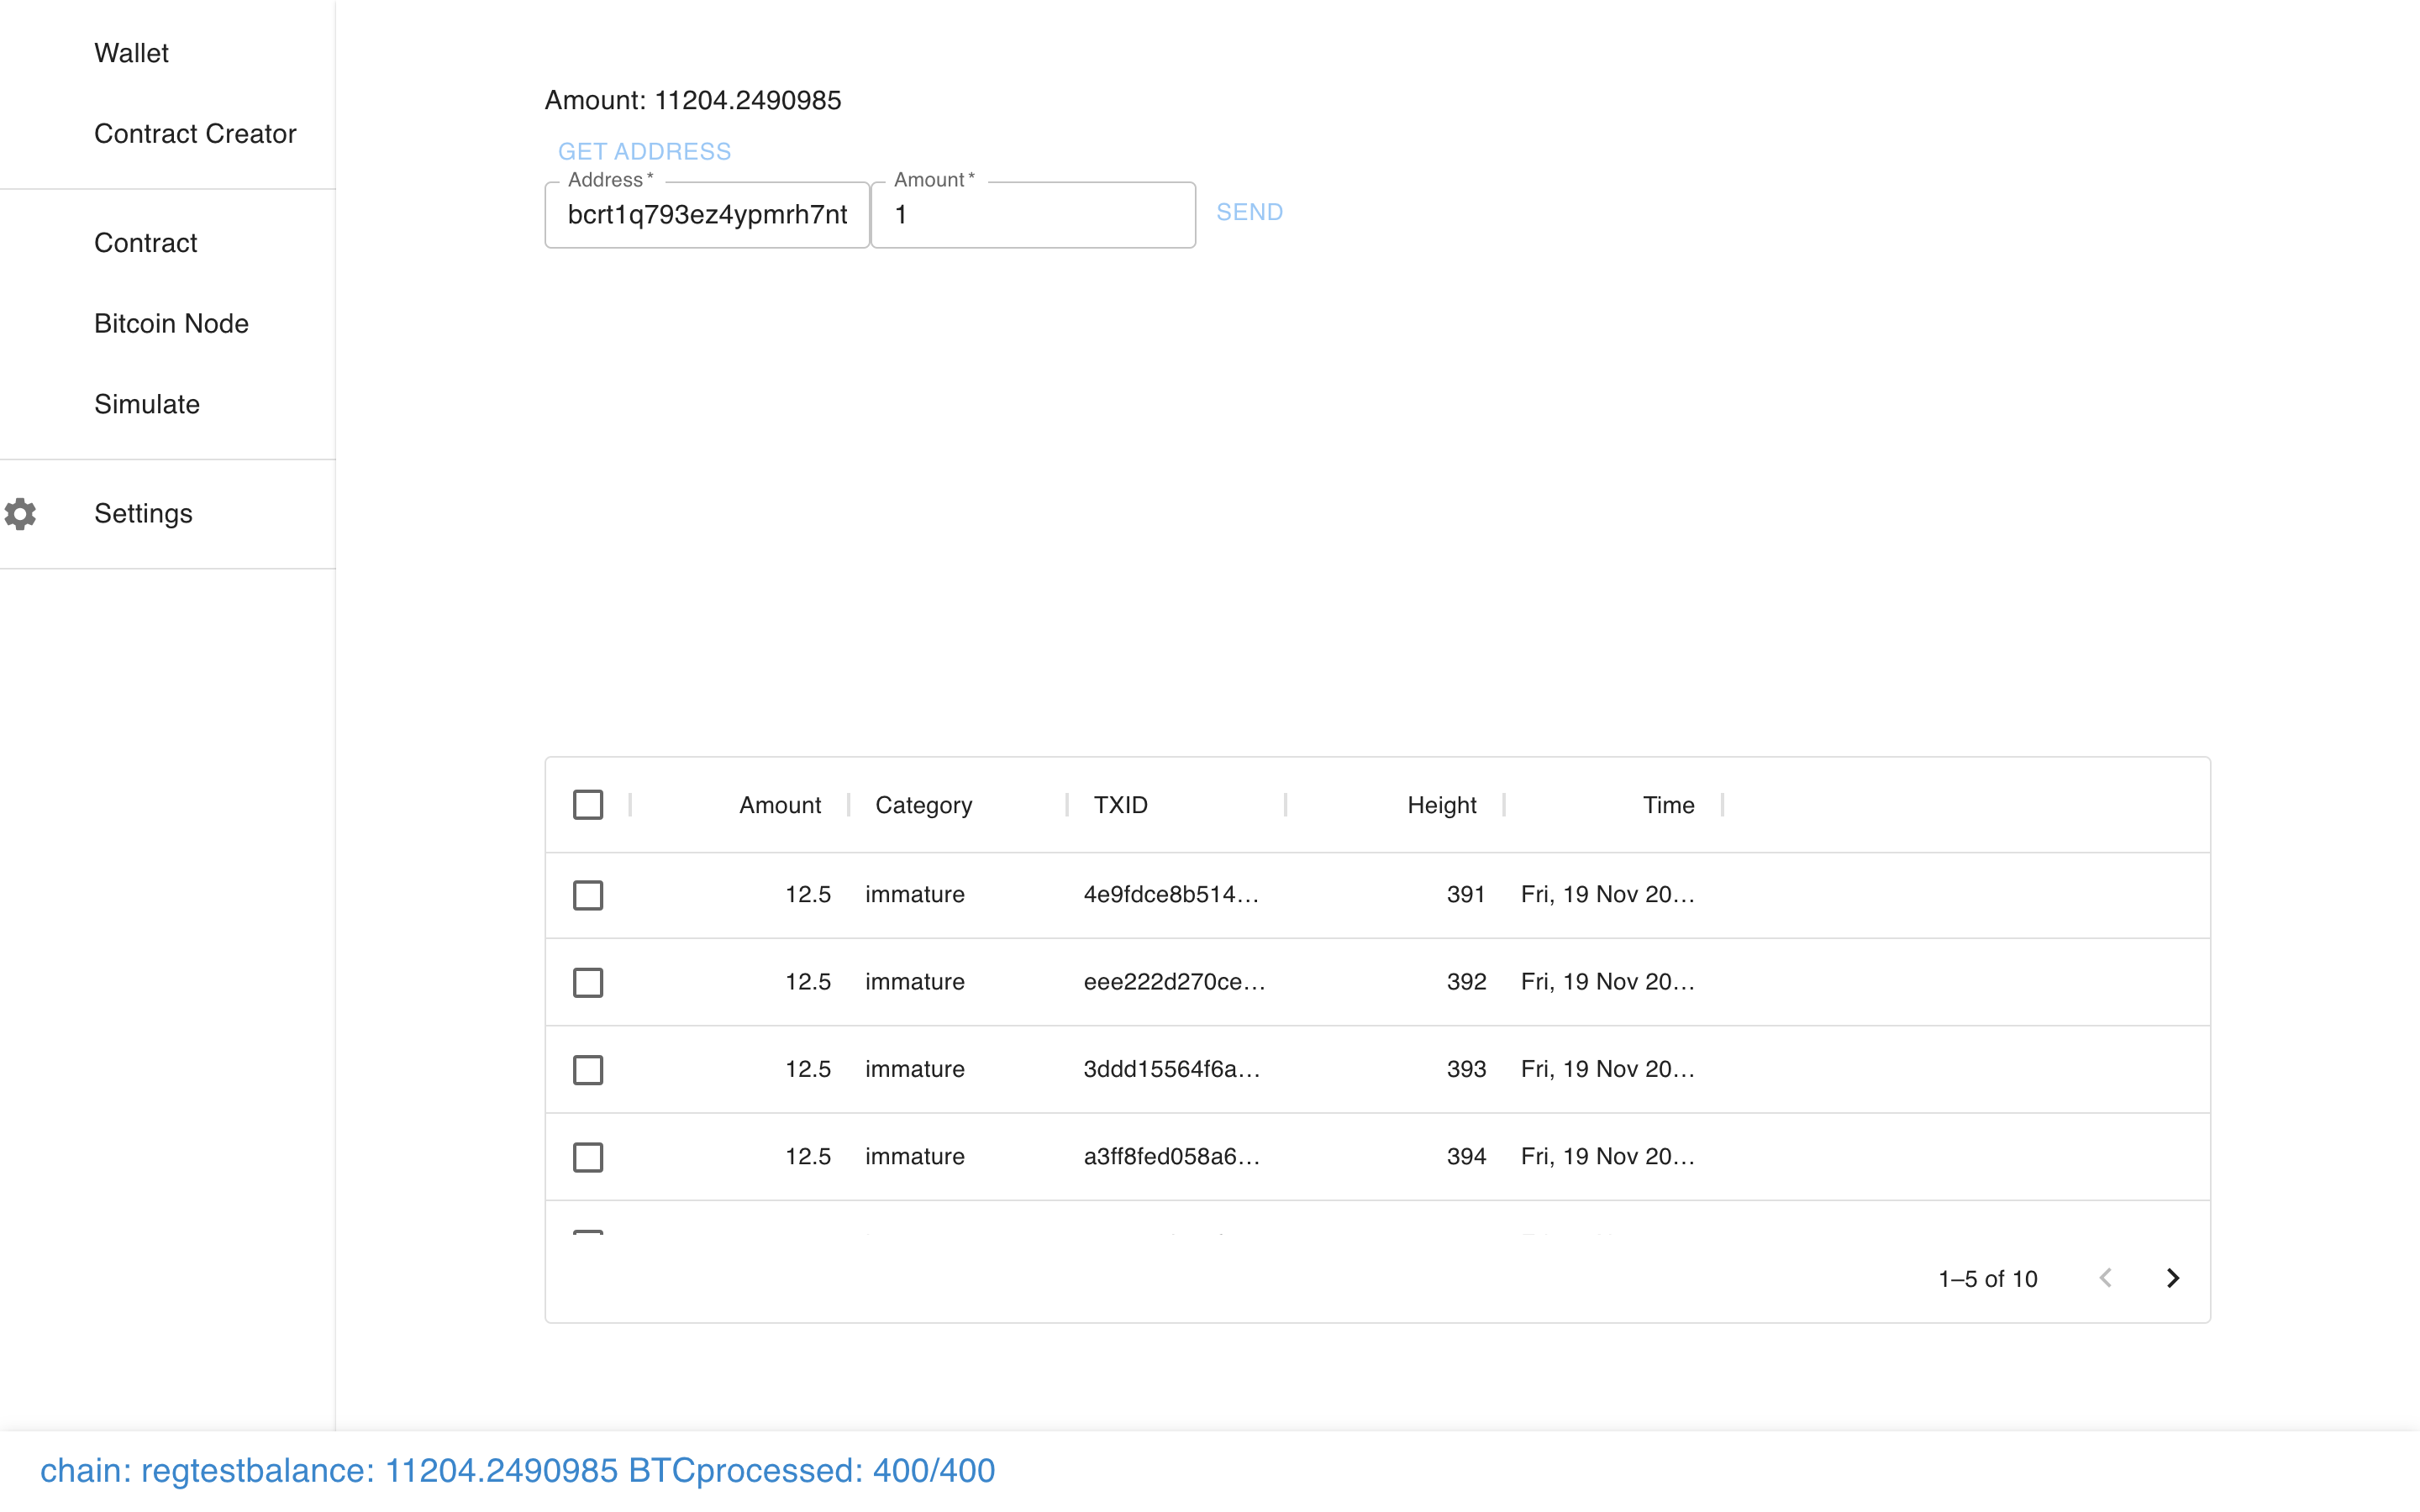
You can make a transaction, just like normal…
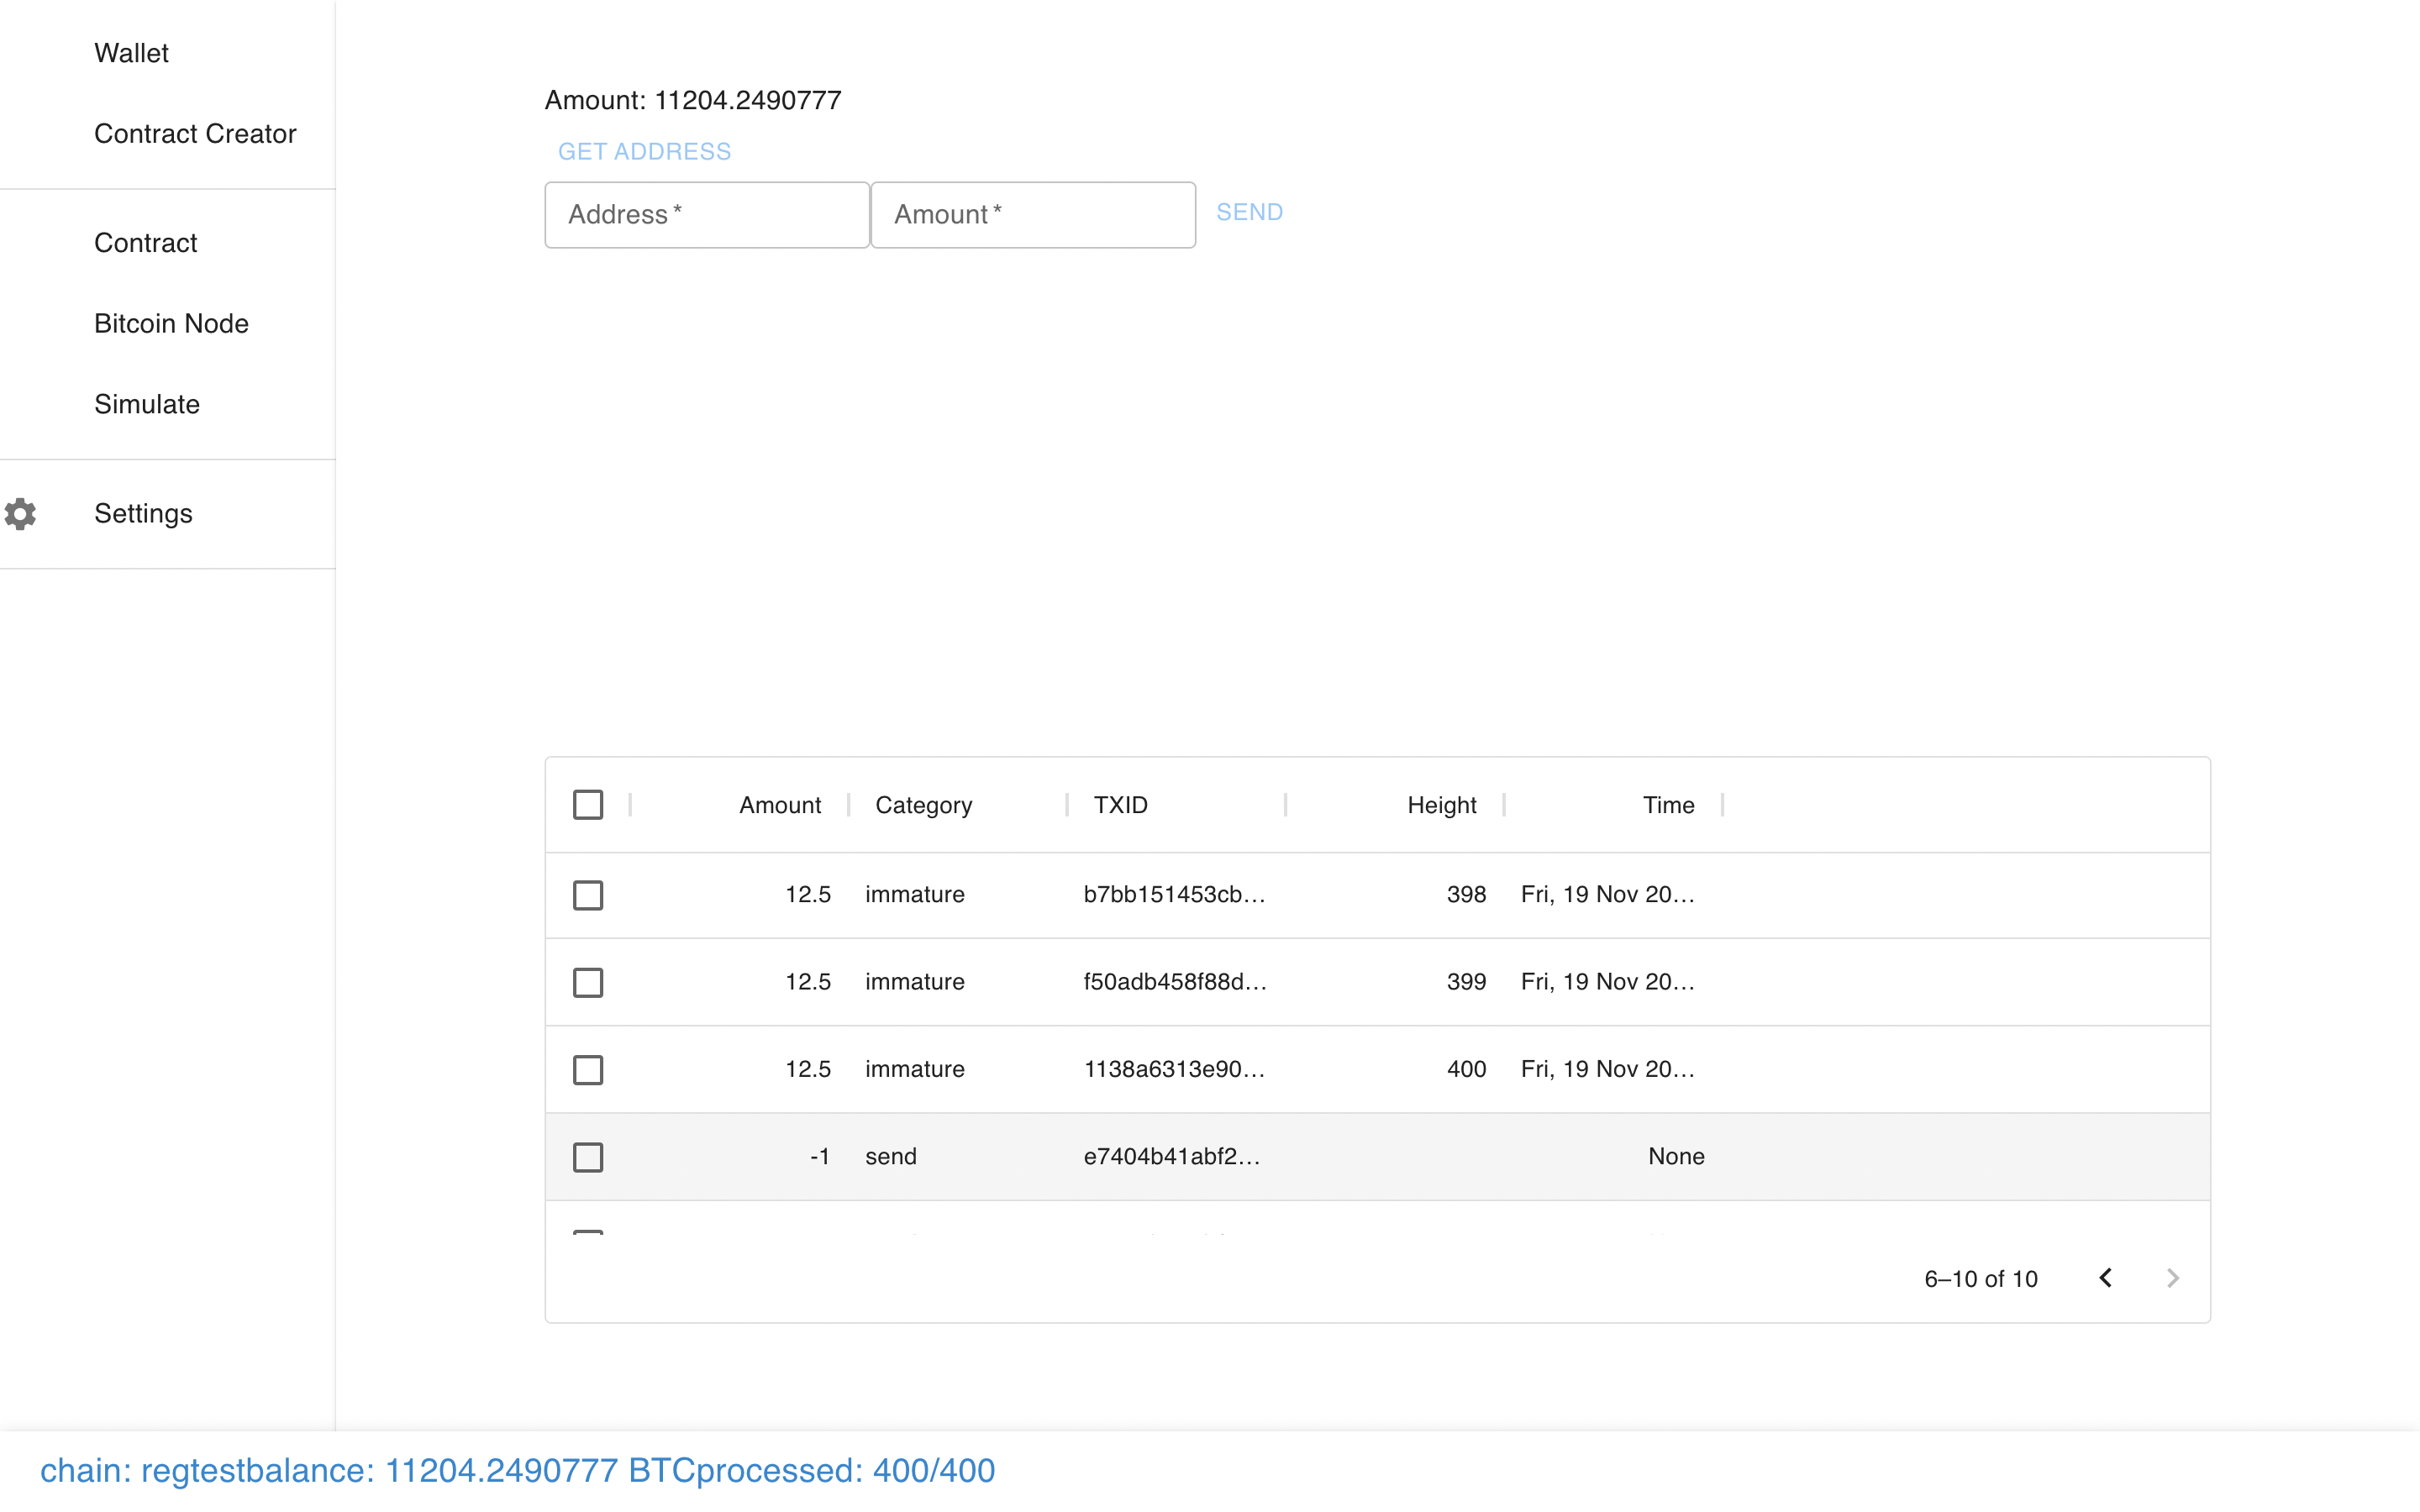
And see it show up in the pending transactions…
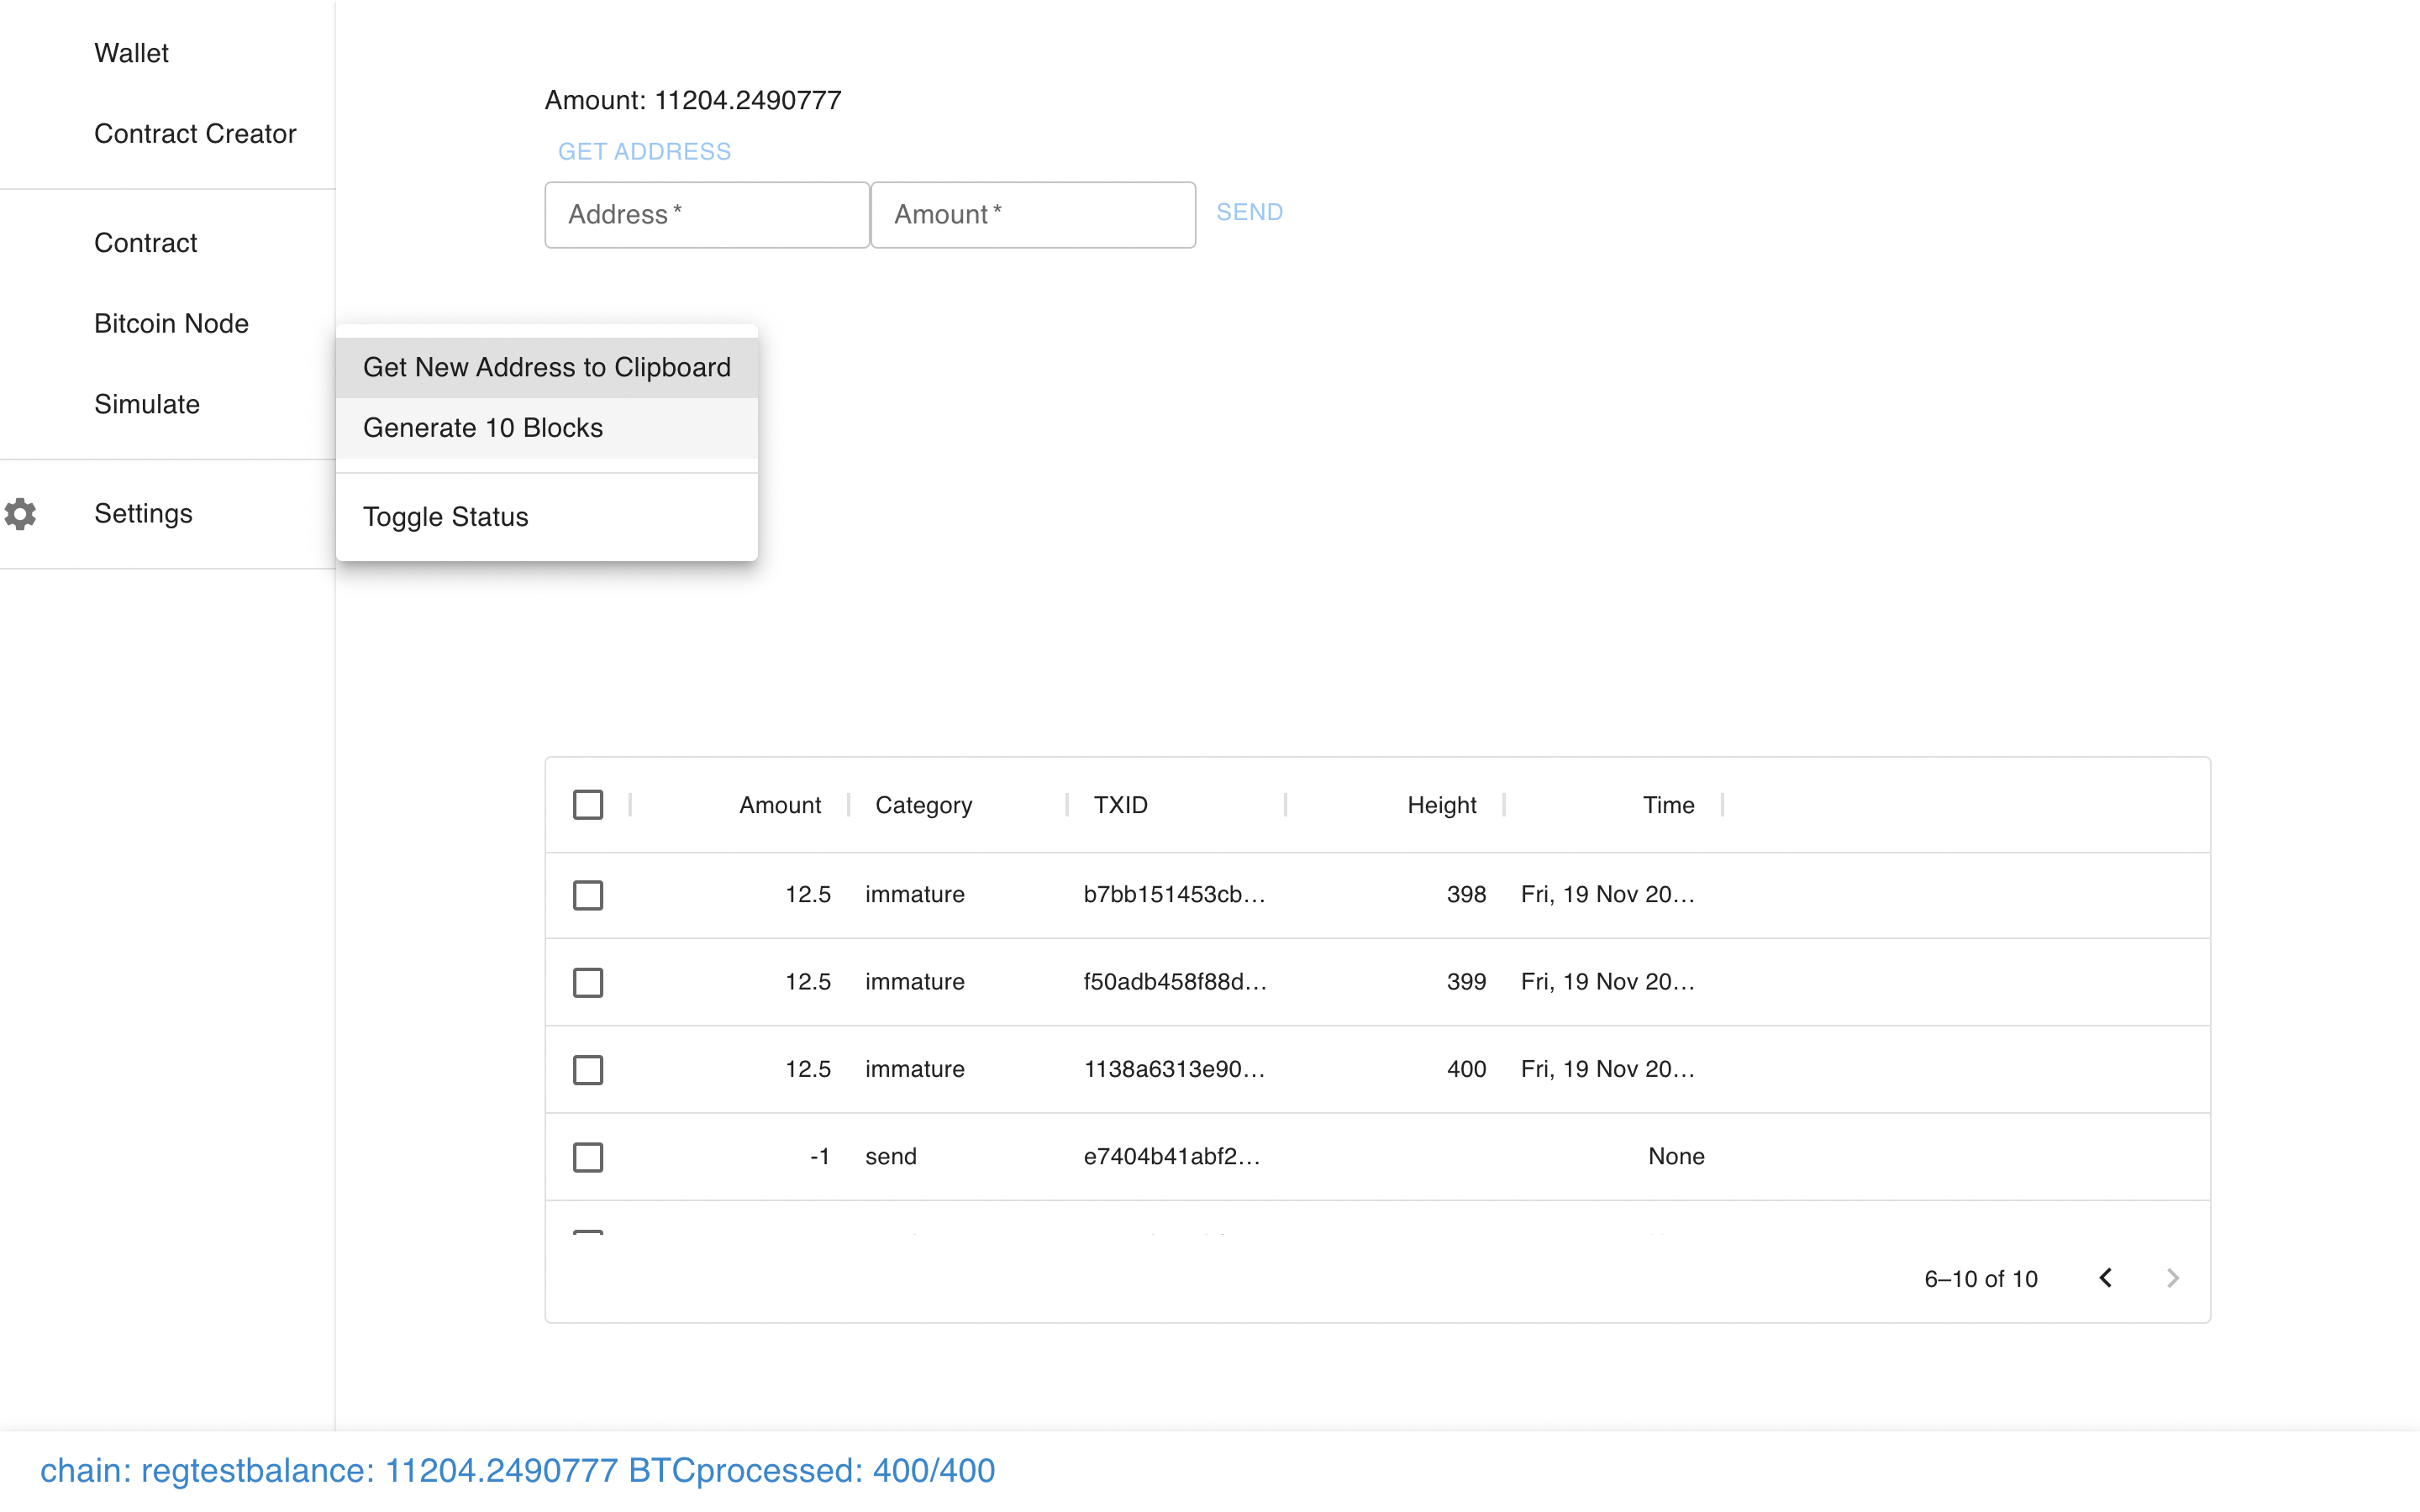
And even mine some regtest blocks.
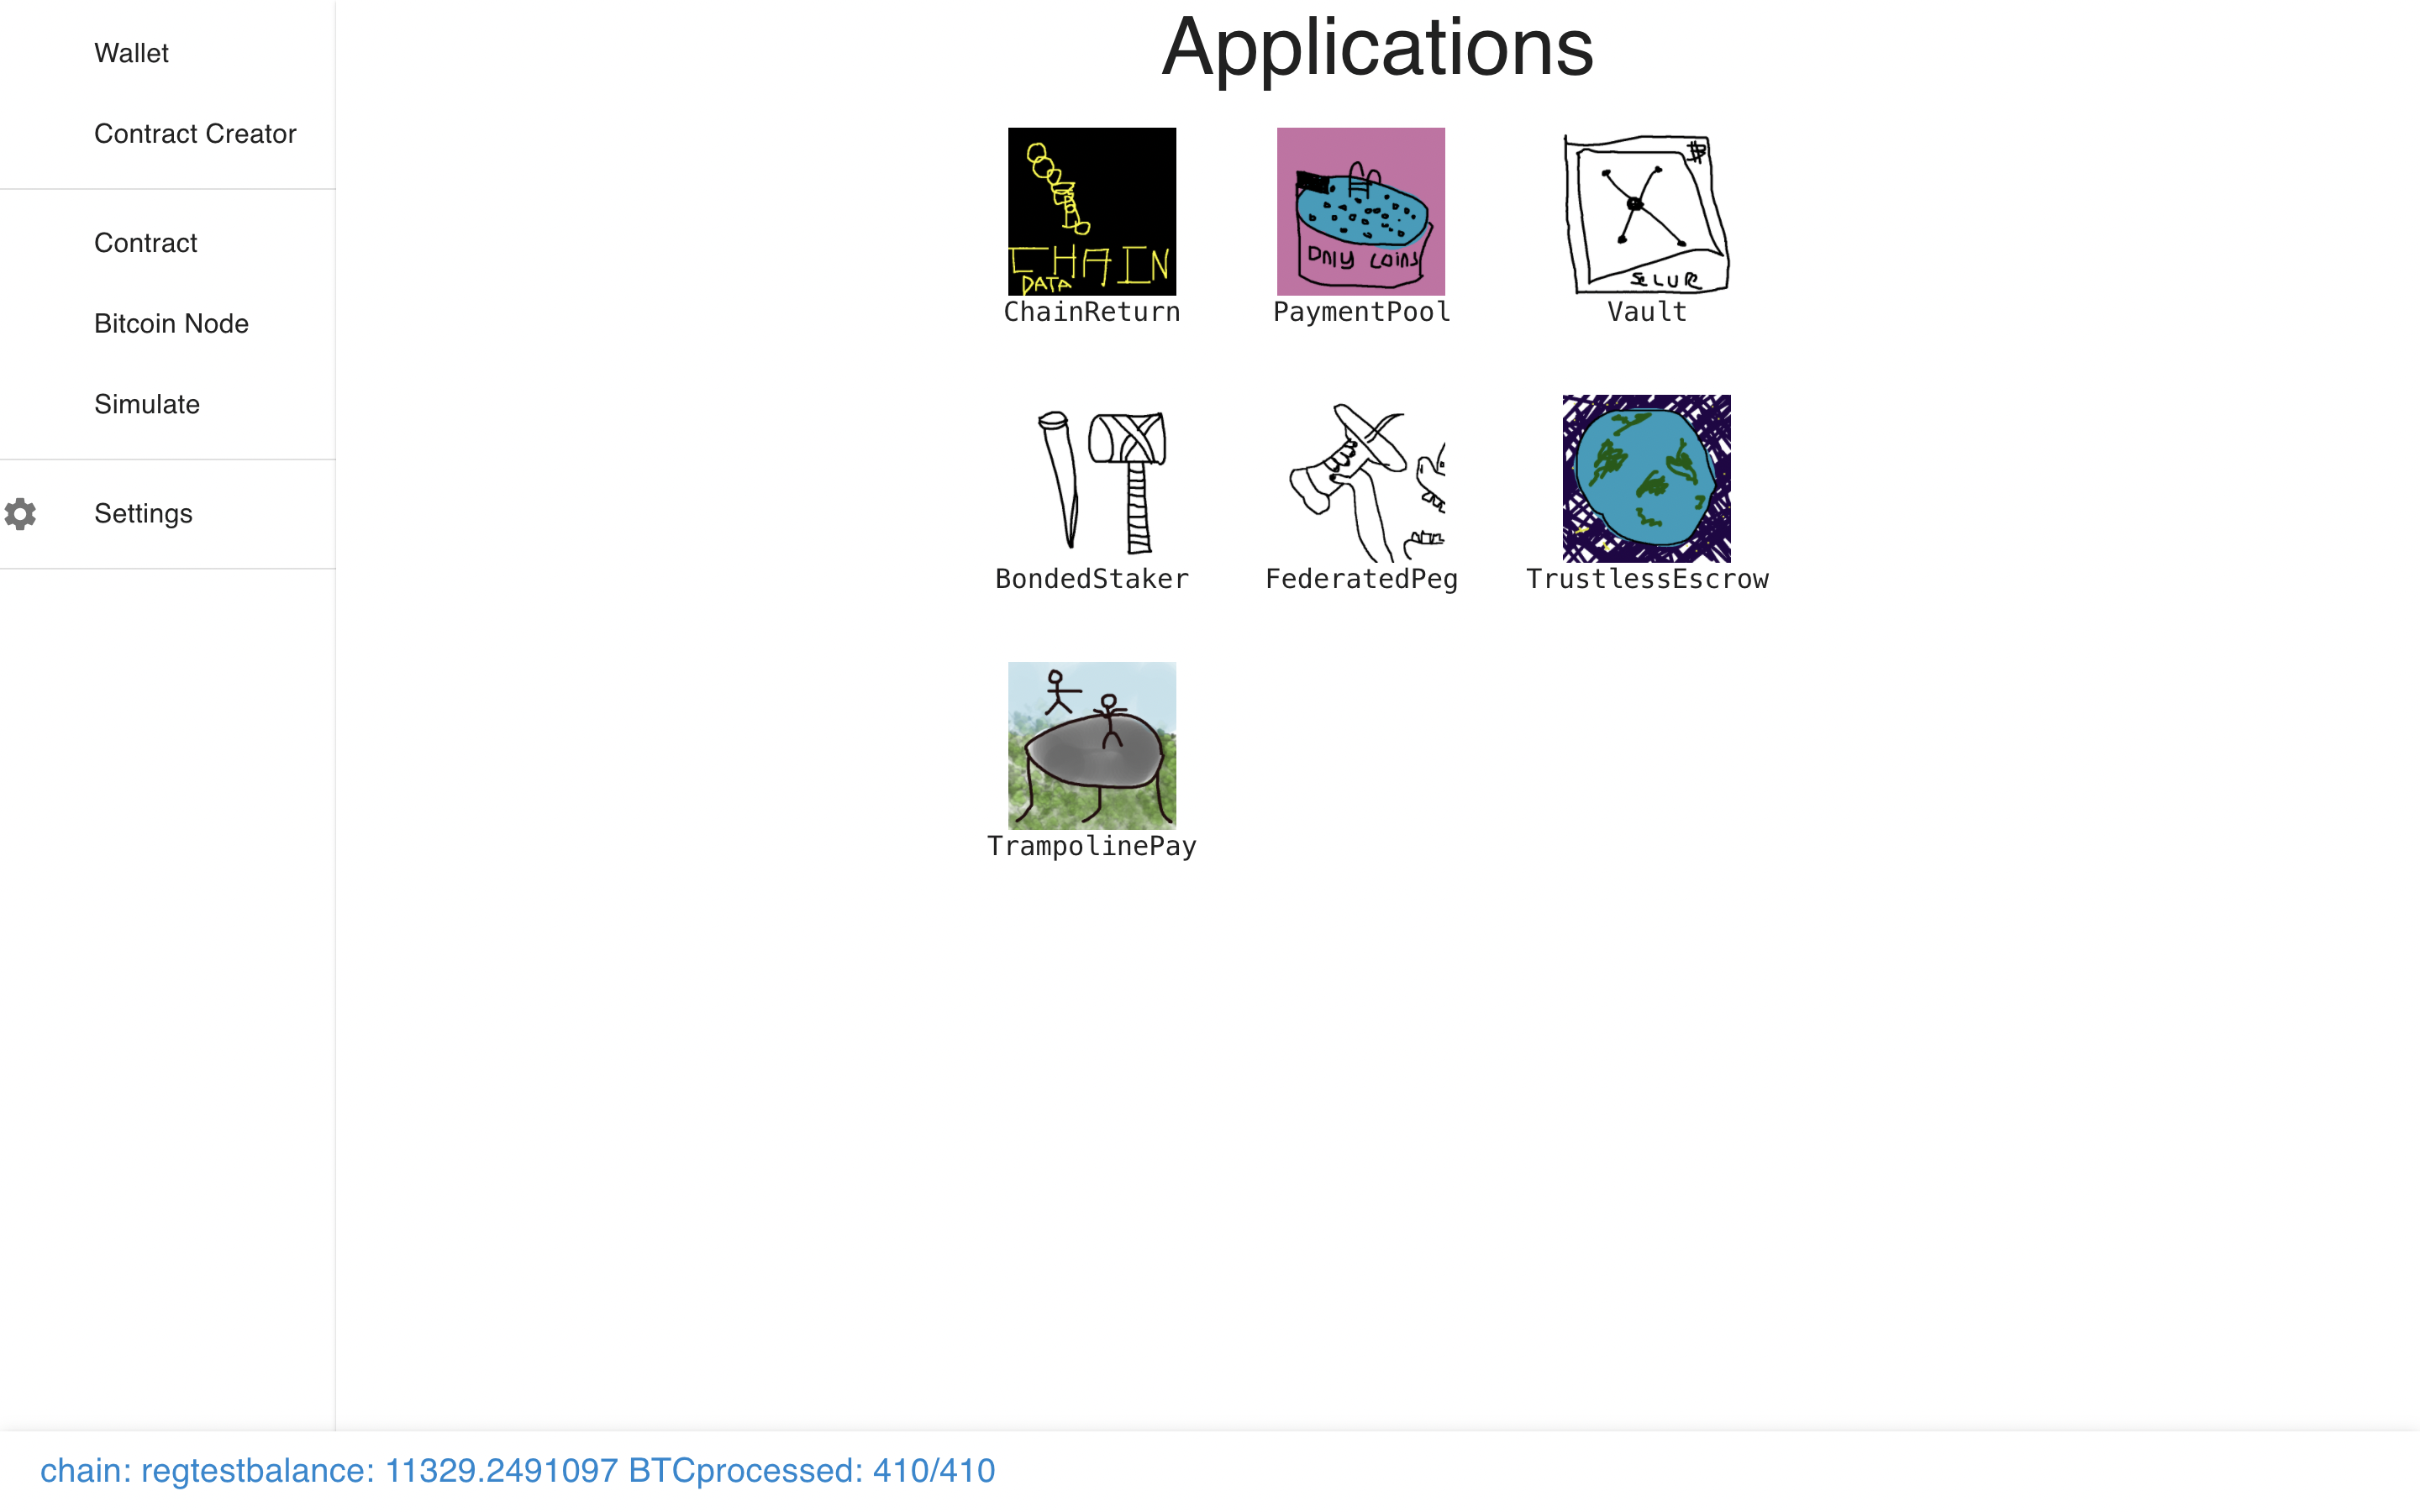
But where Sapio Studio is different is that there is also the ability to create
contracts.
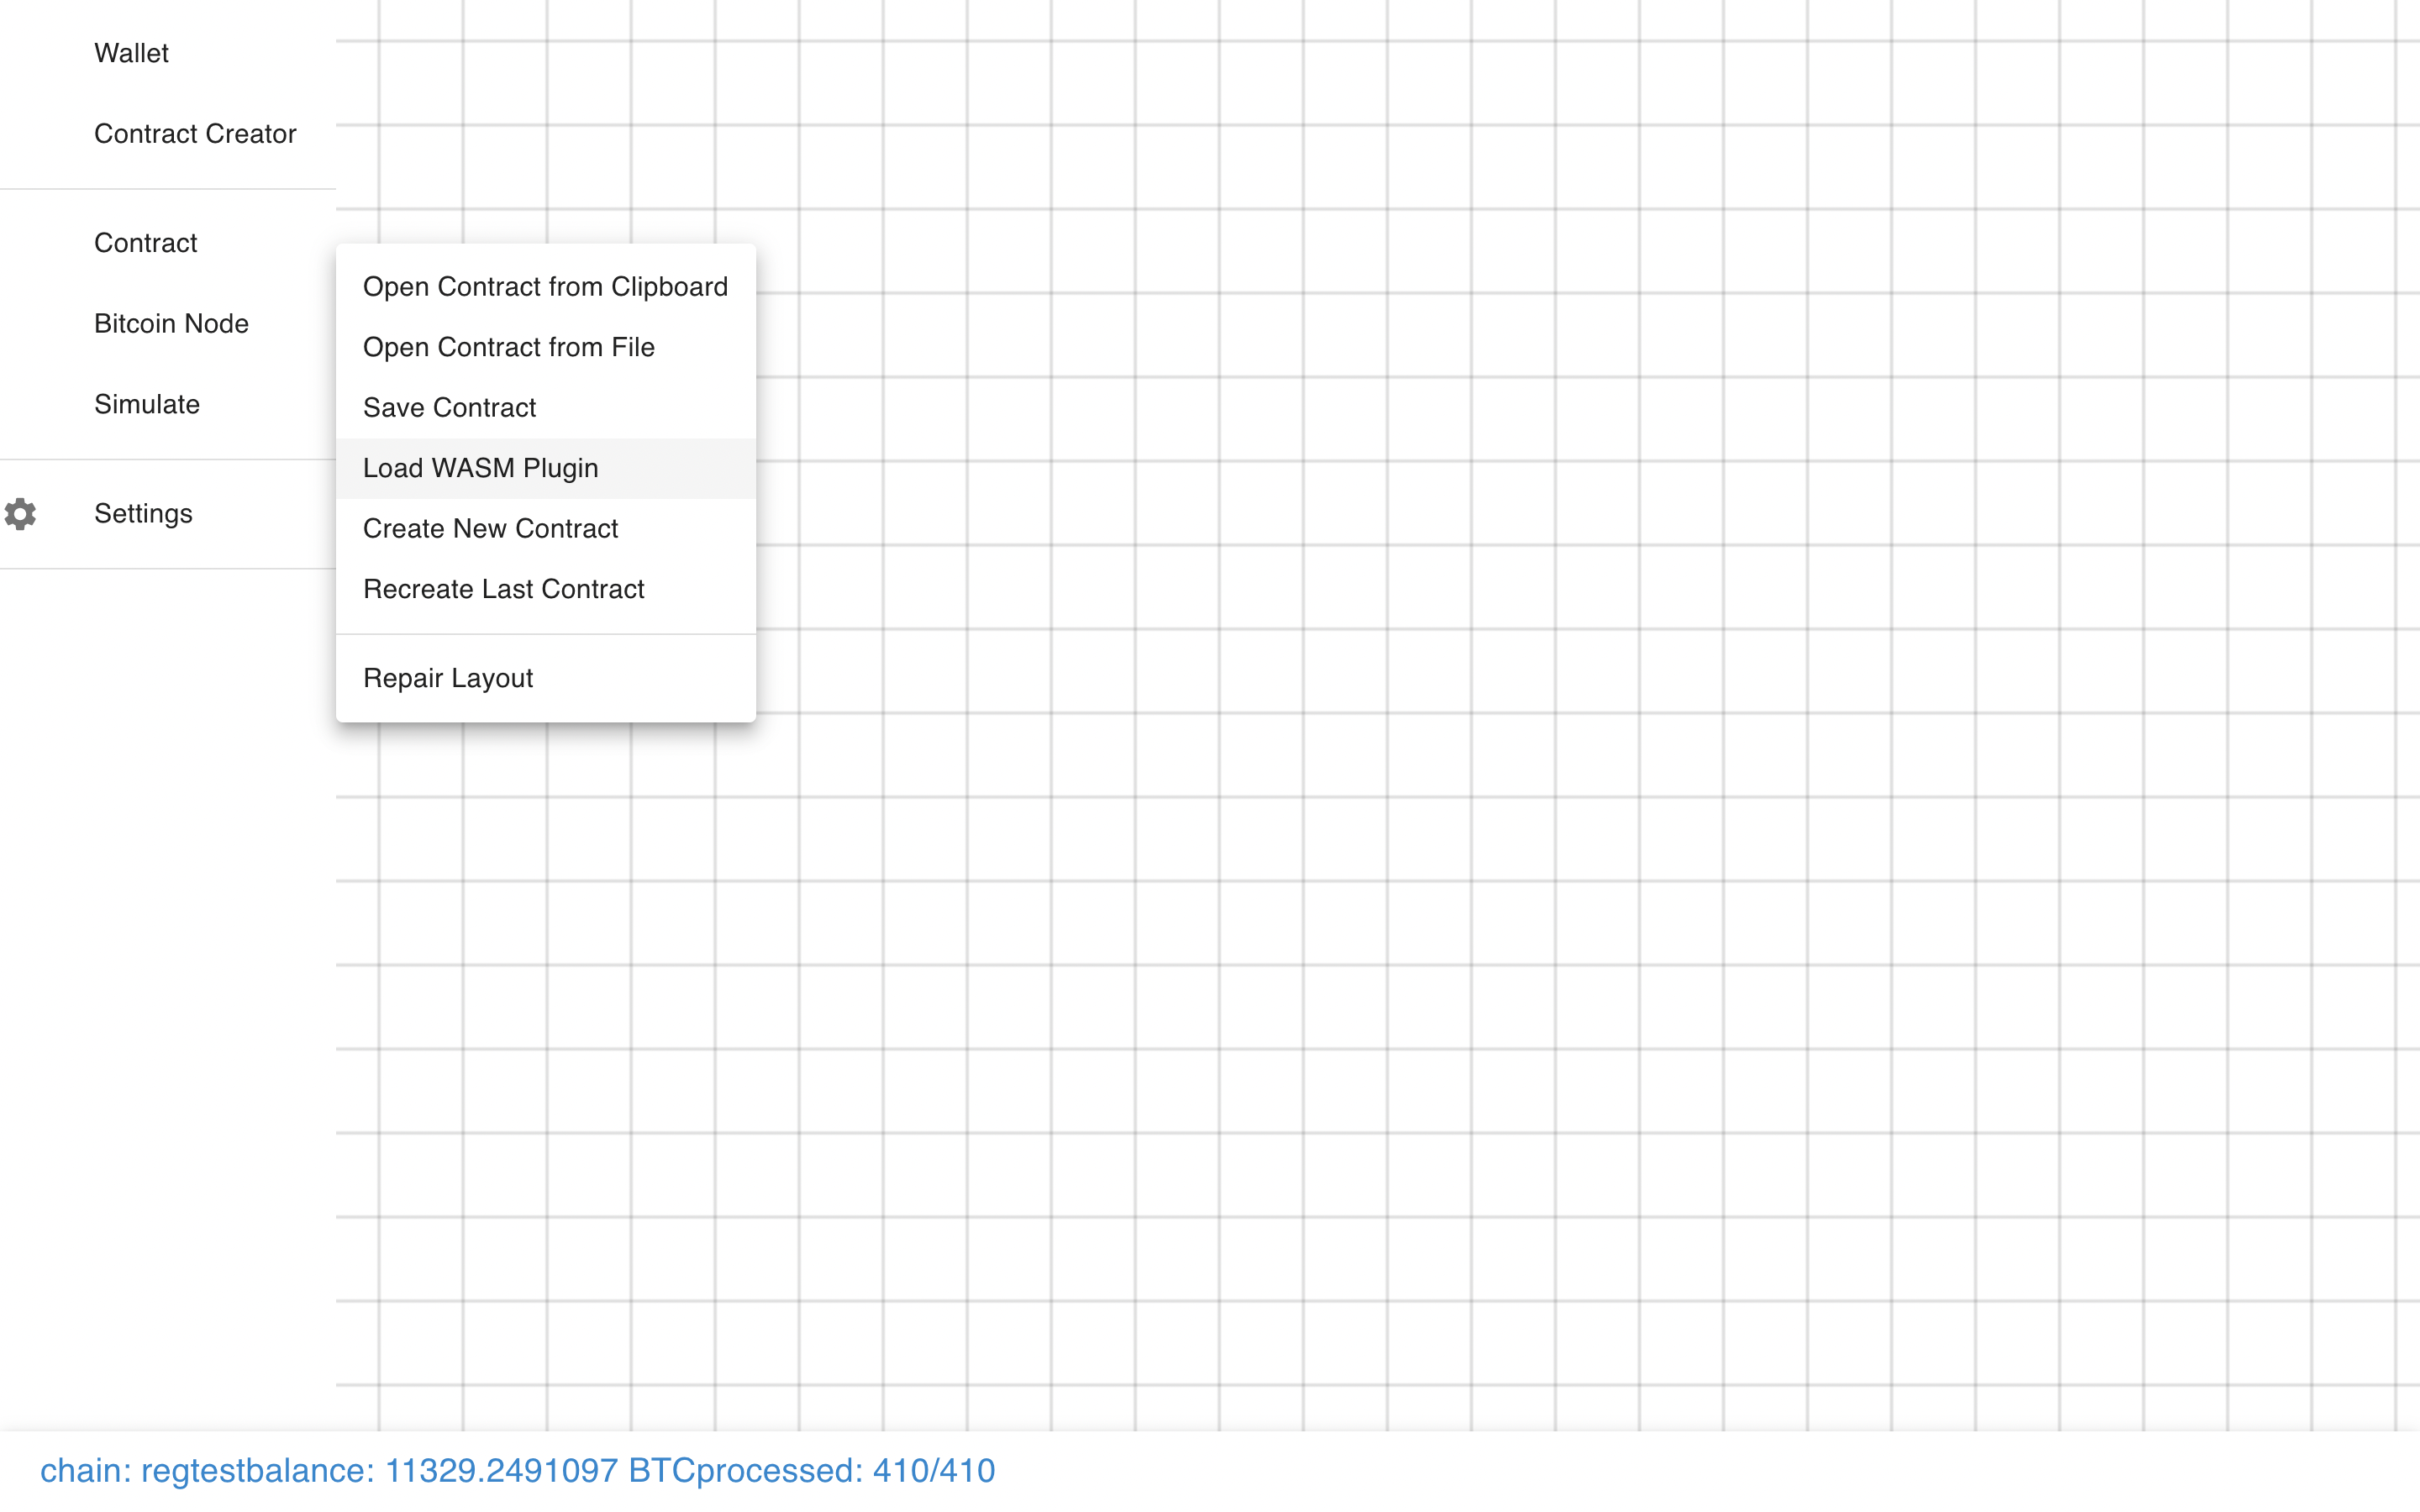
 Before we can do that, we need to load a WASM Plugin with a compiled contract.
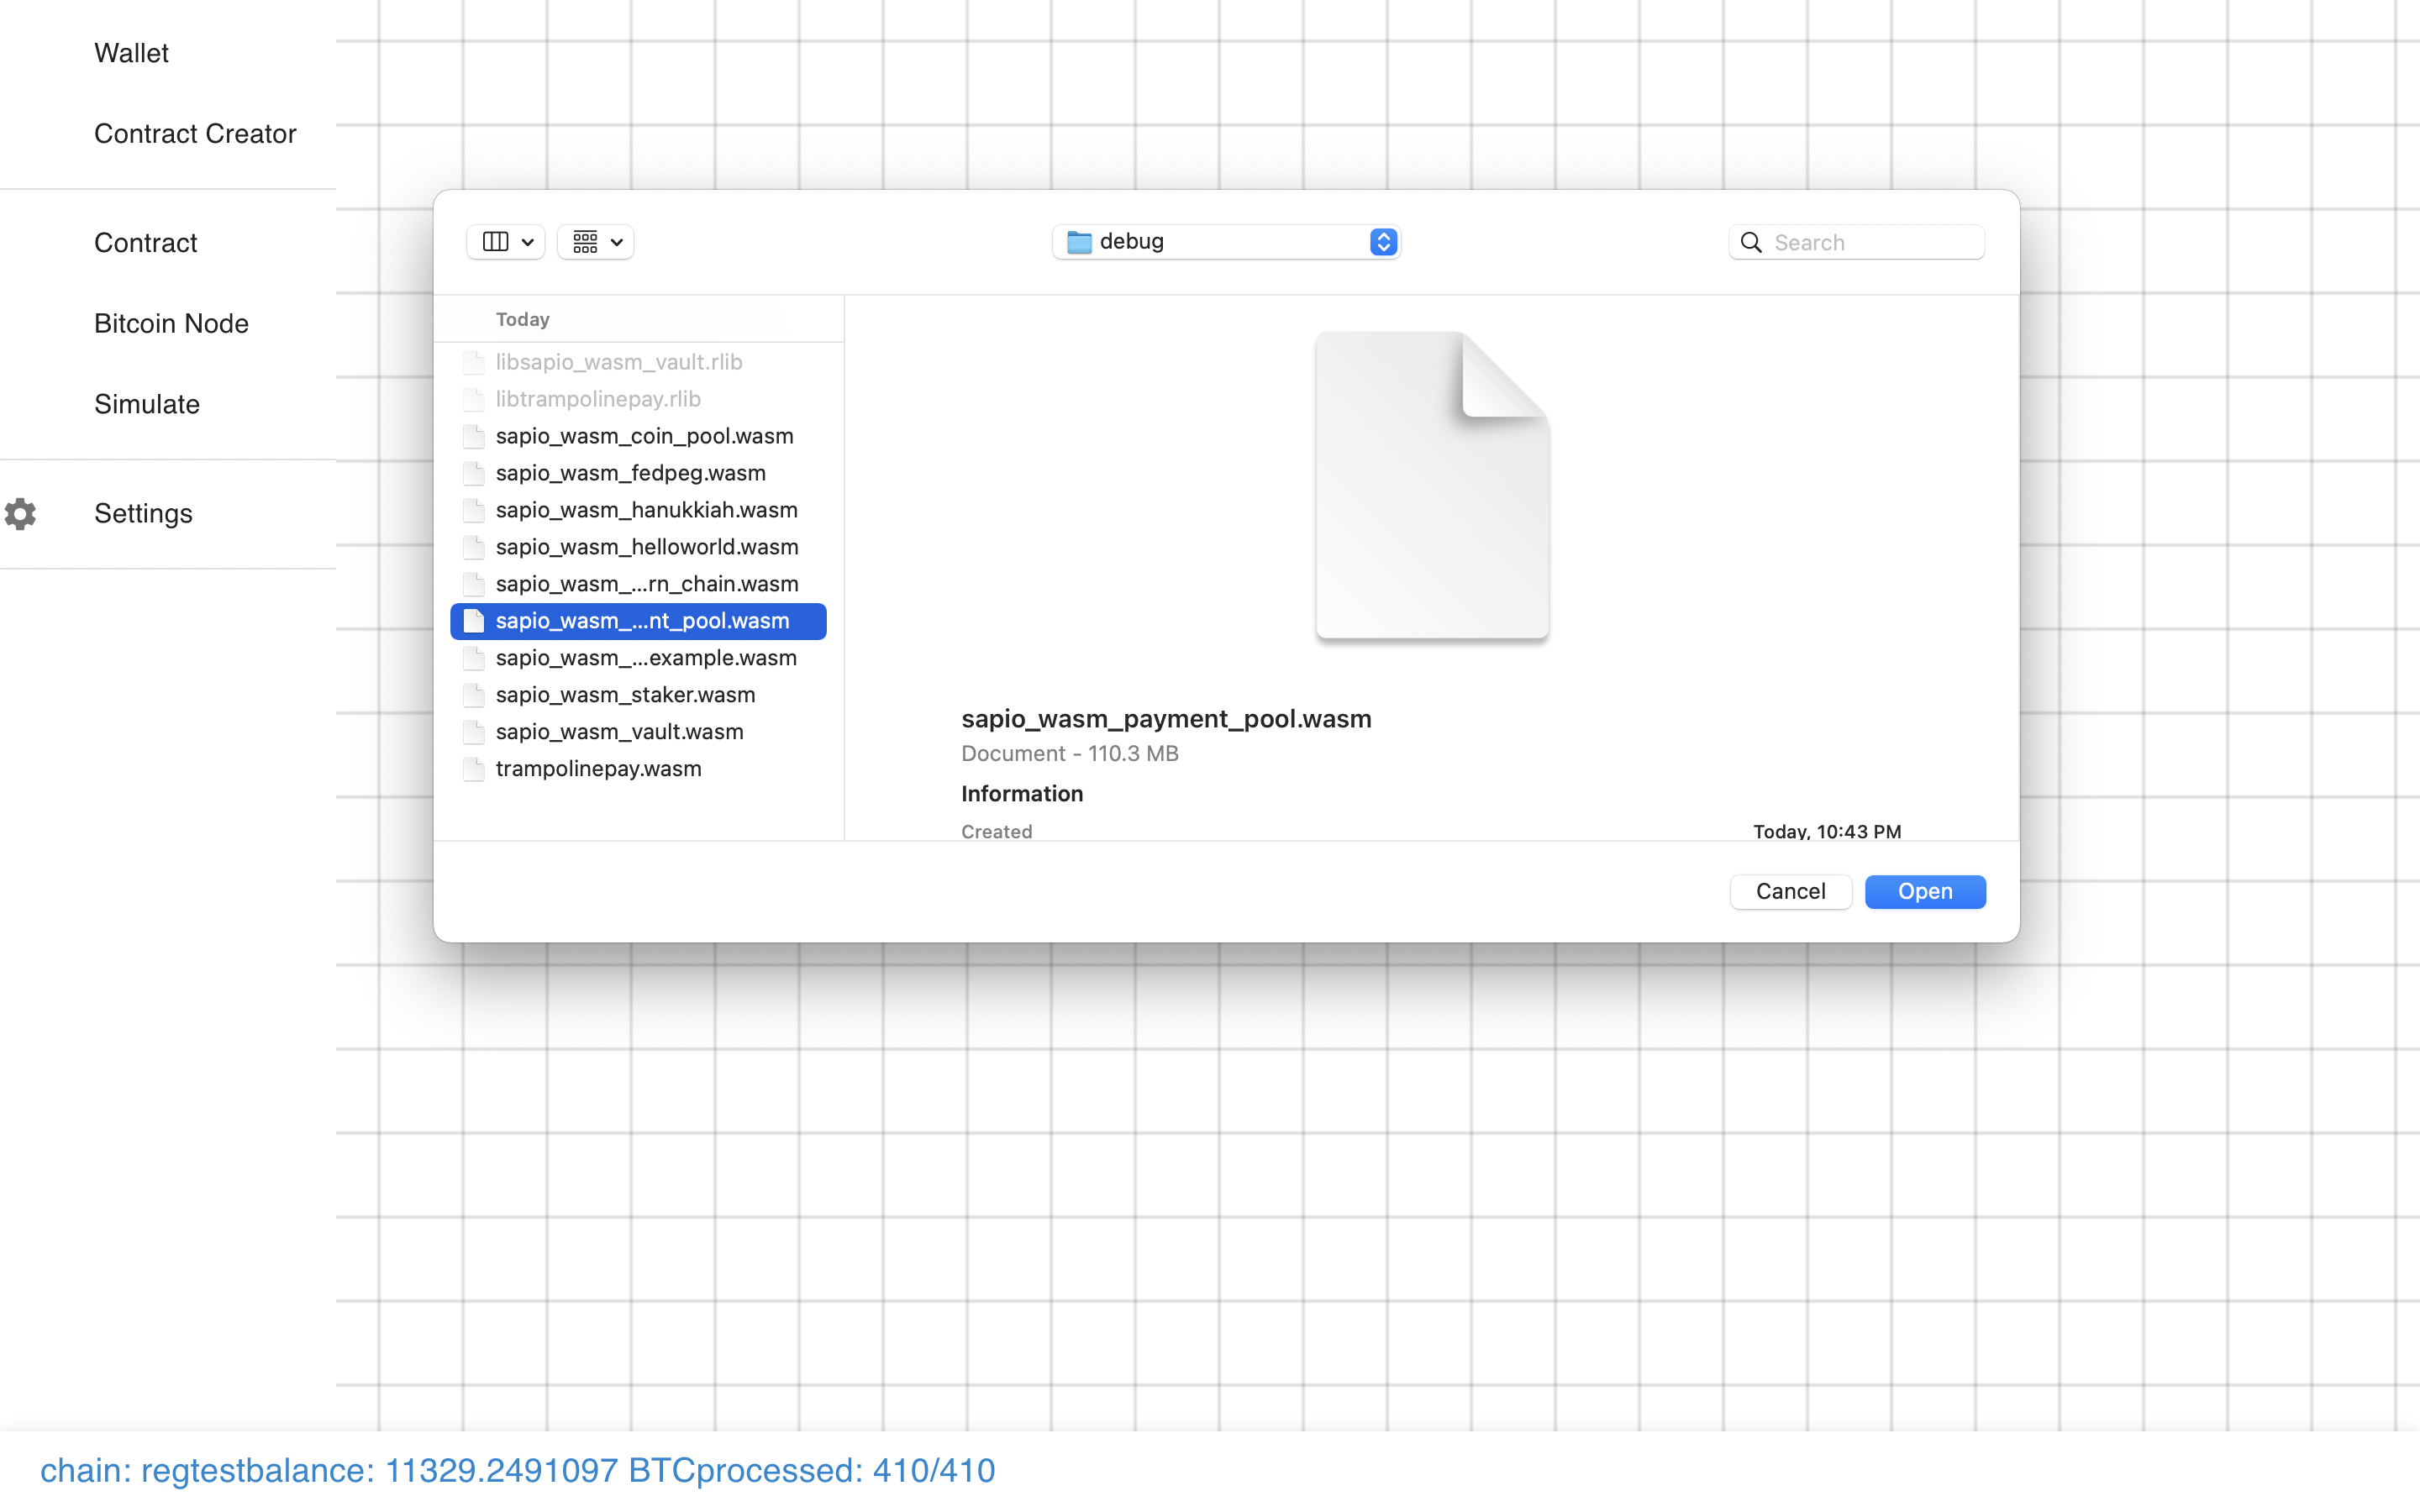
 Let’s load the Payment Pool module. You can see the code for it
here.
Let’s load the Payment Pool module. You can see the code for it
here.
 And now we can see we have a module!
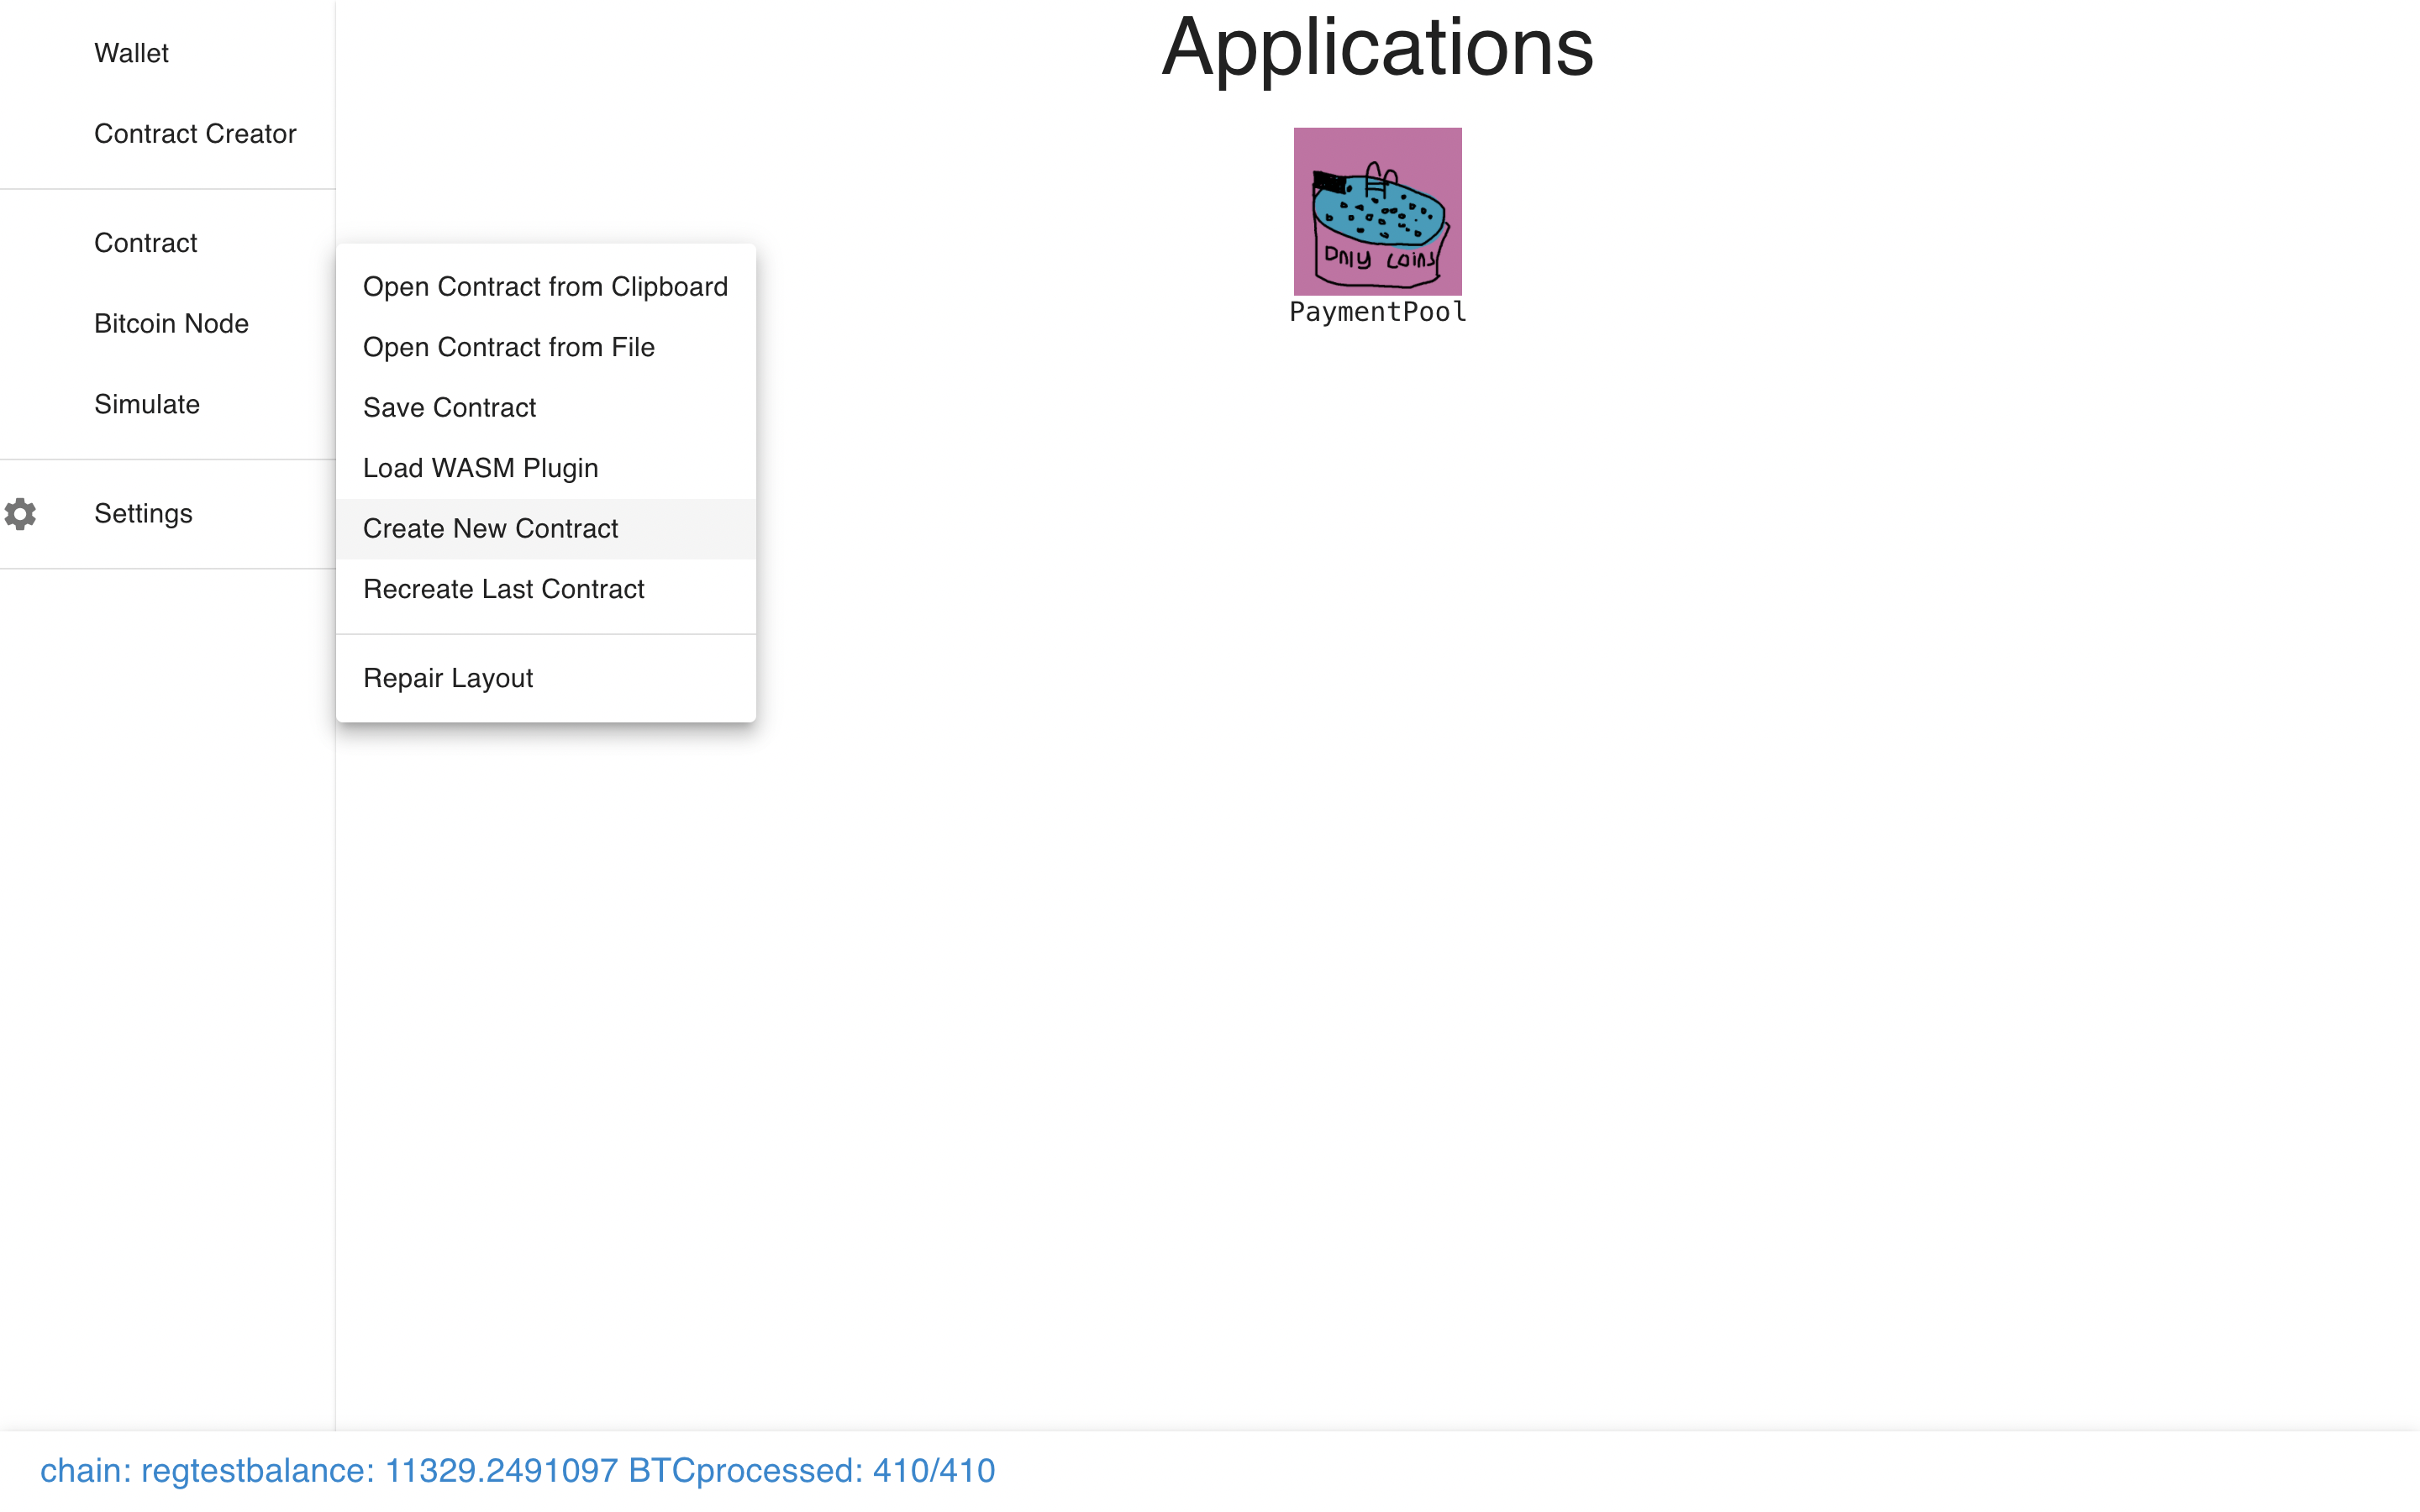 Let’s load a few more so it doesn’t look lonely.
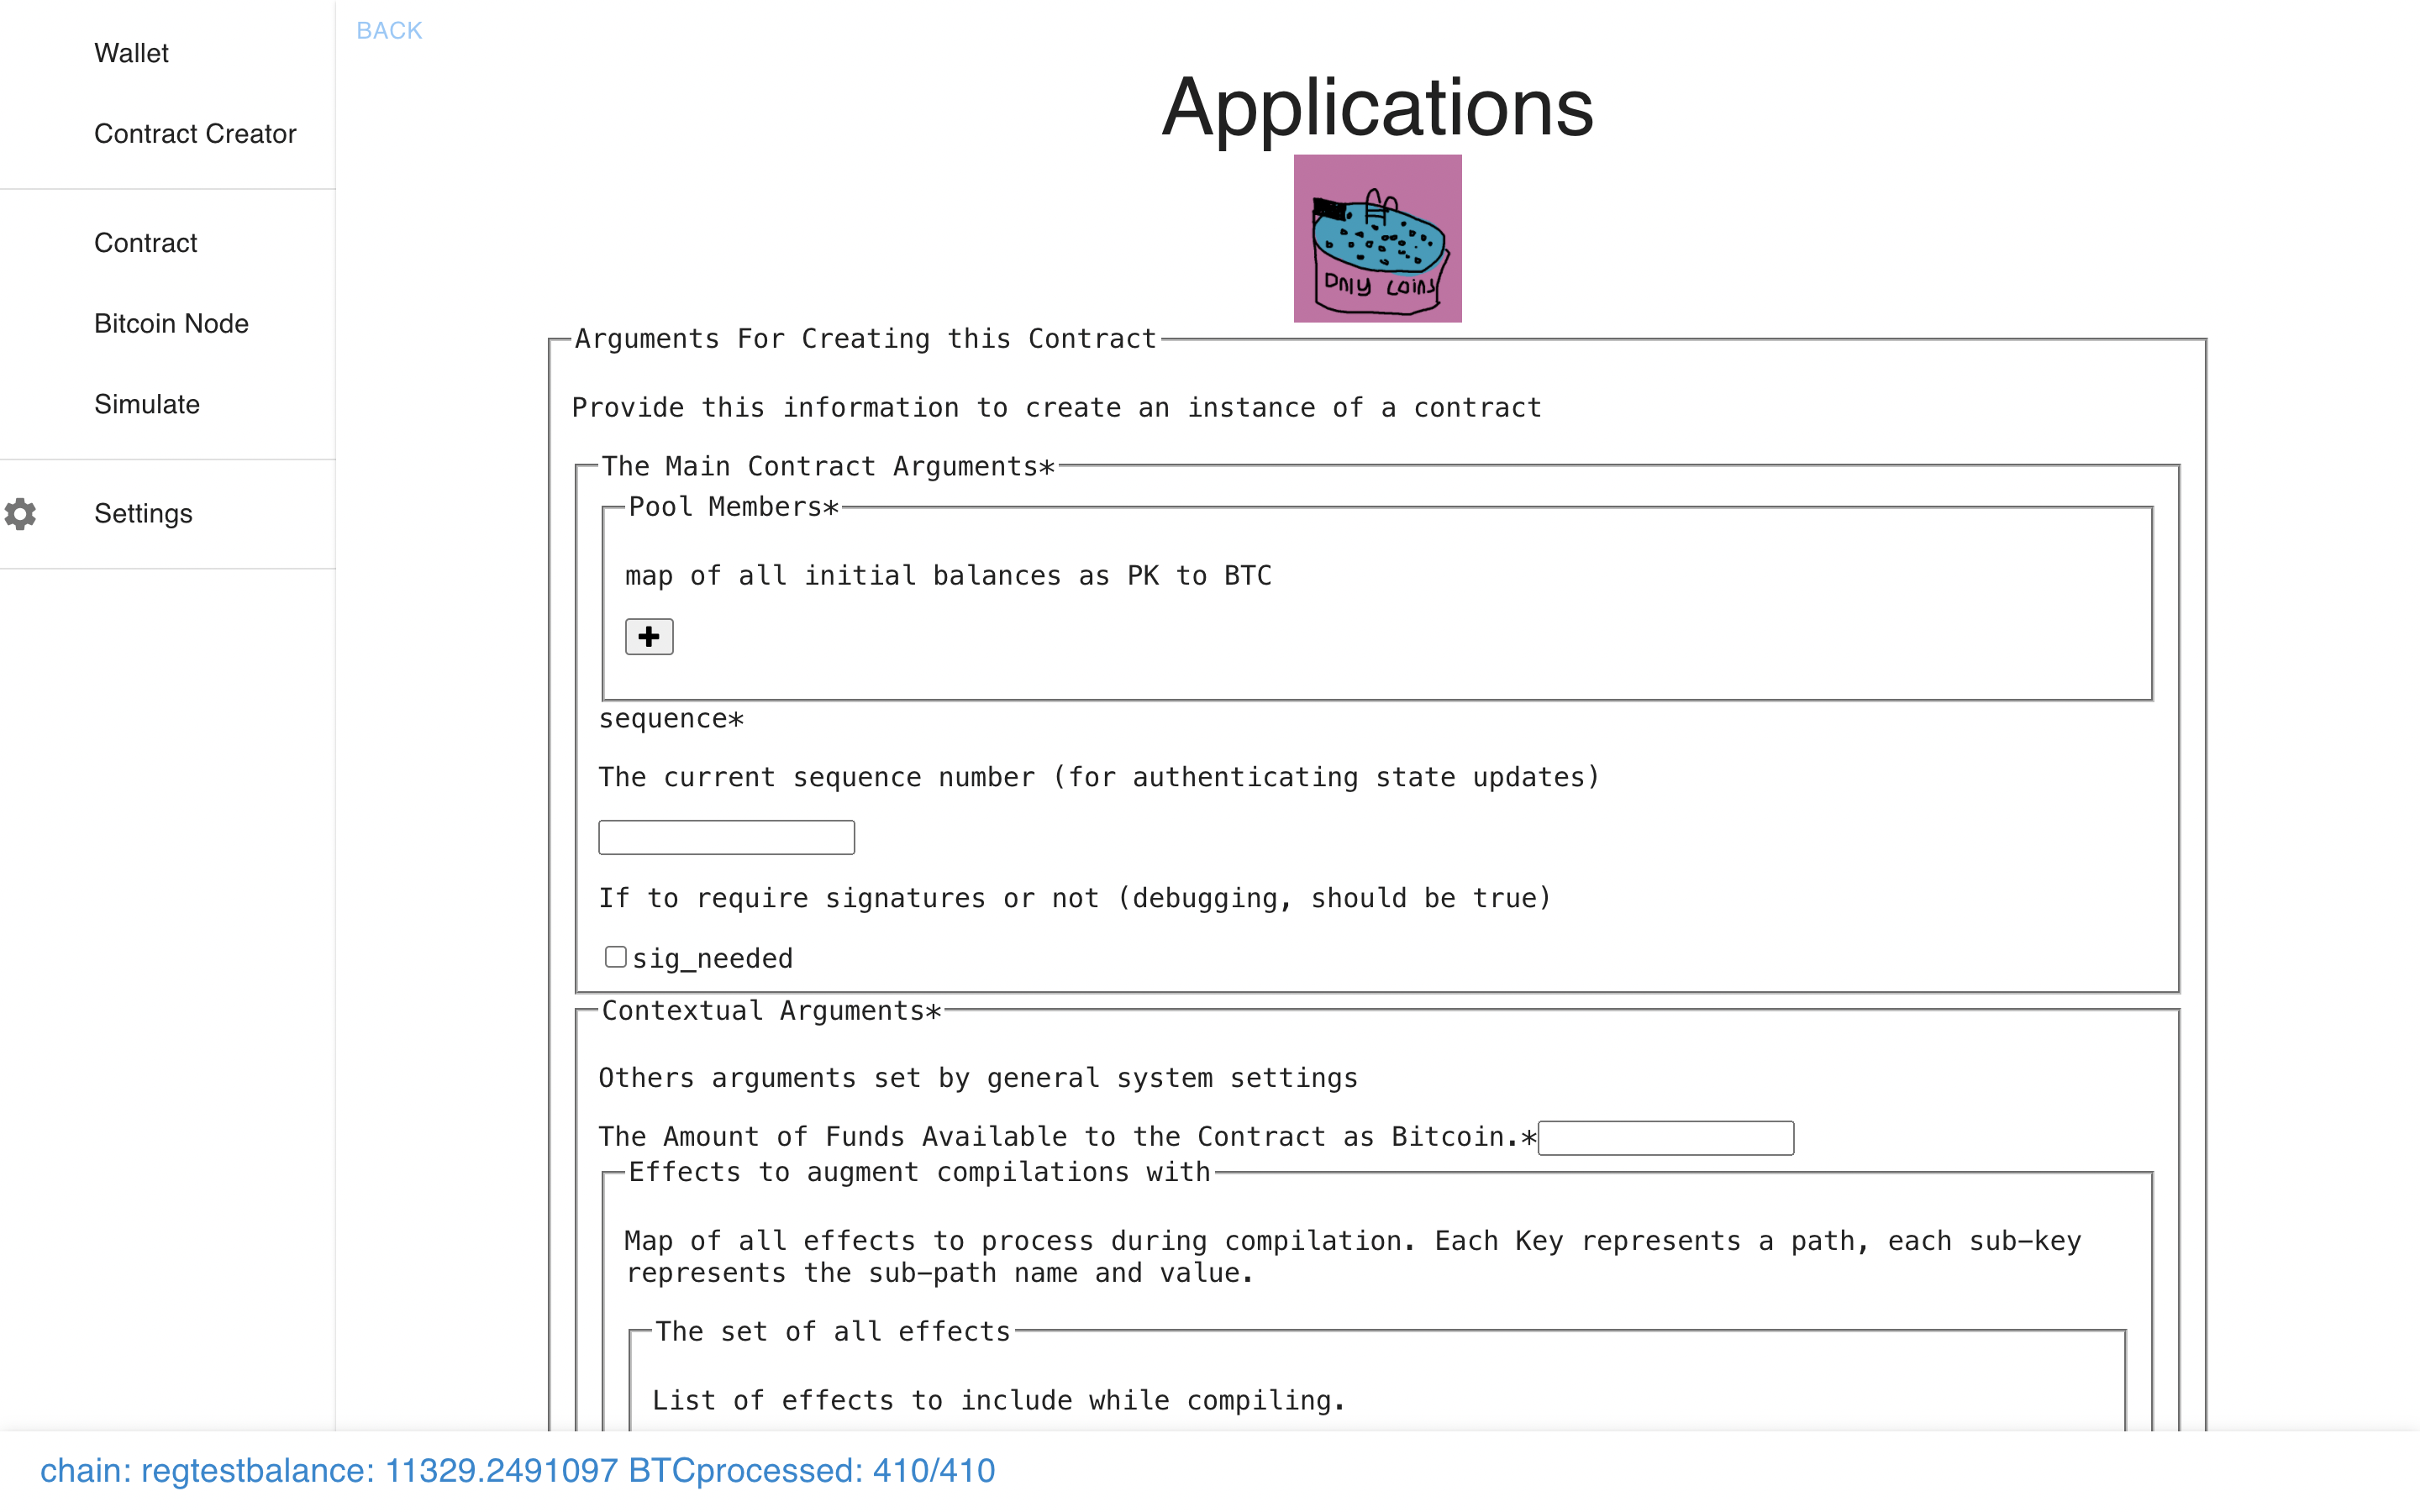
 Now let’s check out the Payment Pool module.
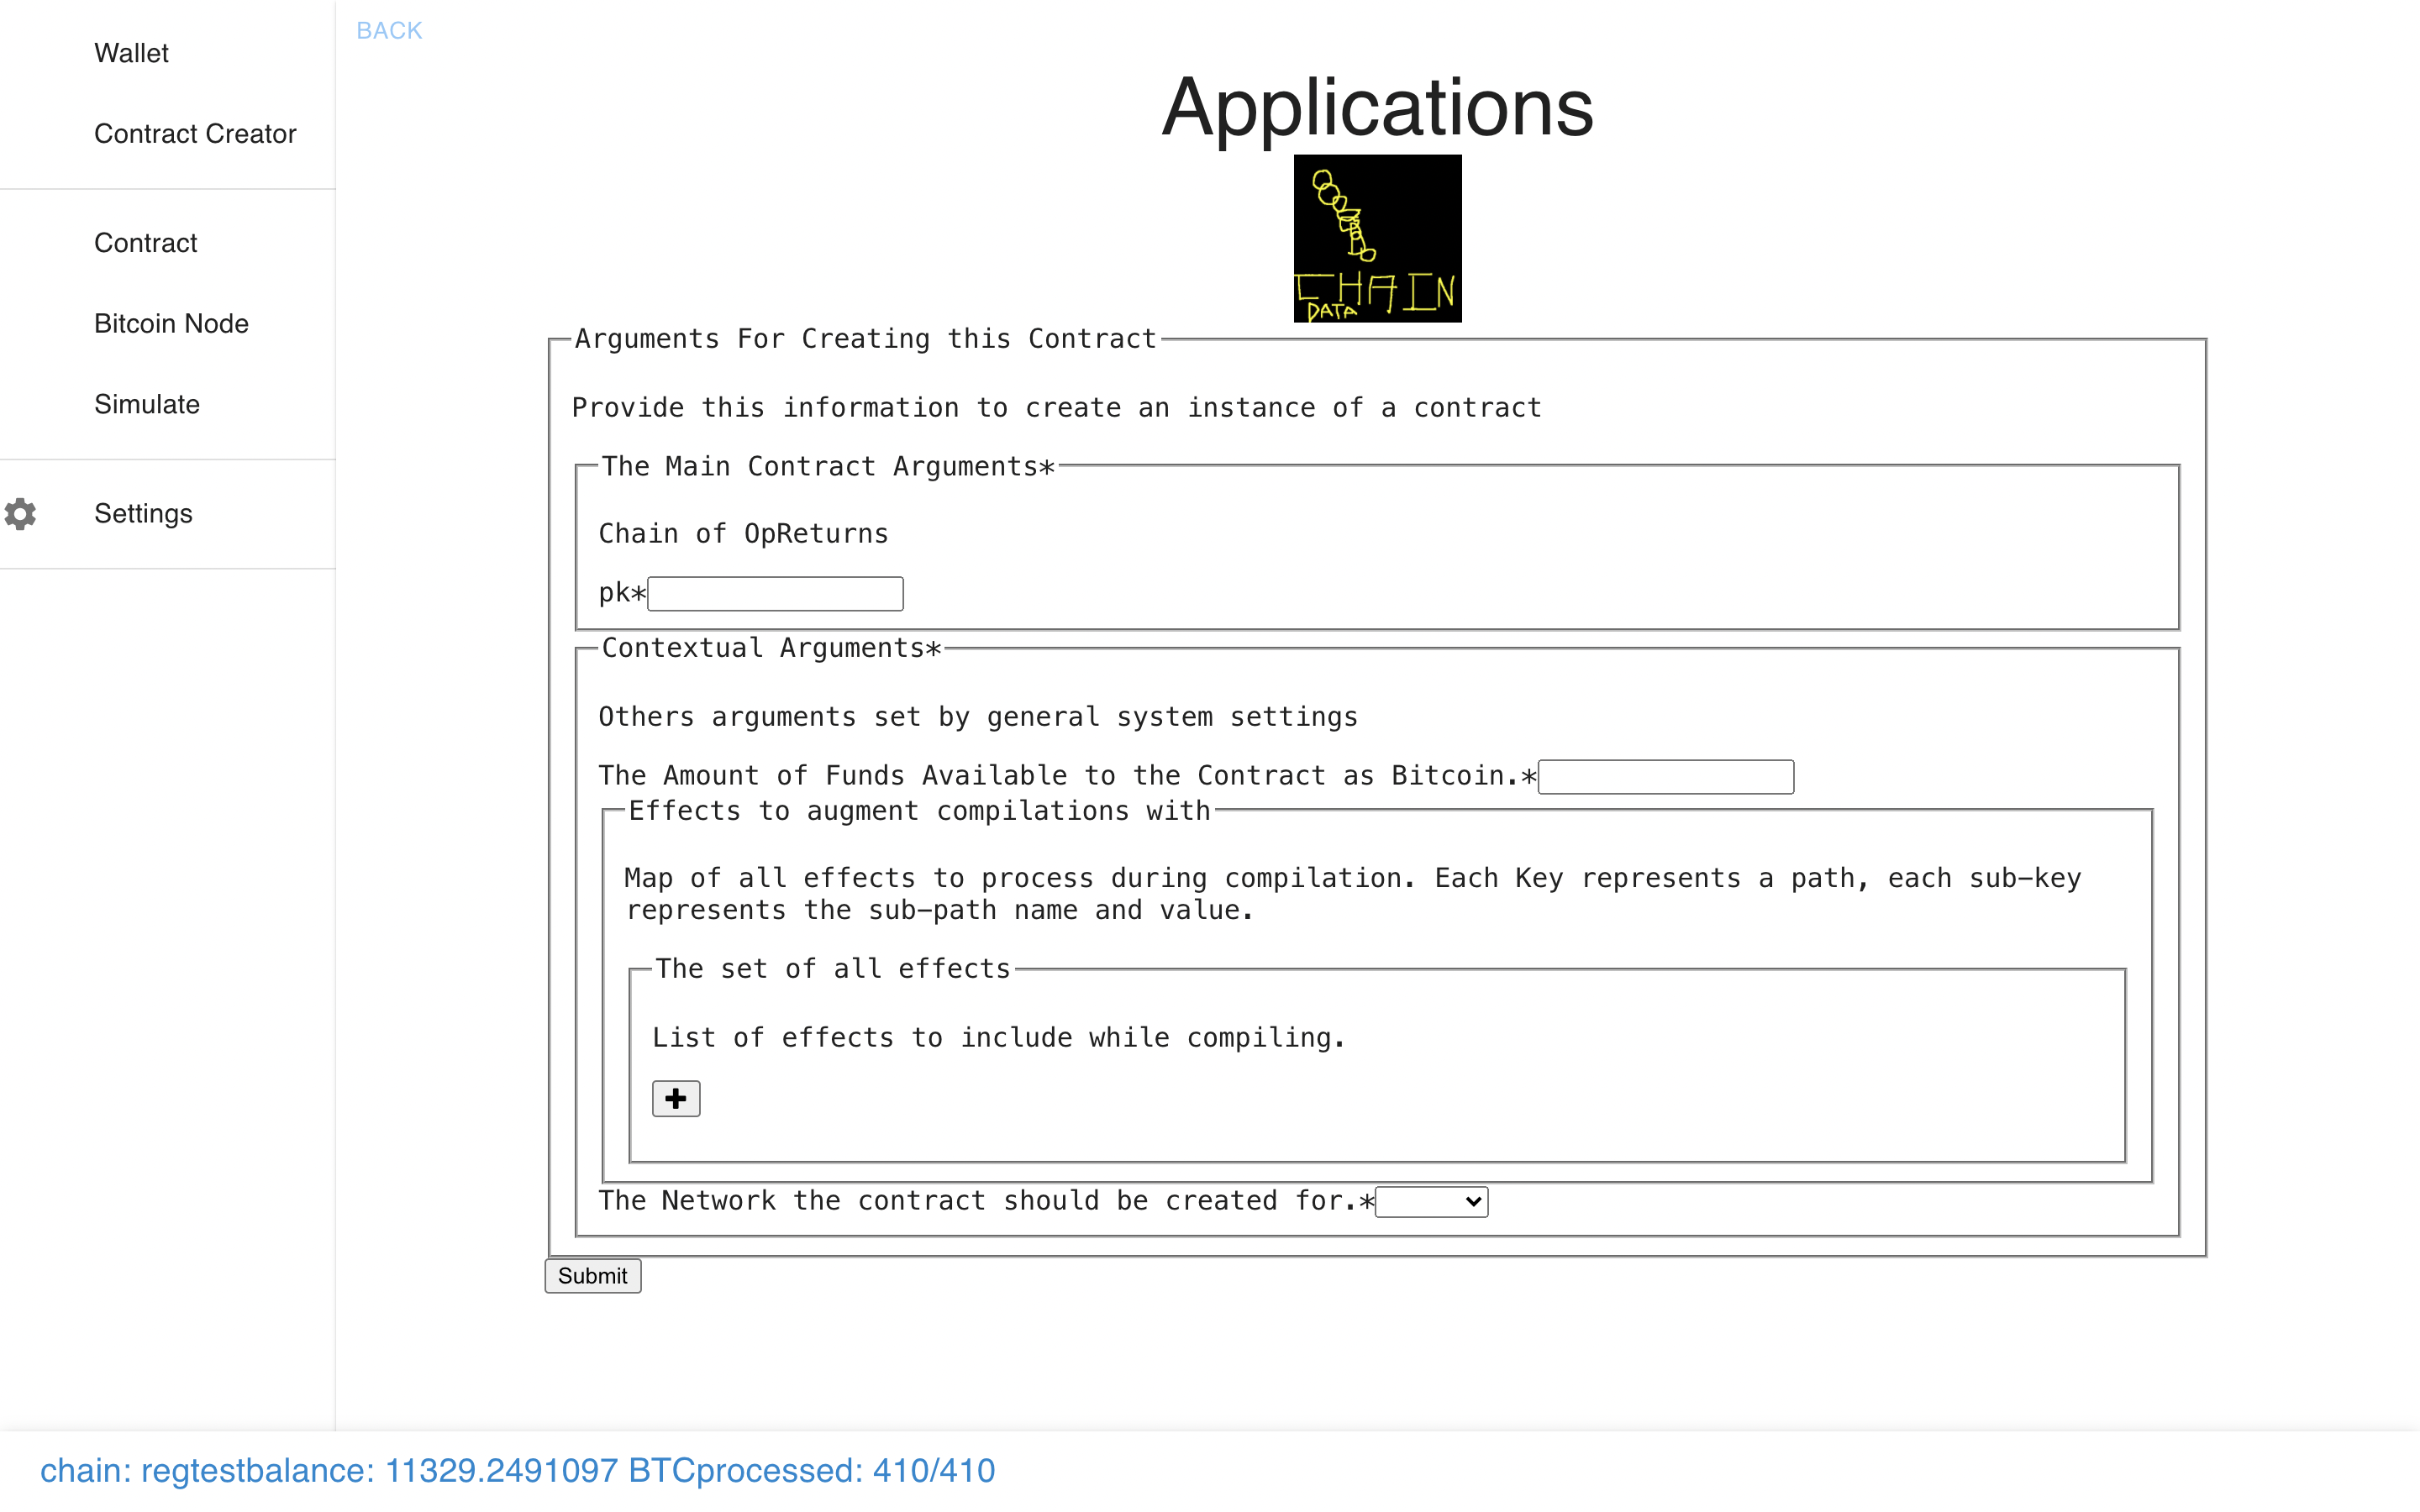
 Now let’s check out another one – we can see they each have different types of
arguments, auto-generated from the code.
Now let’s check out another one – we can see they each have different types of
arguments, auto-generated from the code.
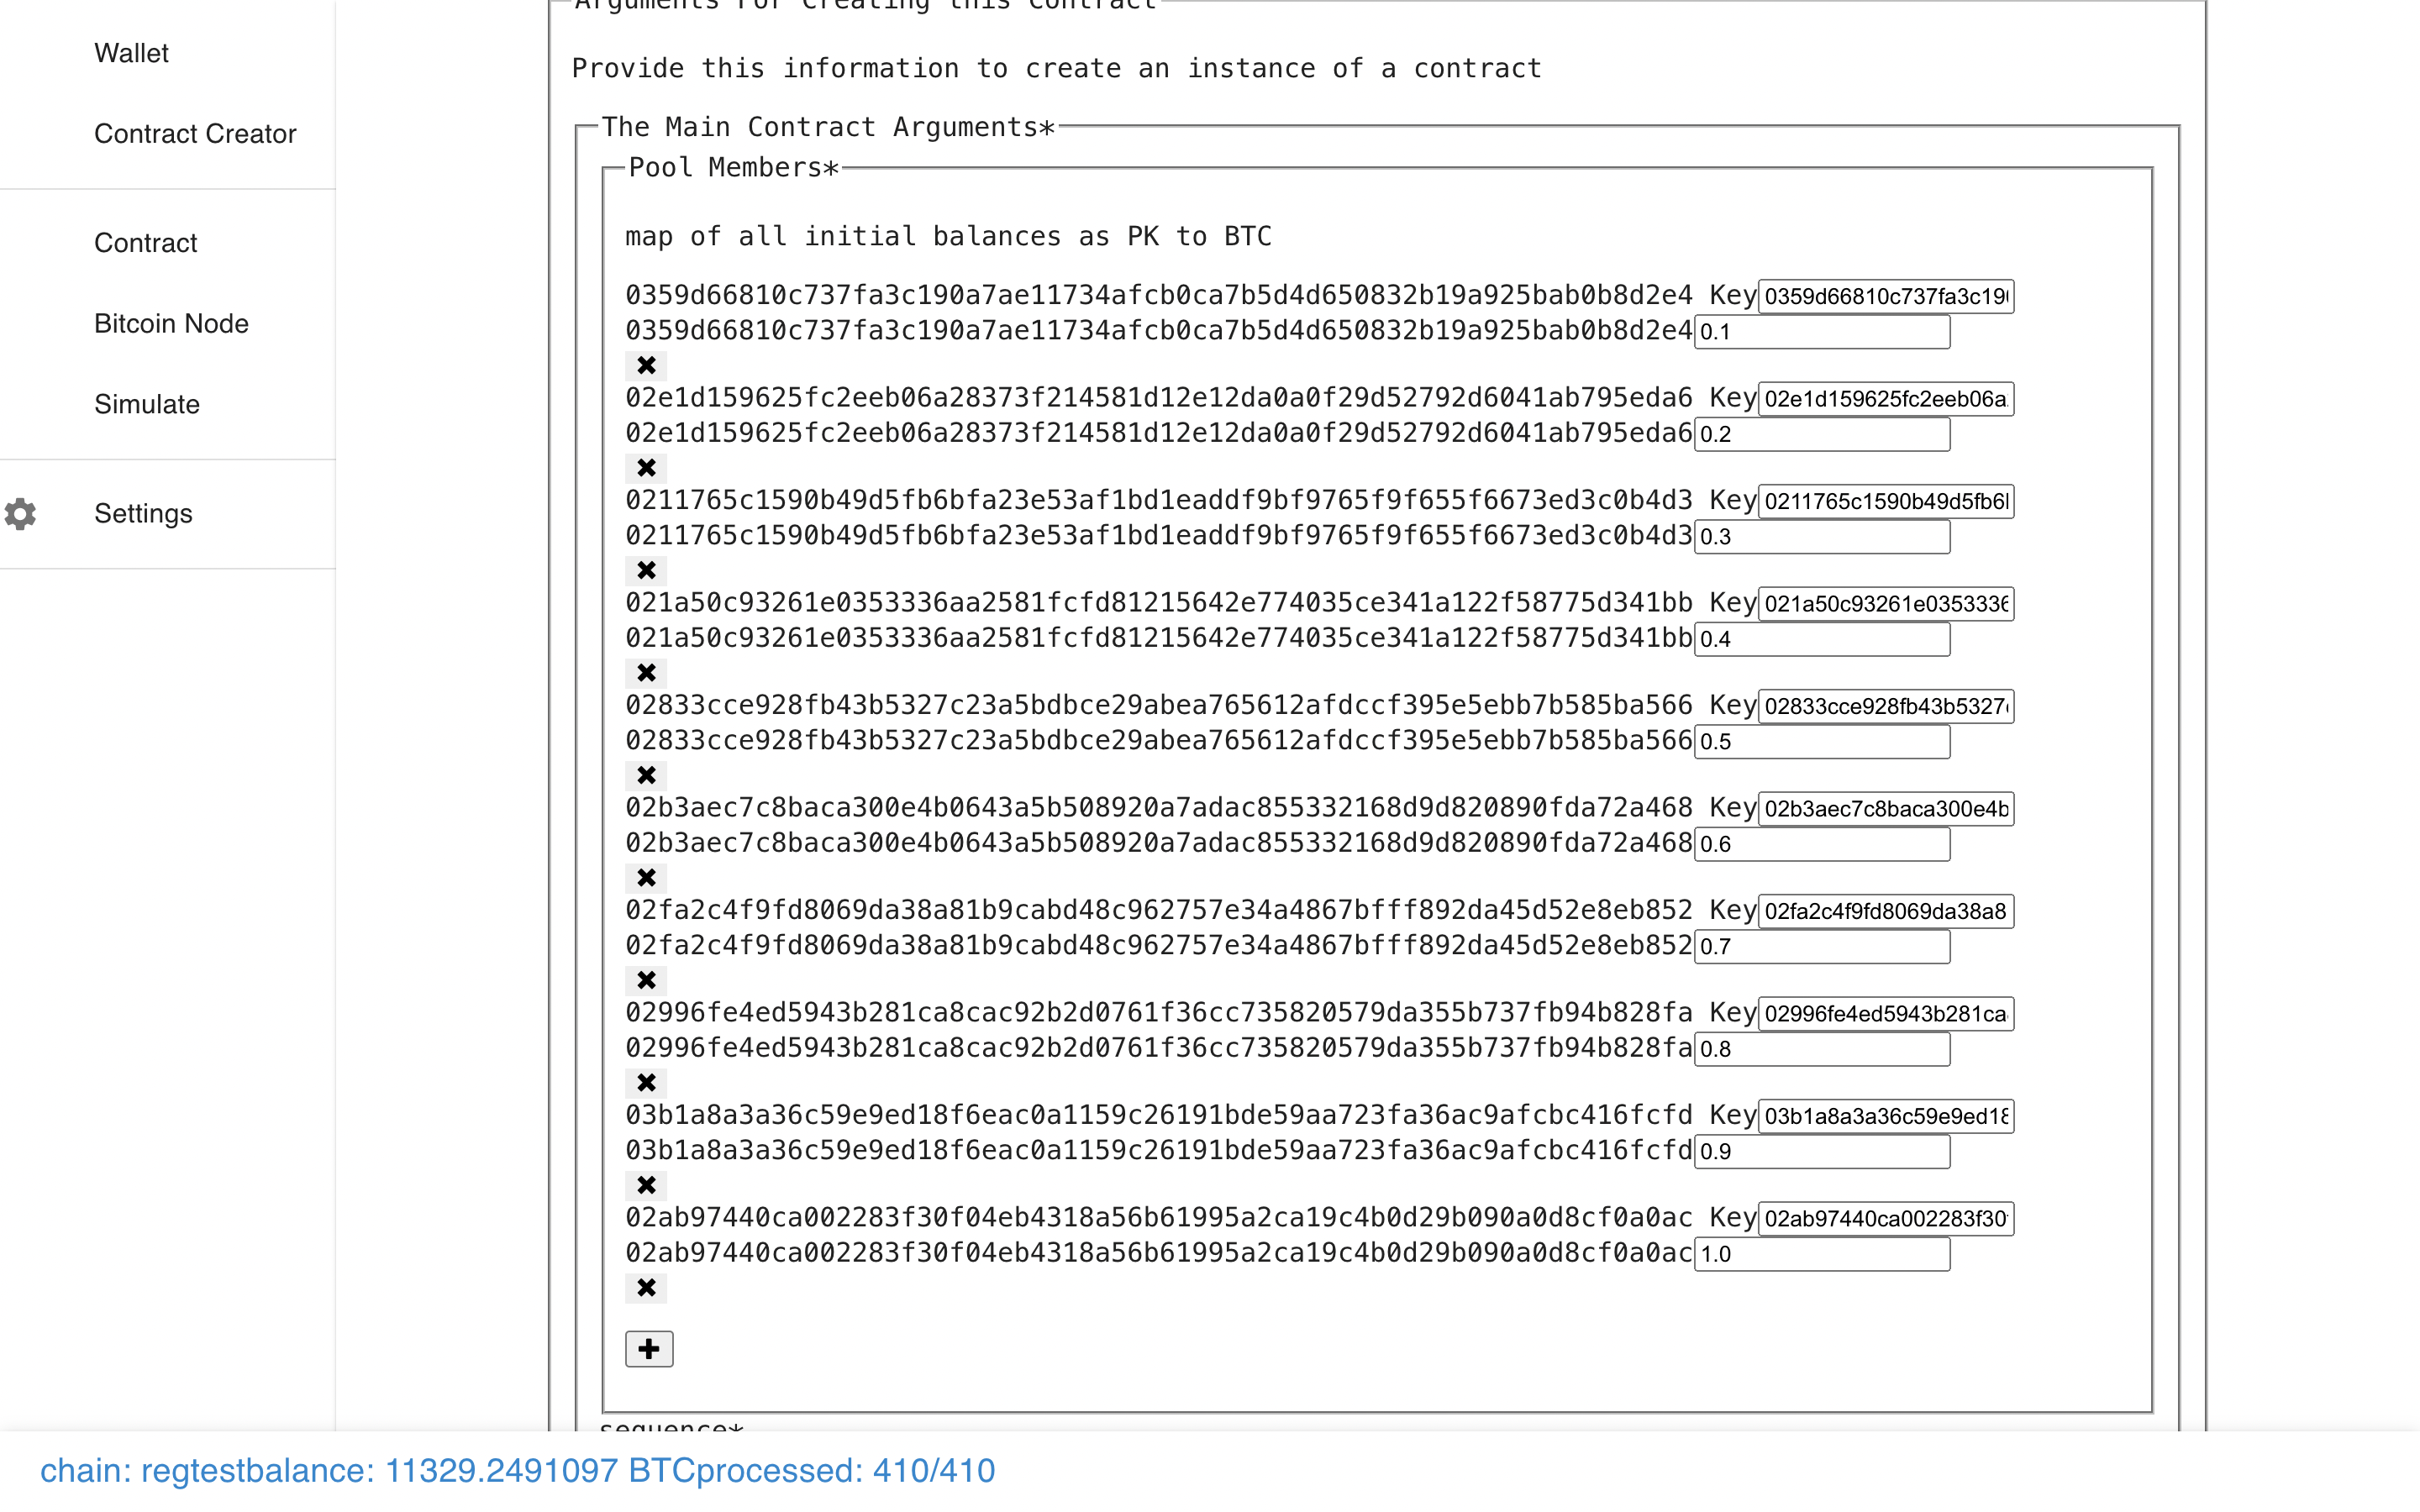
Let’s fill out the form with 10 keys to make a Payment Pool controlled by 10
people, and then submit it.
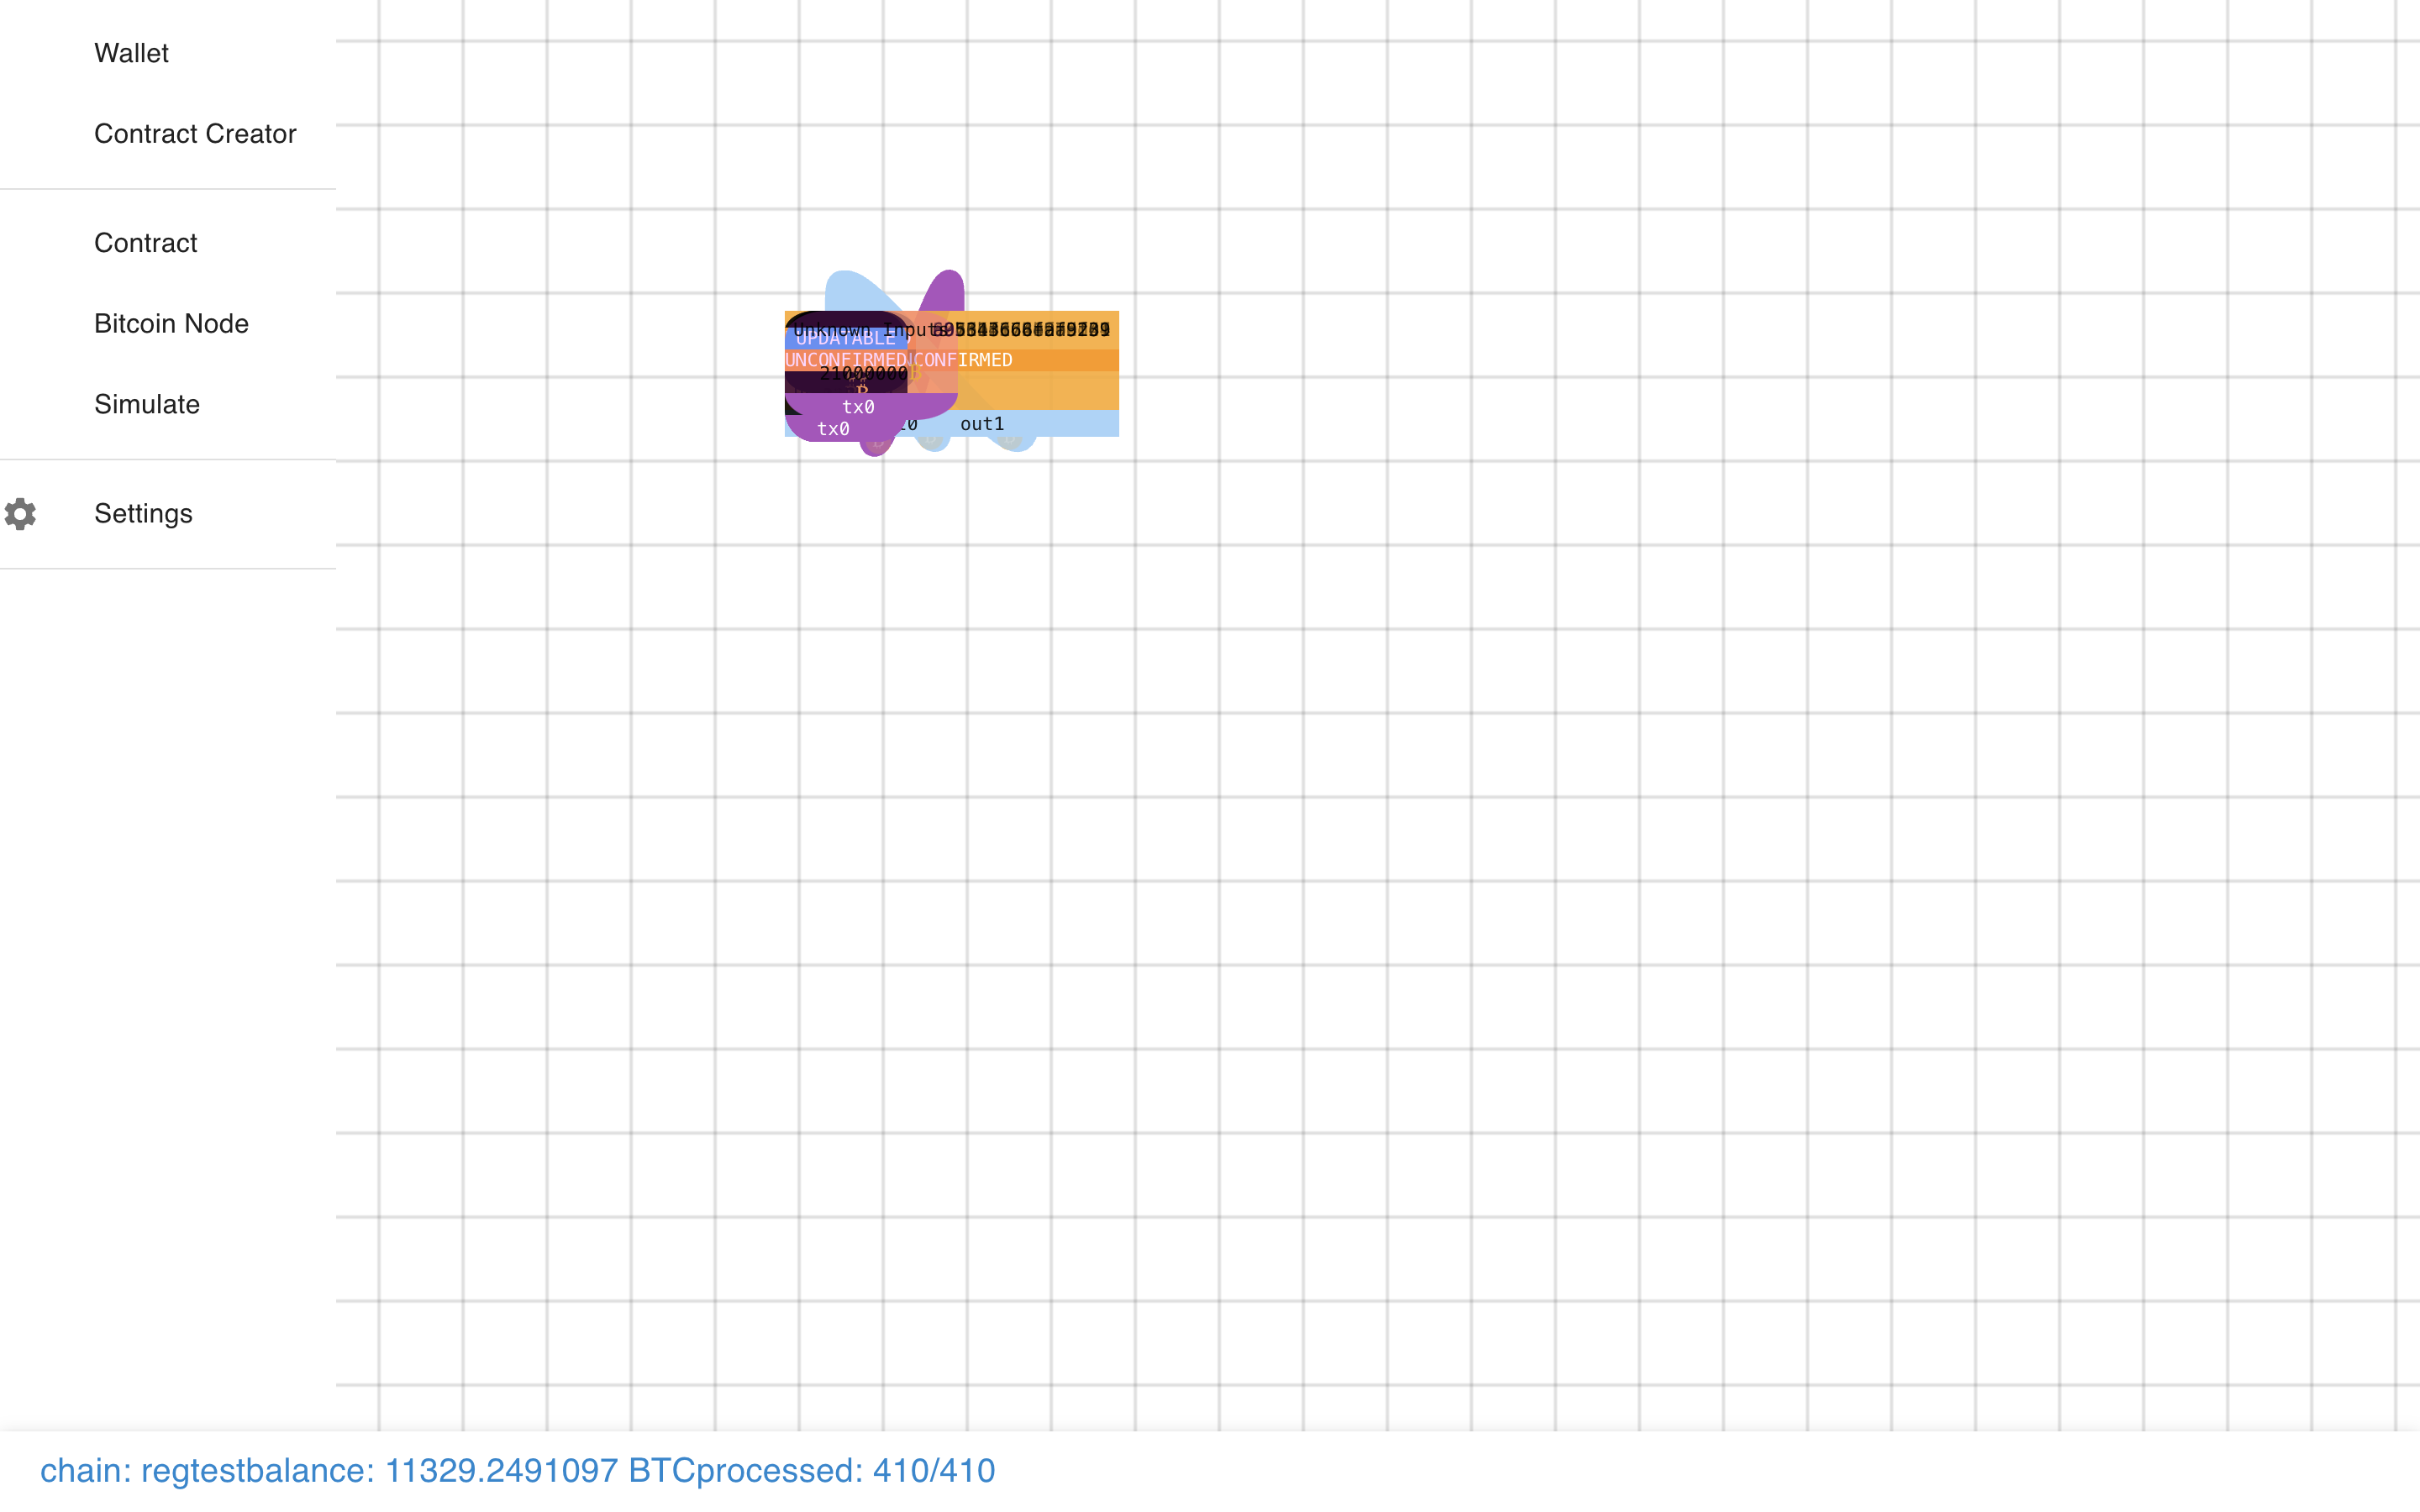
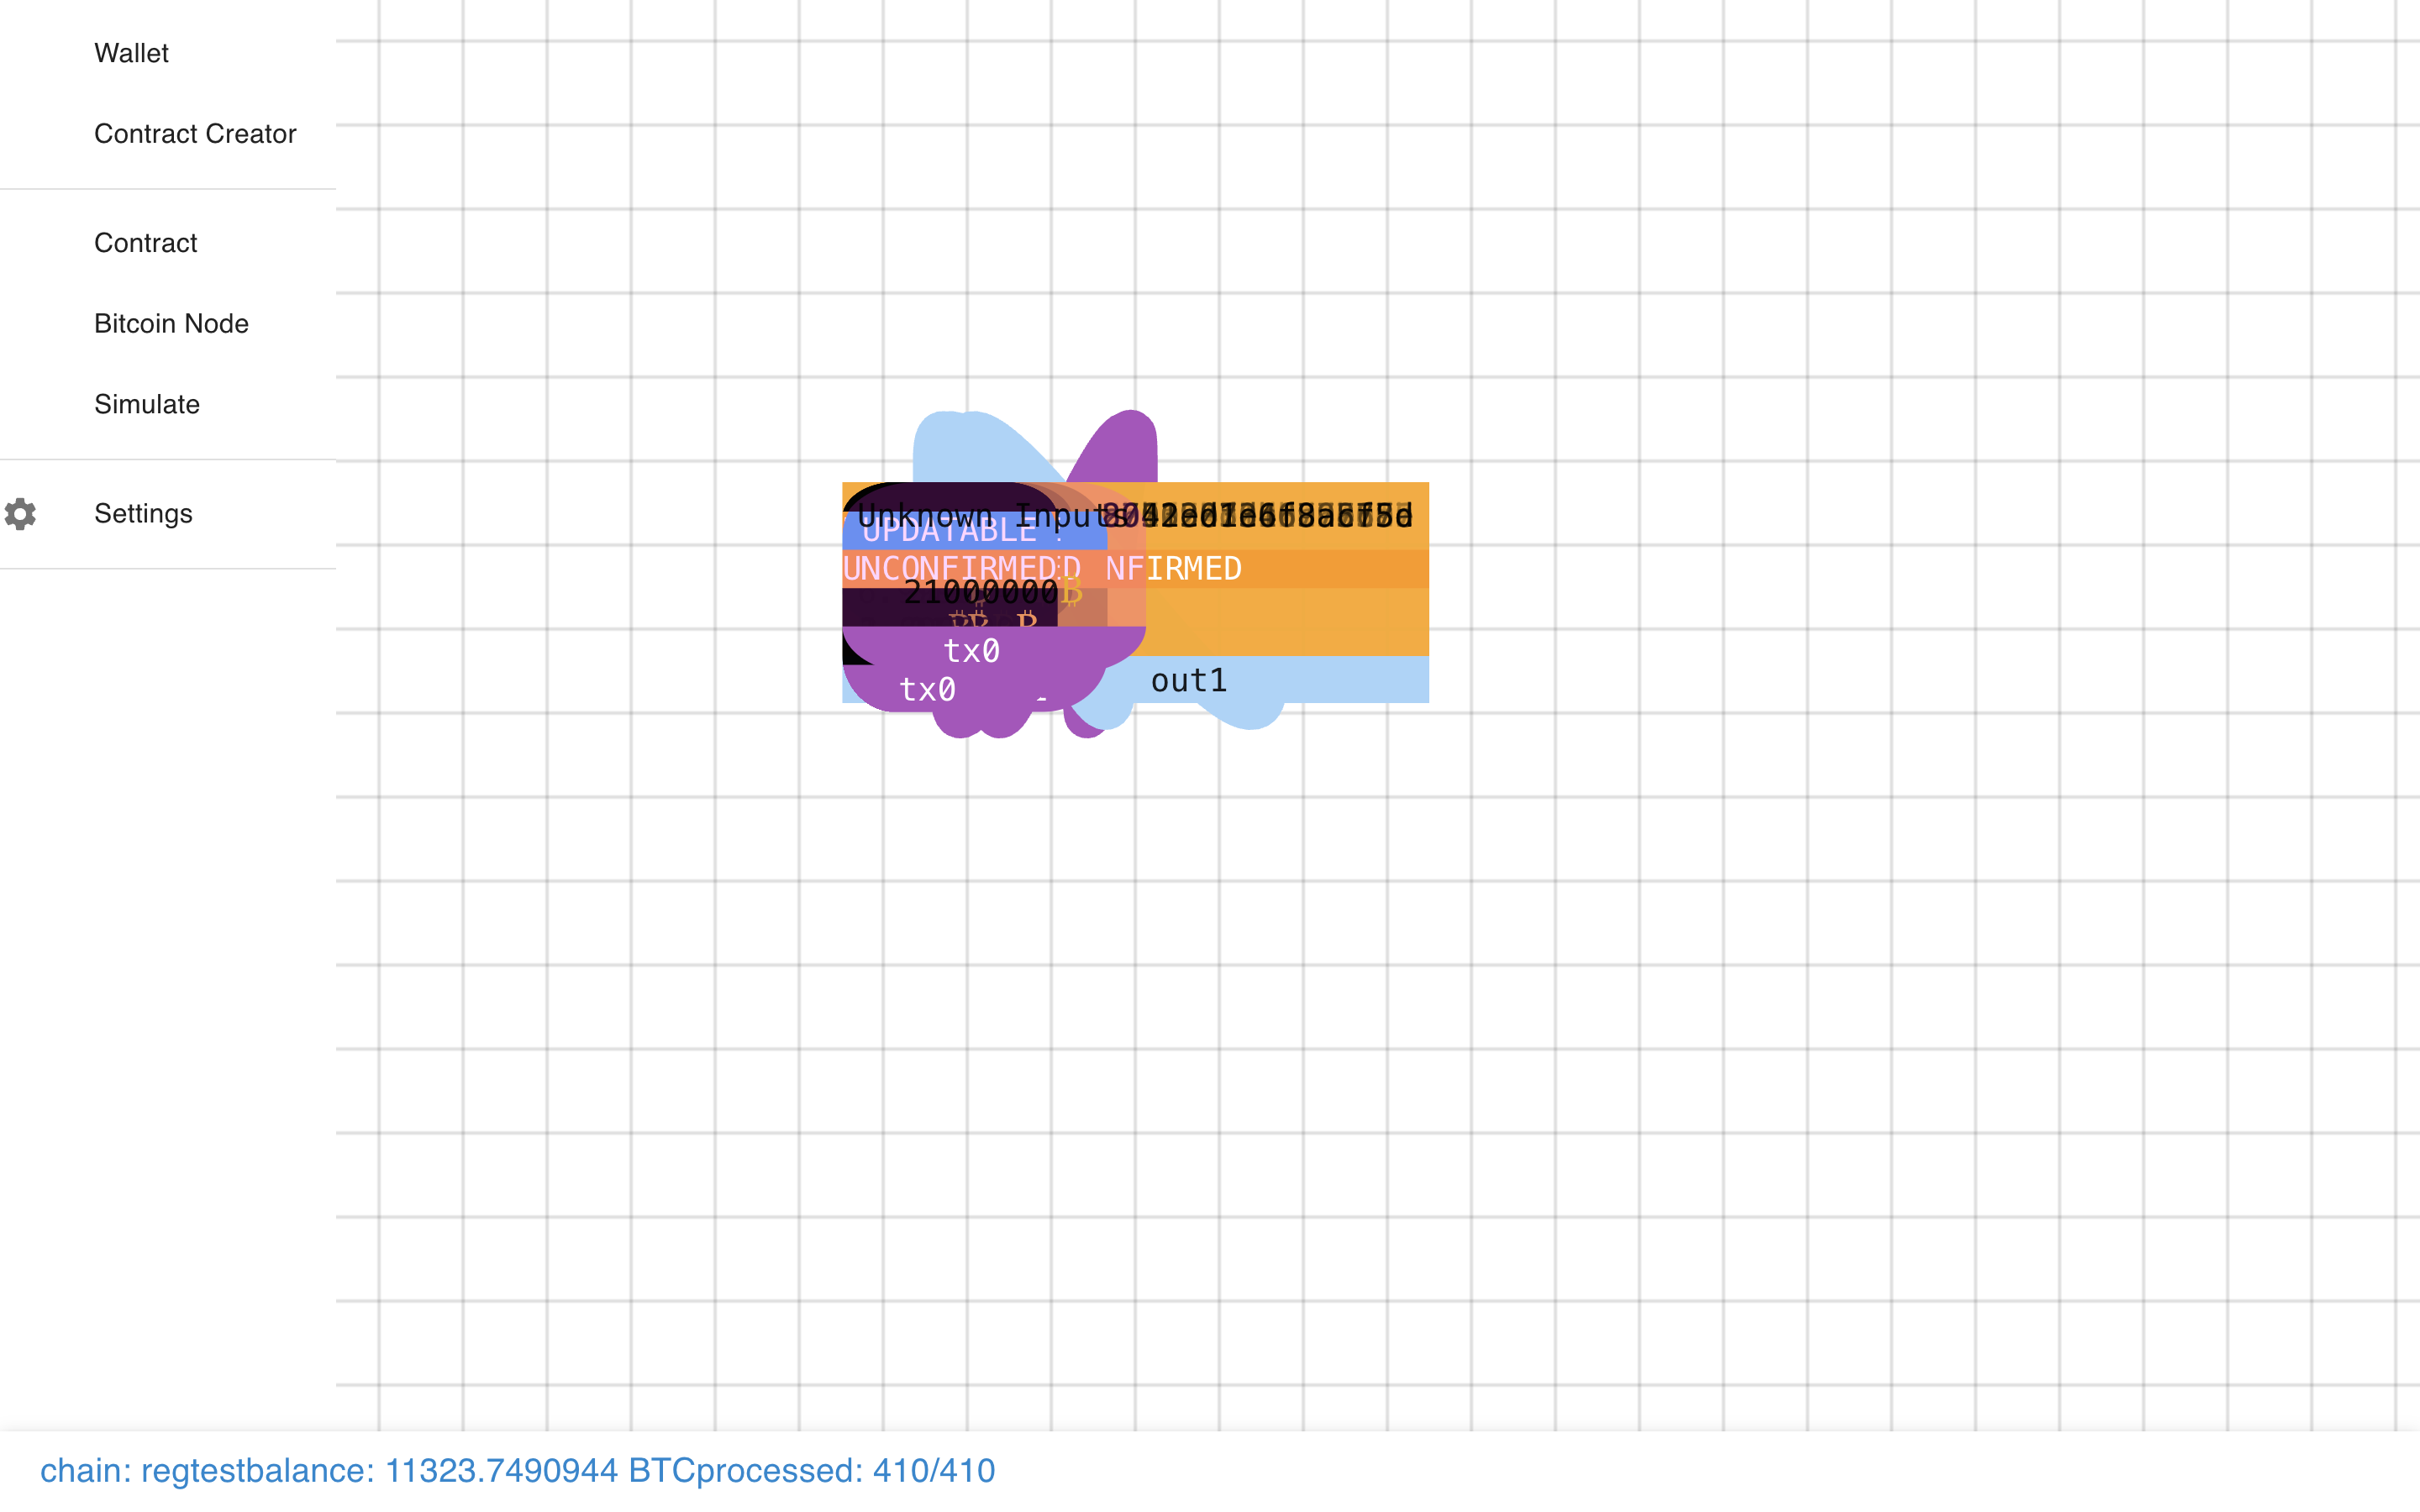
 What’s that??? It’s a small bug I am fixing :/. Not to worry…
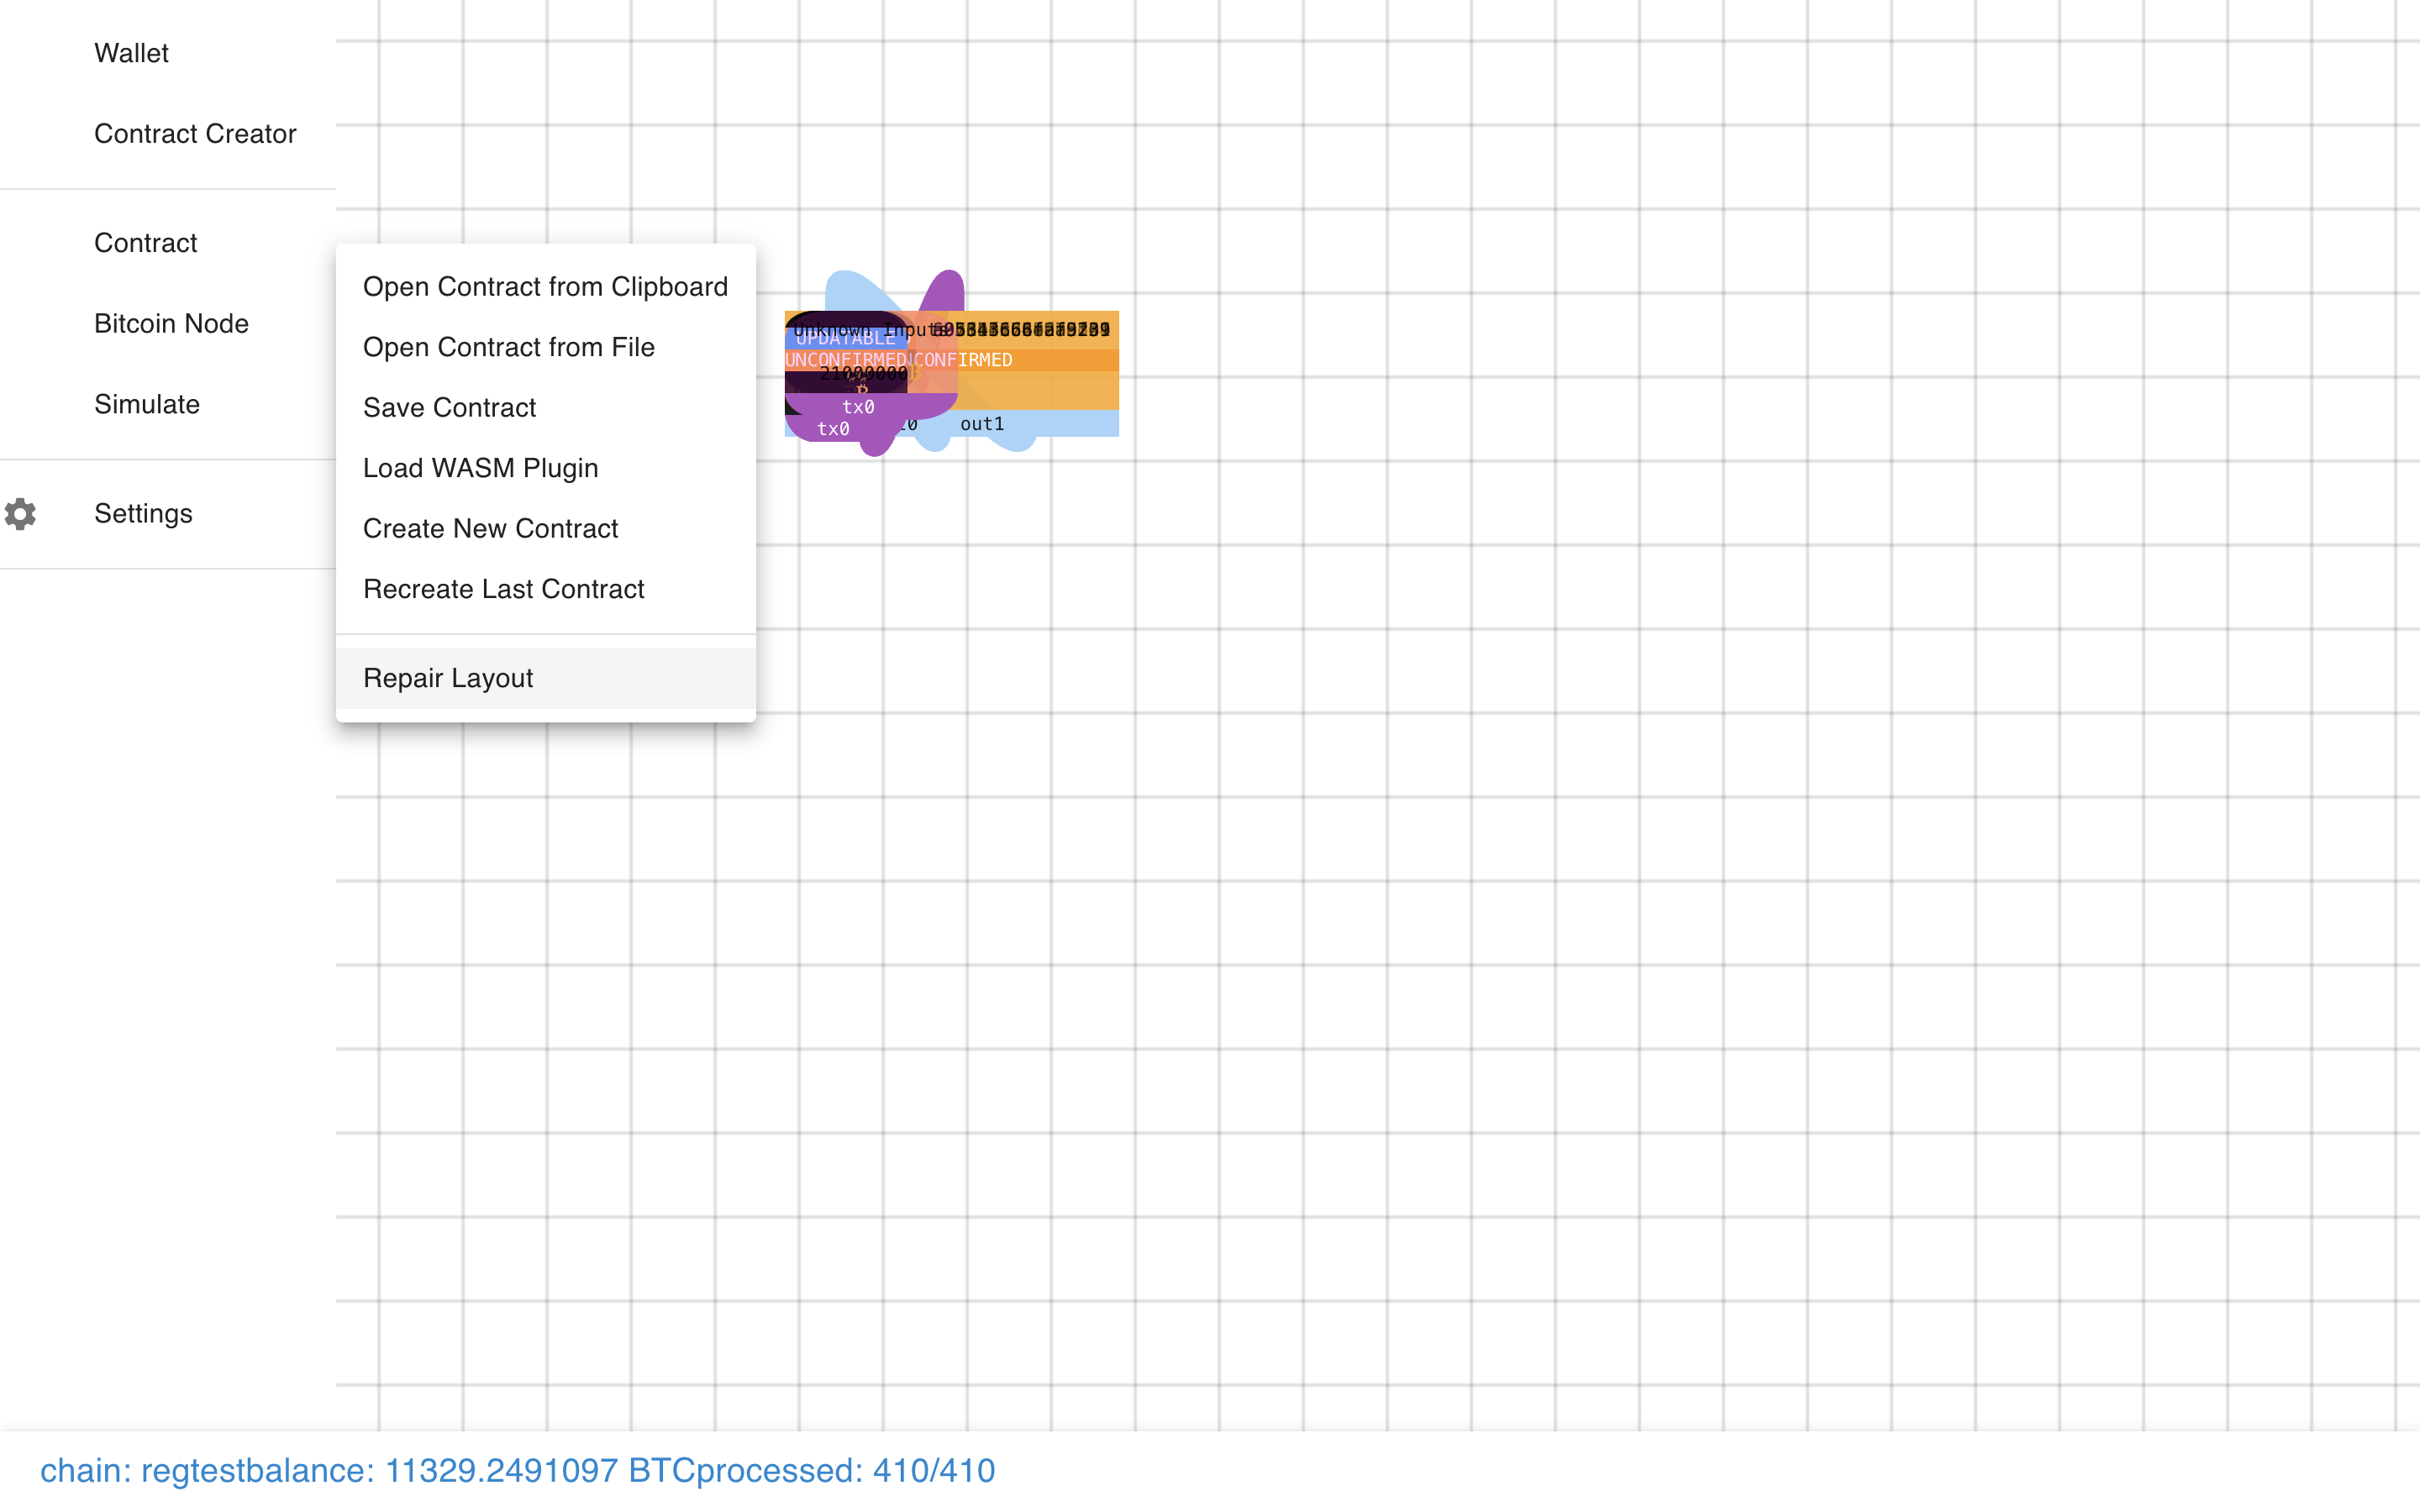
 Just click repair layout.
 And the presentation resets. I’ll fix it soon, but it can be useful if there’s a
glitch to reset it.
And the presentation resets. I’ll fix it soon, but it can be useful if there’s a
glitch to reset it.
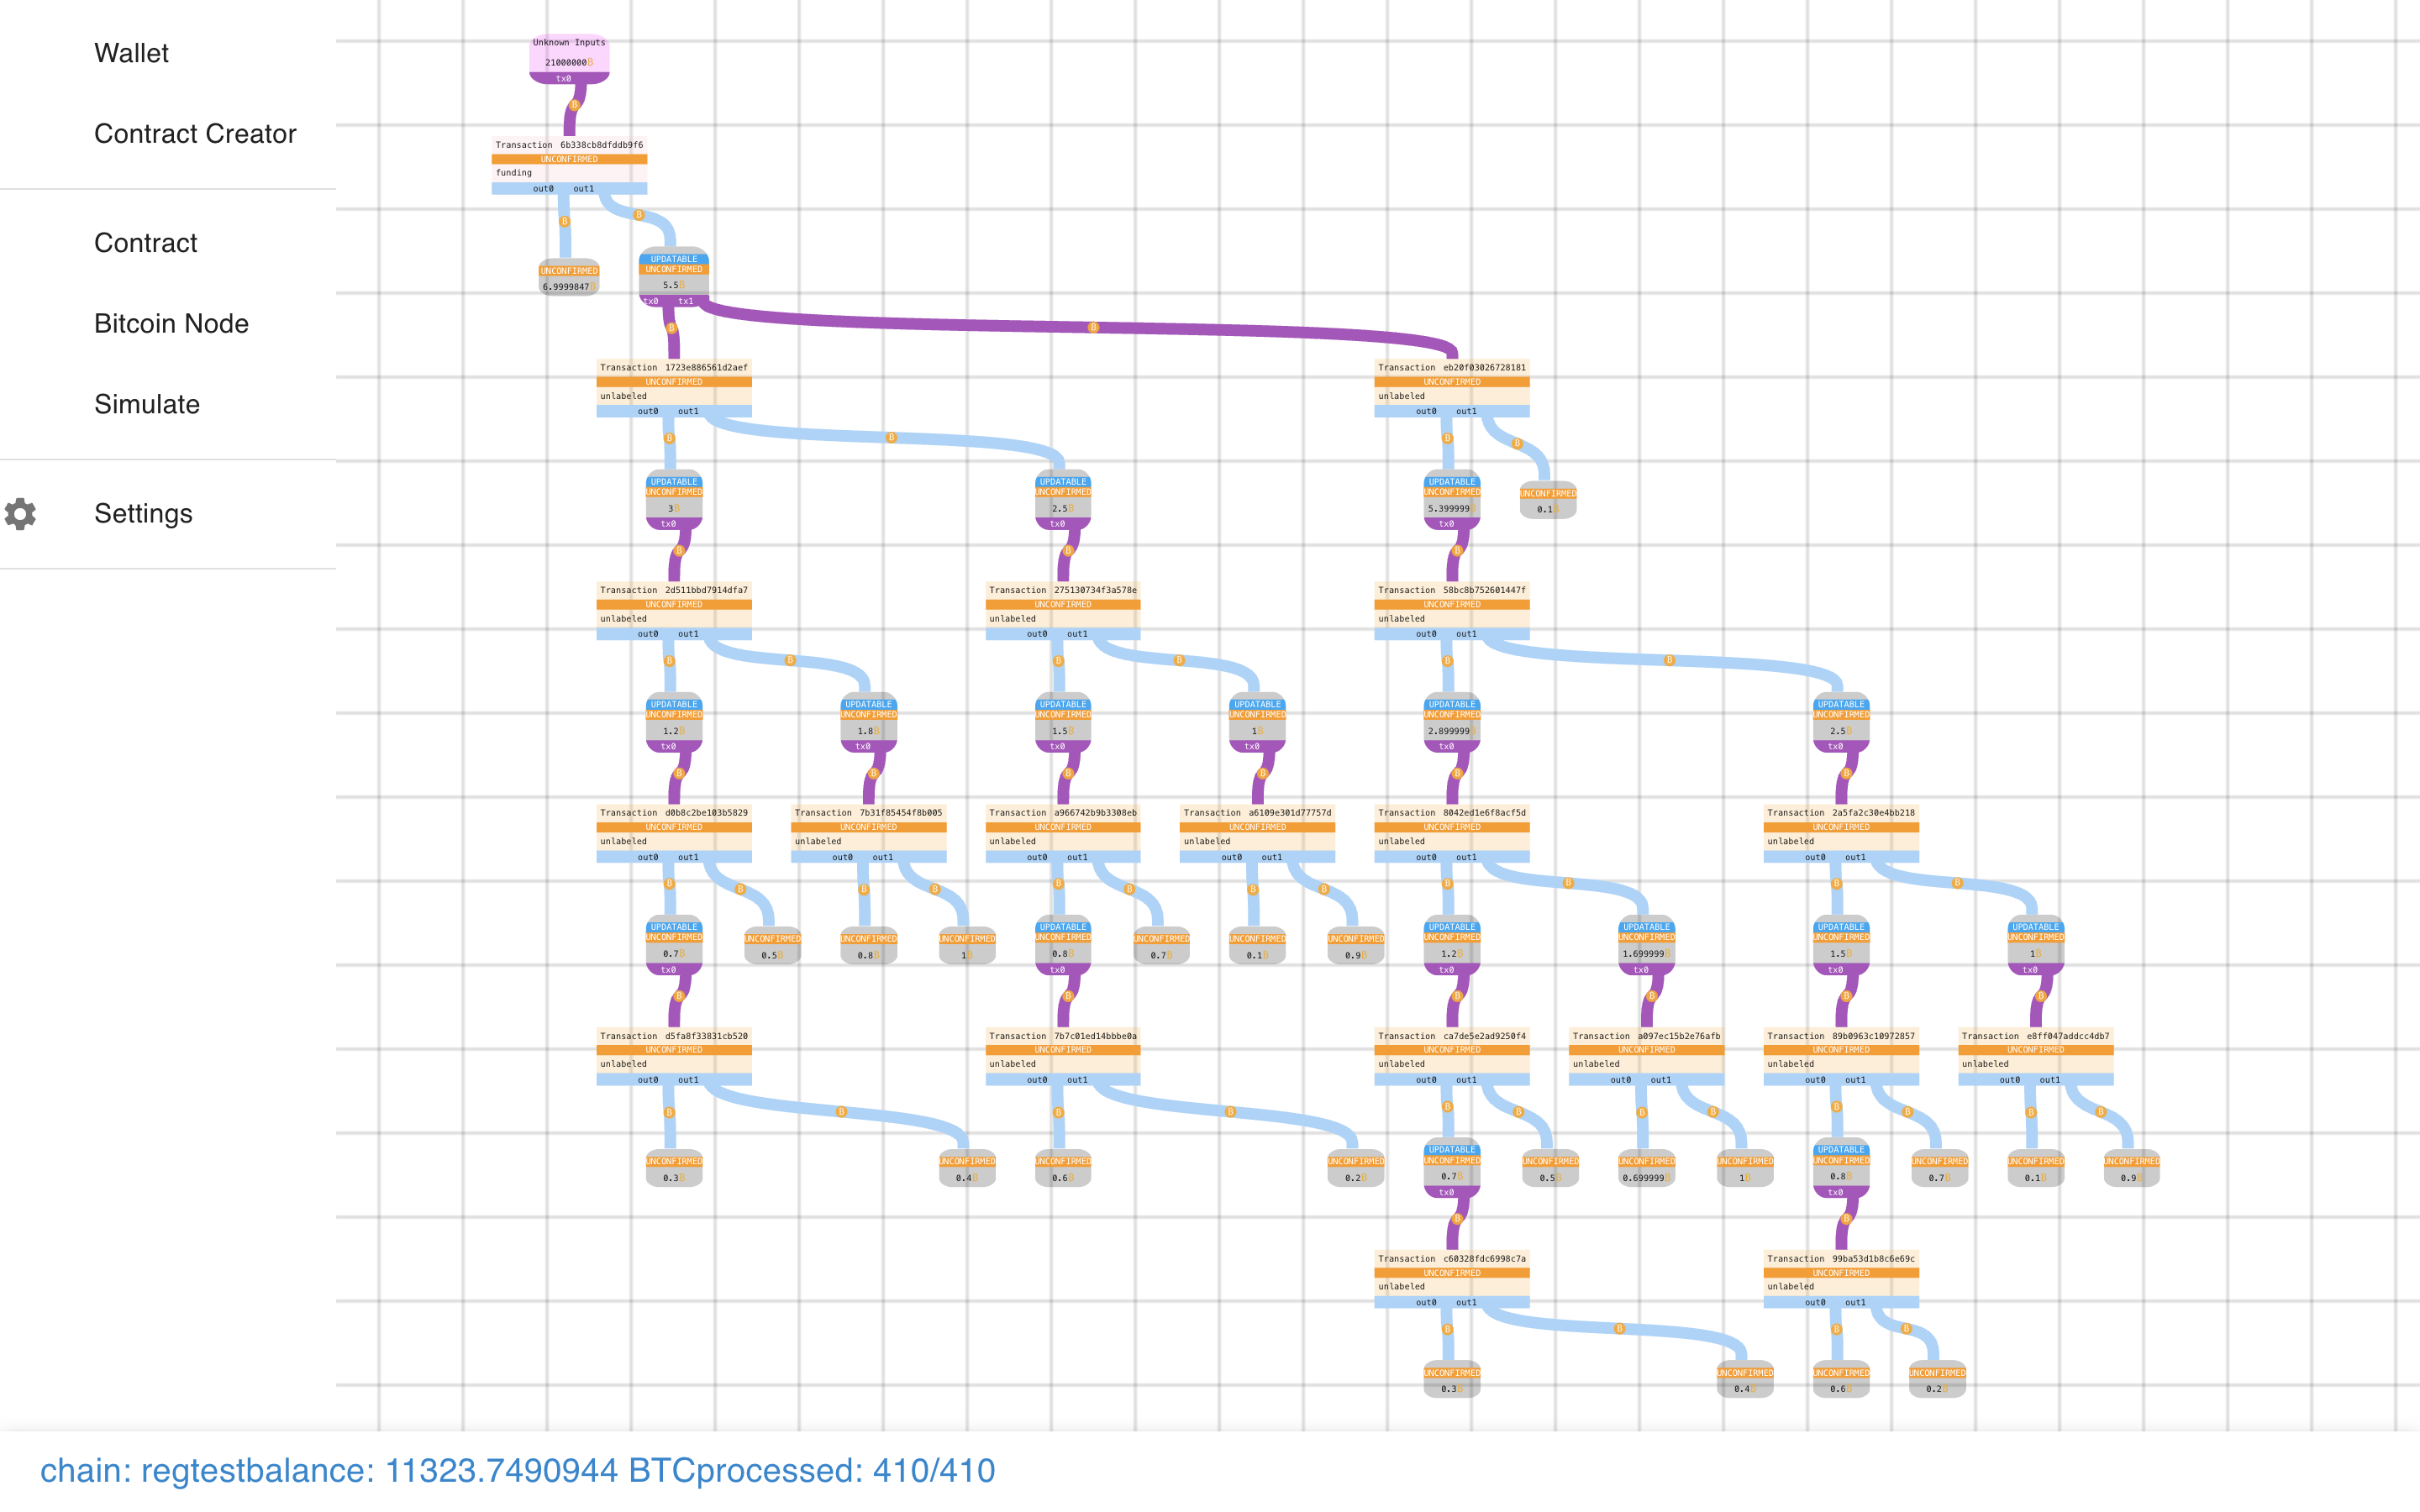
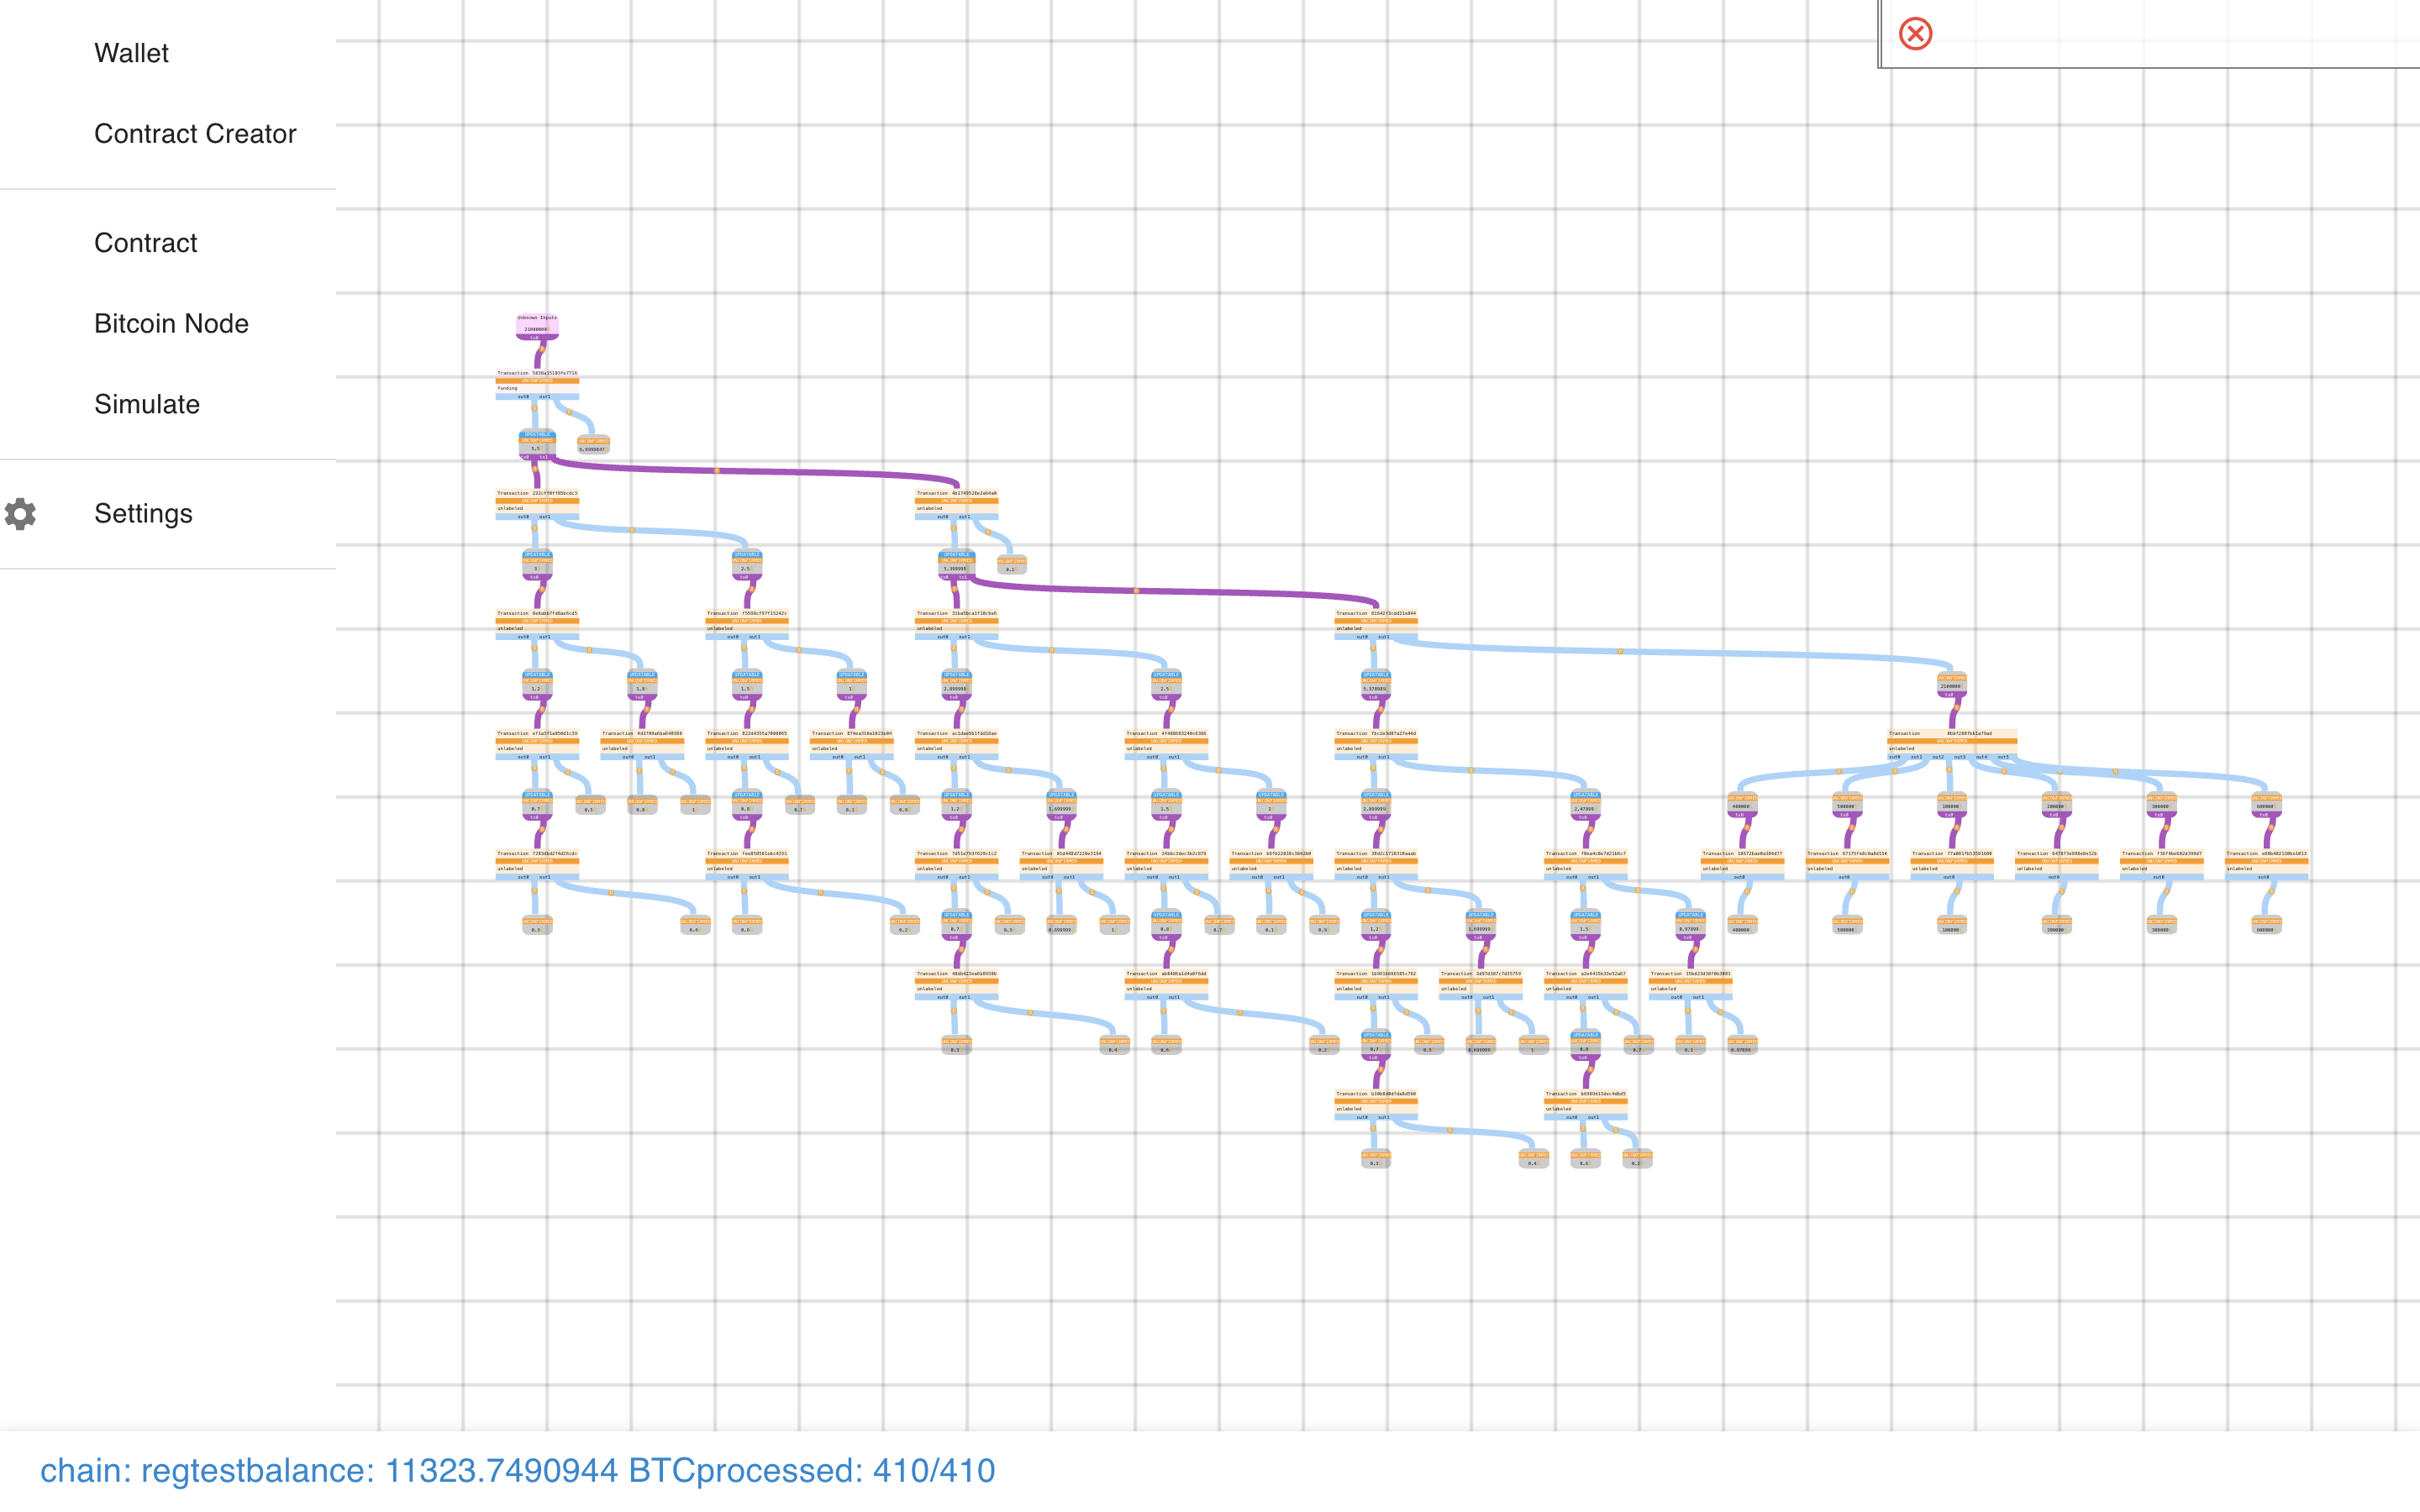
Now we can see the basic structure of the Payment Pool, and how it splits up.
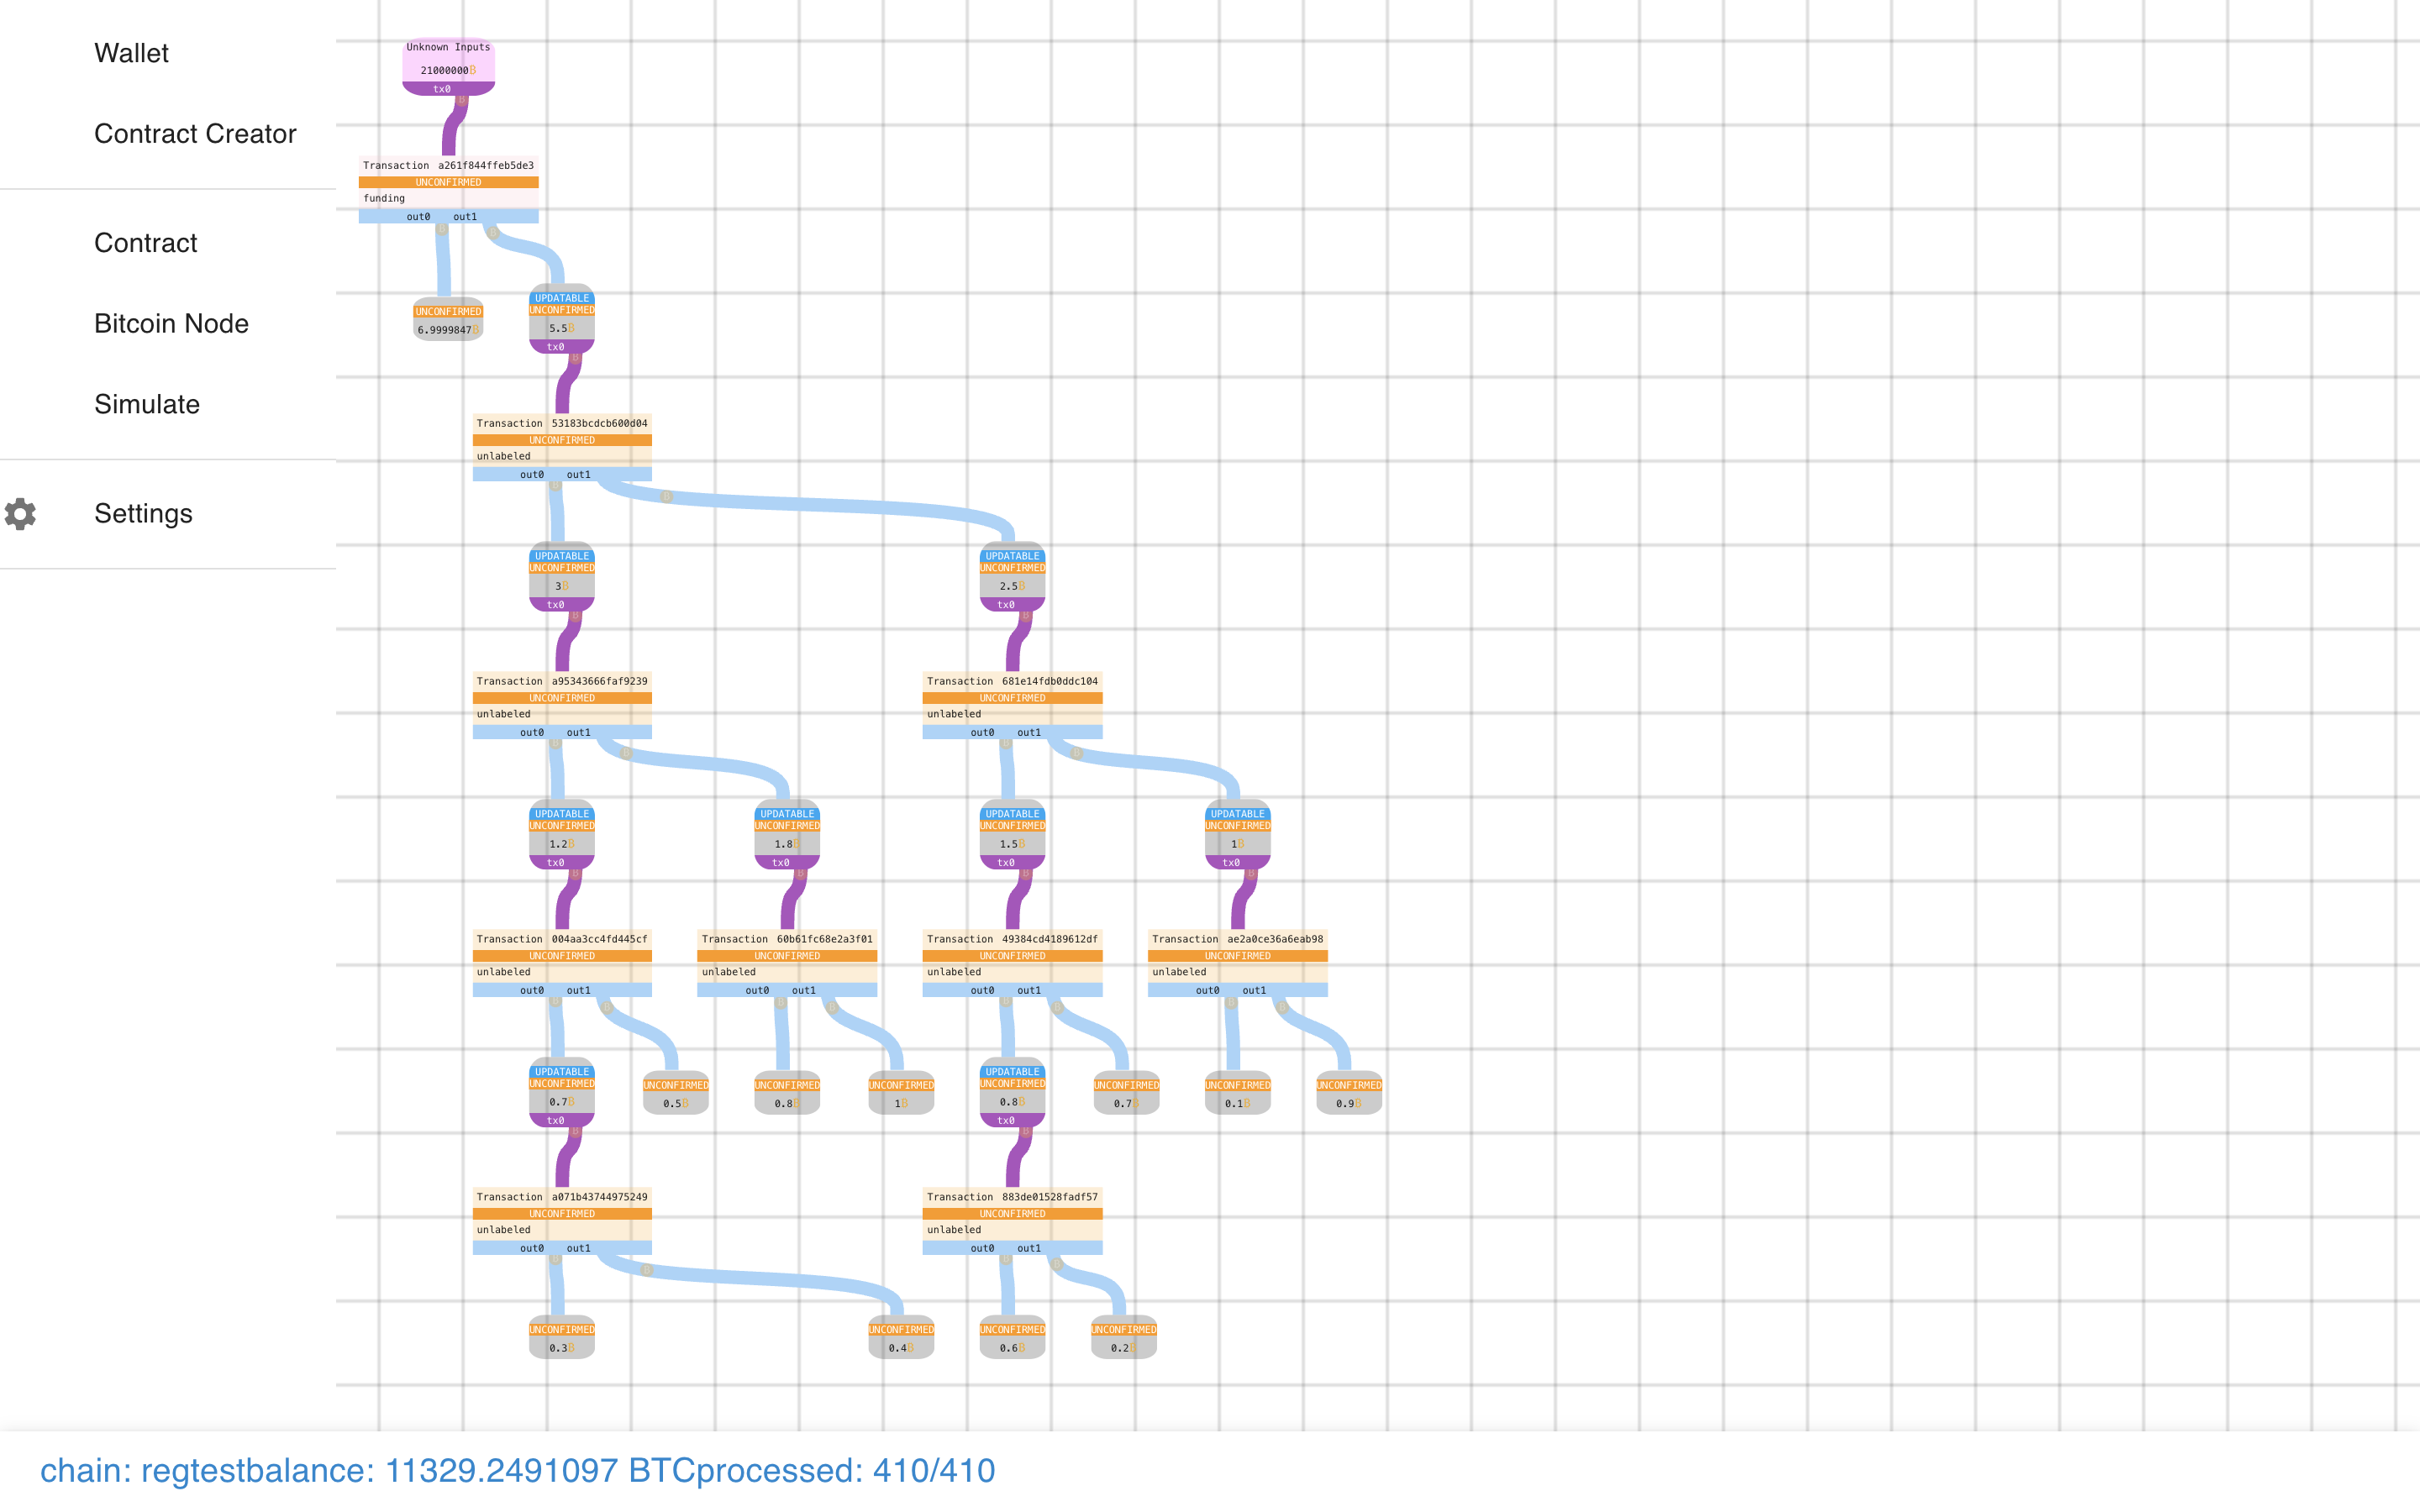 Let’s get a closer look…
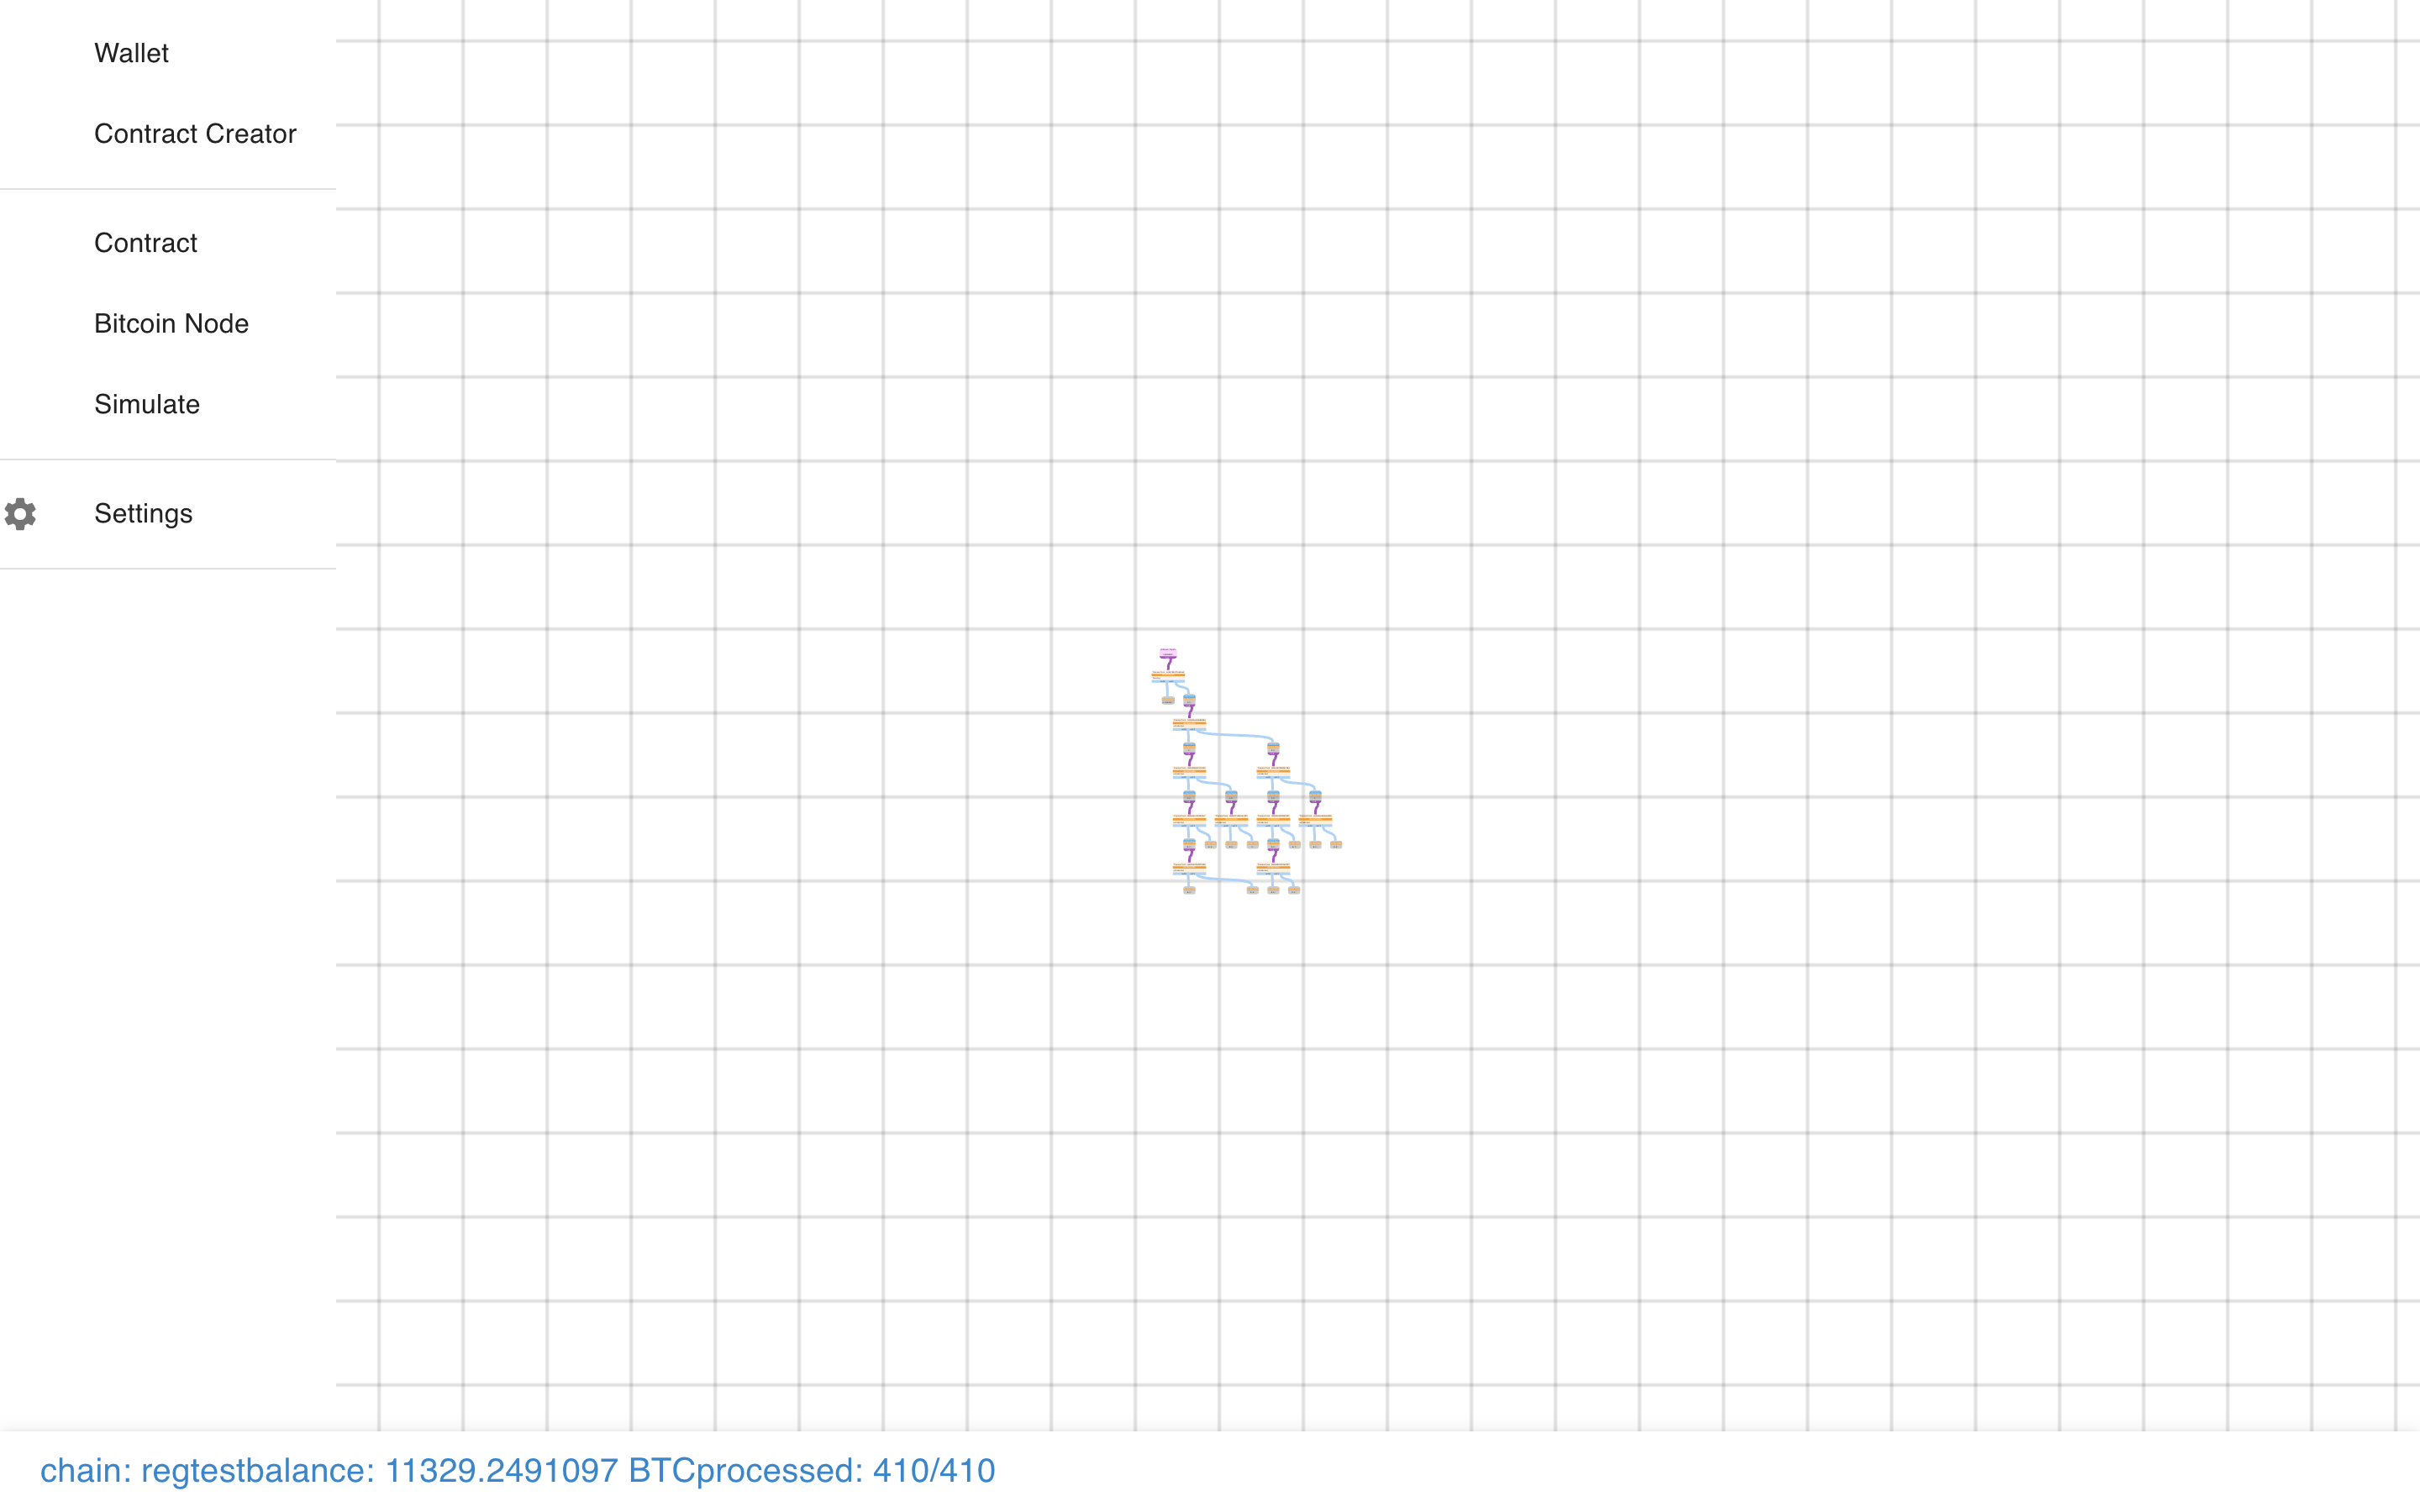
 Let’s zoom out (not helpful!)…
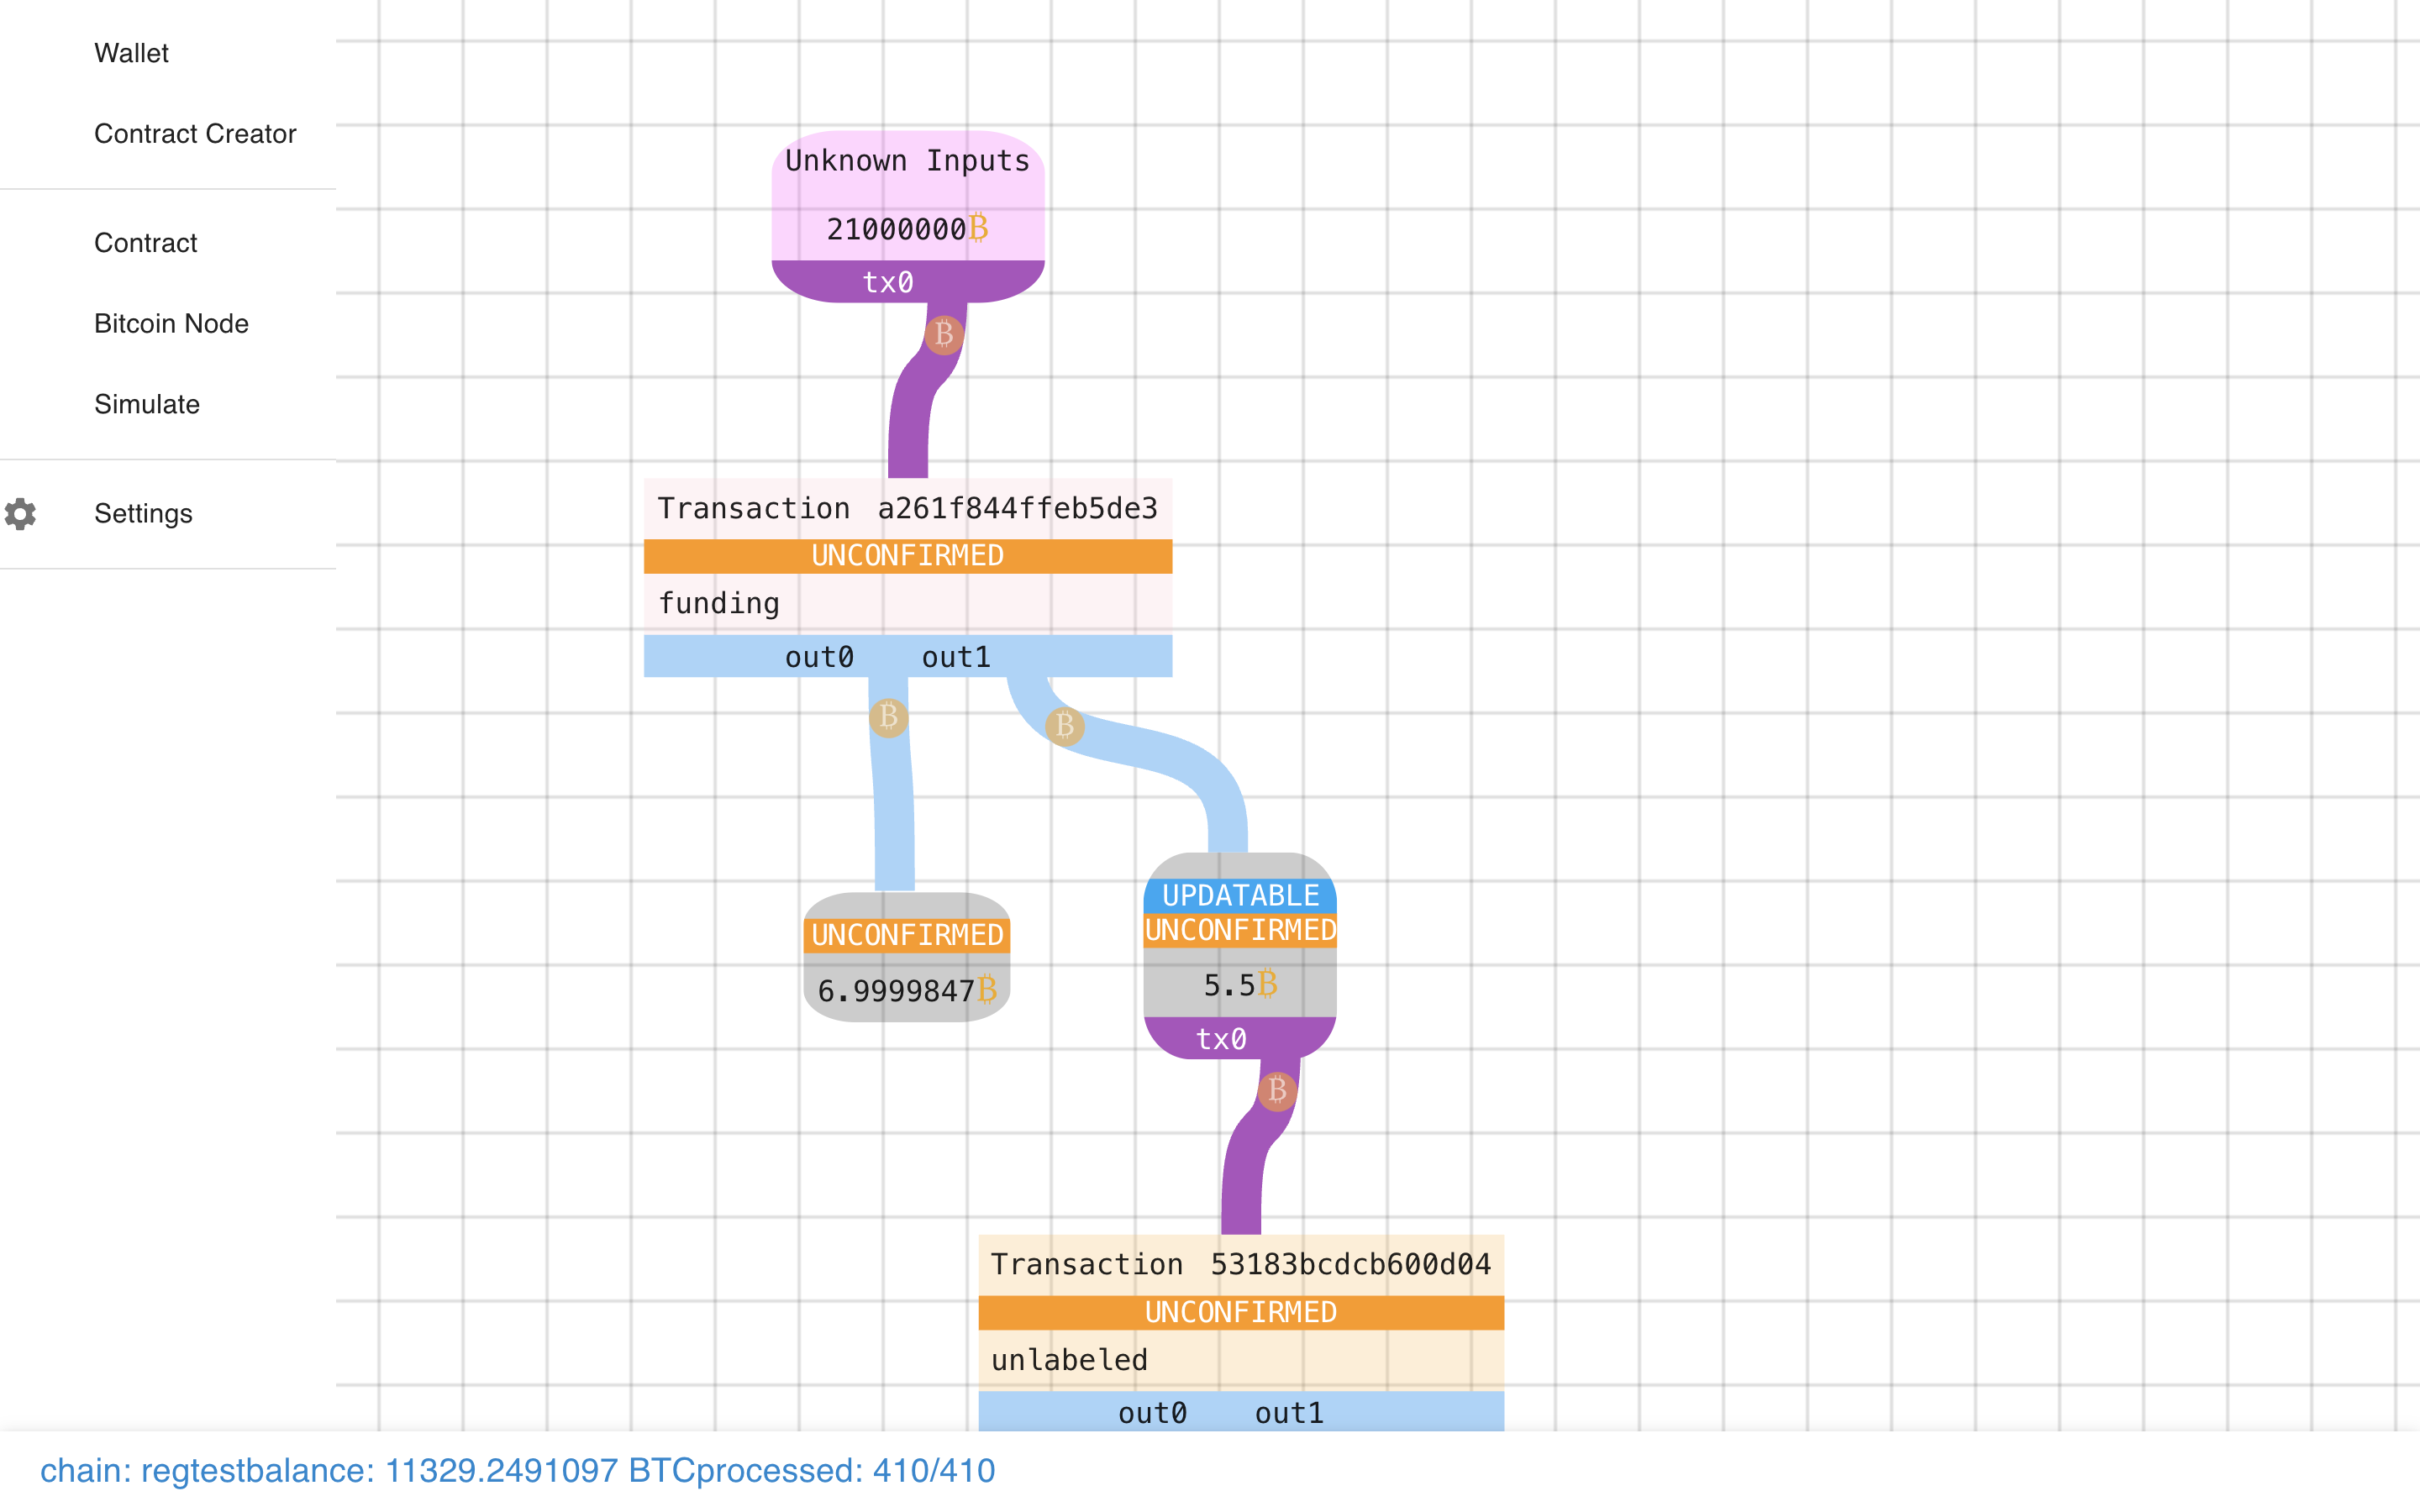
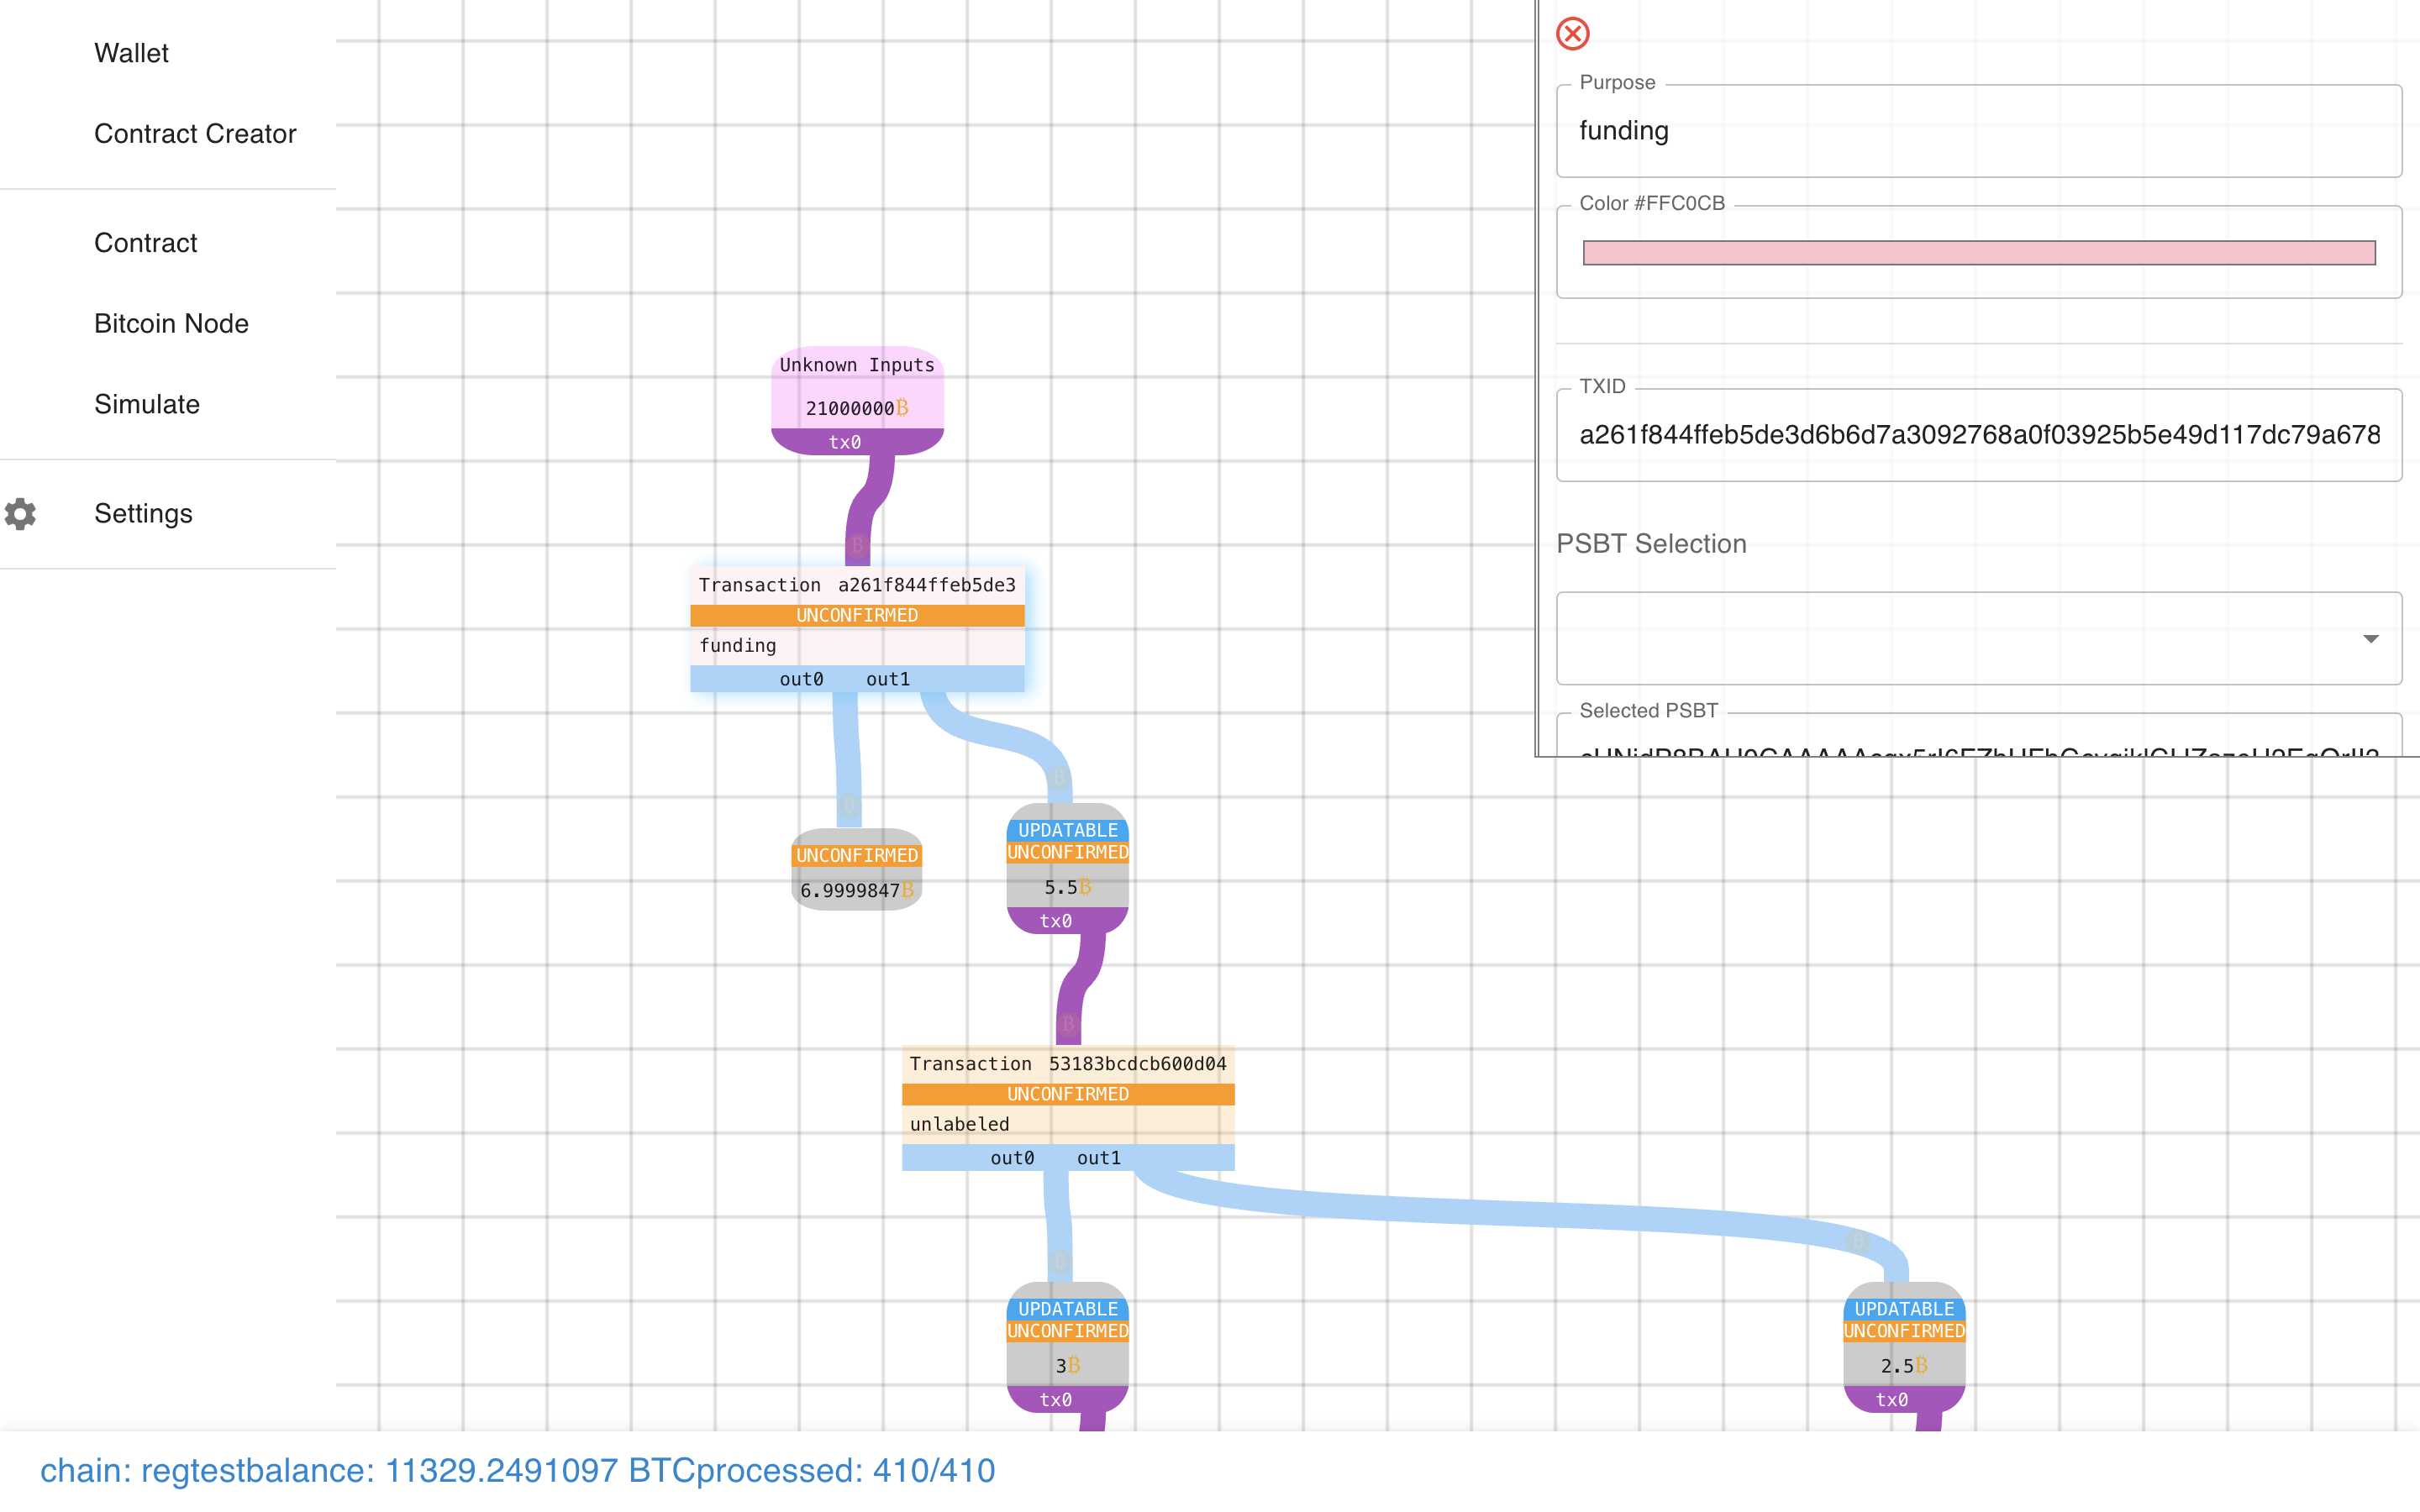
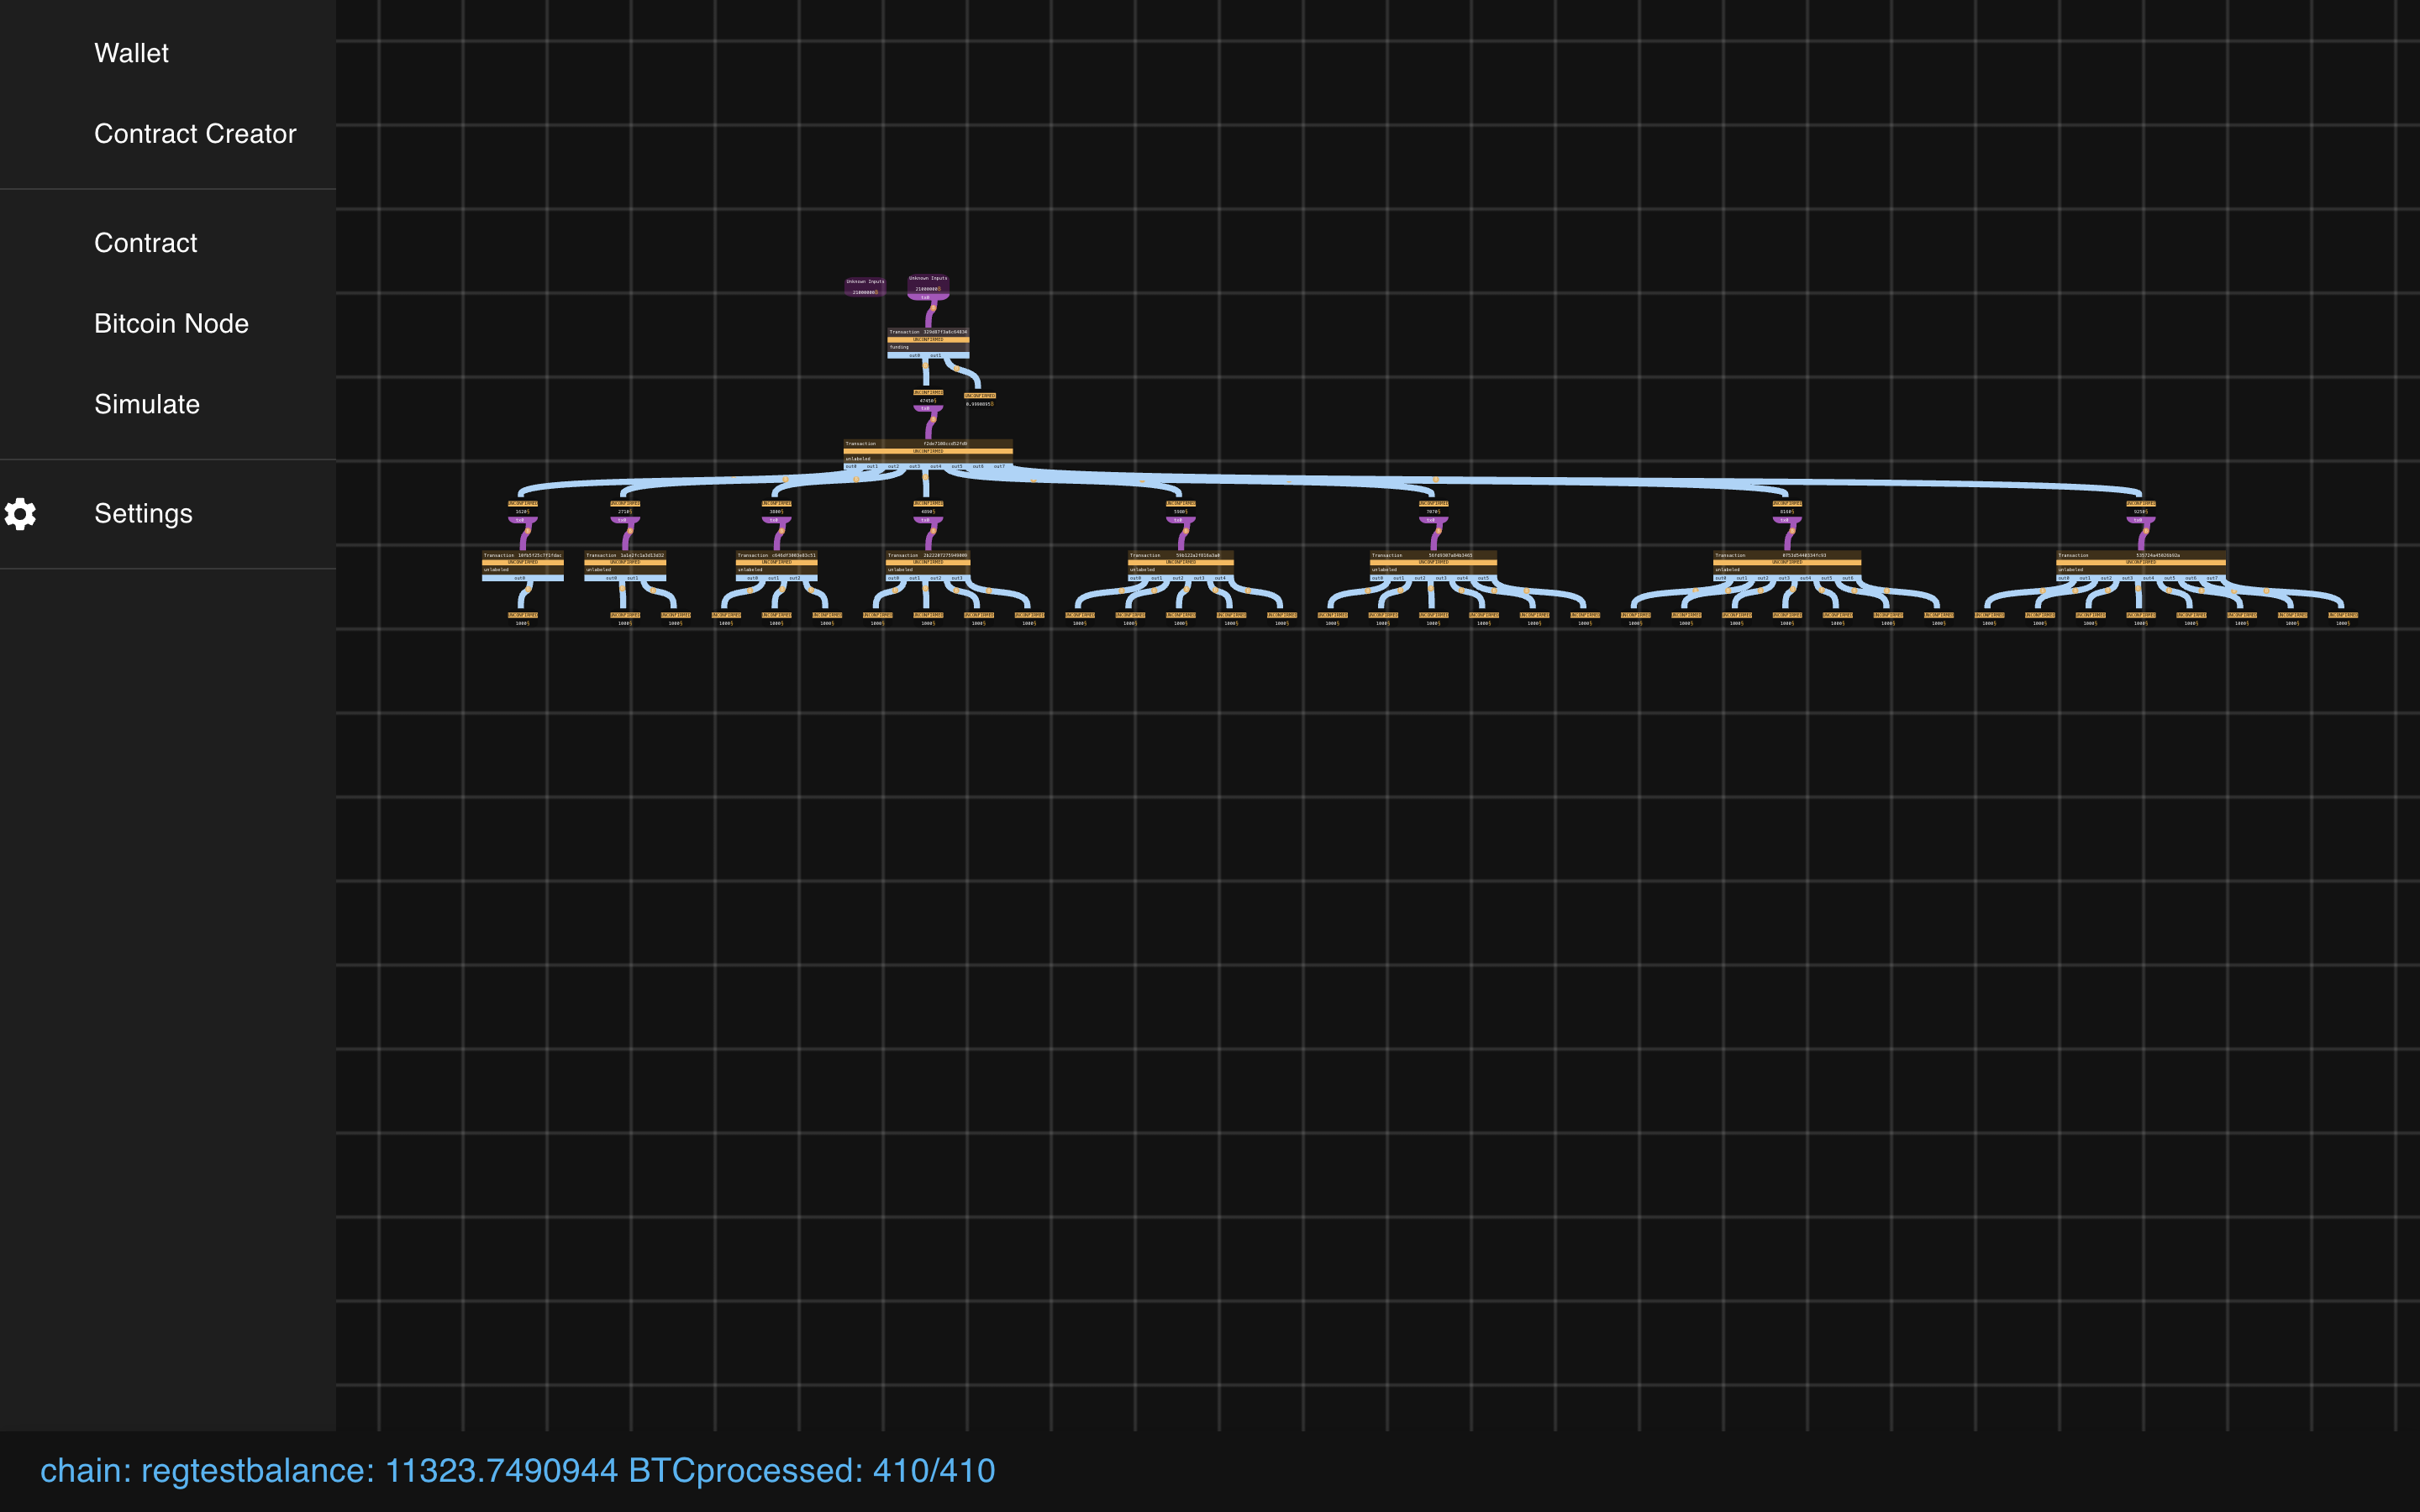
 Let’s zoom back in. Note how the transactions are square boxes and the outputs
are rounded rectangles. Blue lines connect transactions to their outputs. Purple lines
connect outputs to their (potential) spends.
If we click on a transaction we can learn more about it.
Let’s zoom back in. Note how the transactions are square boxes and the outputs
are rounded rectangles. Blue lines connect transactions to their outputs. Purple lines
connect outputs to their (potential) spends.
If we click on a transaction we can learn more about it.
 We even have some actions that we can take, like sending it to the network.
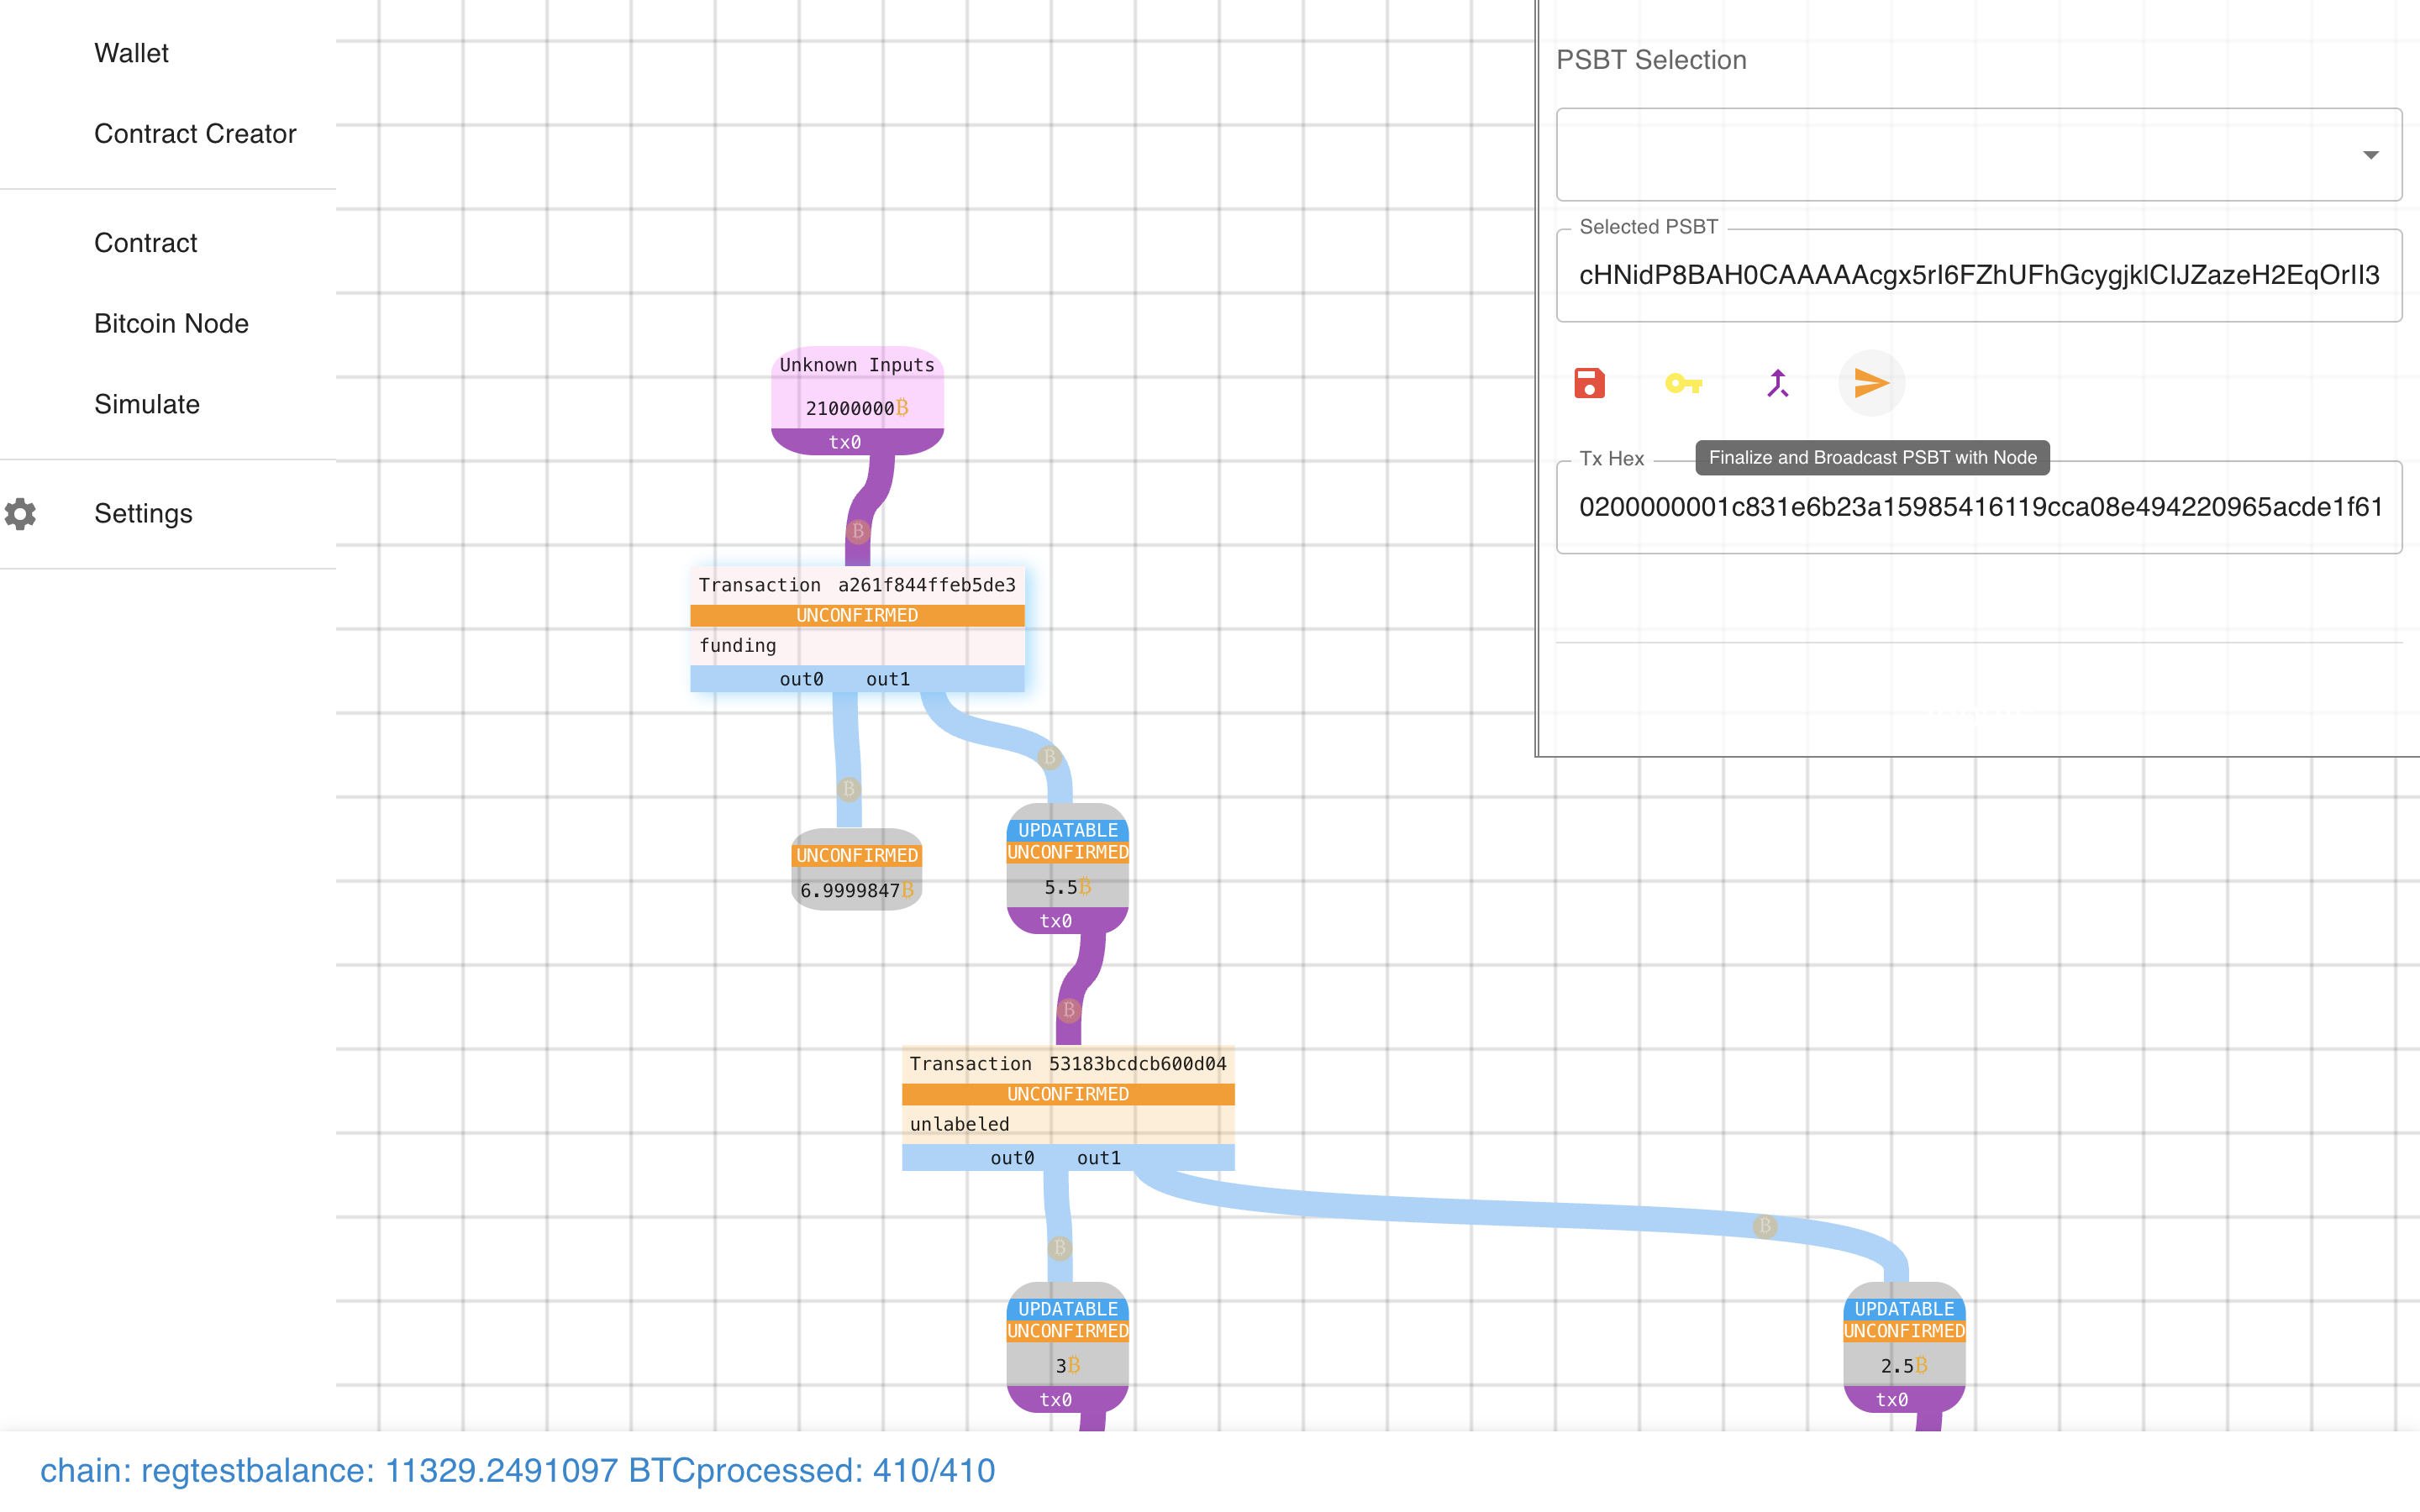 Let’s try it….
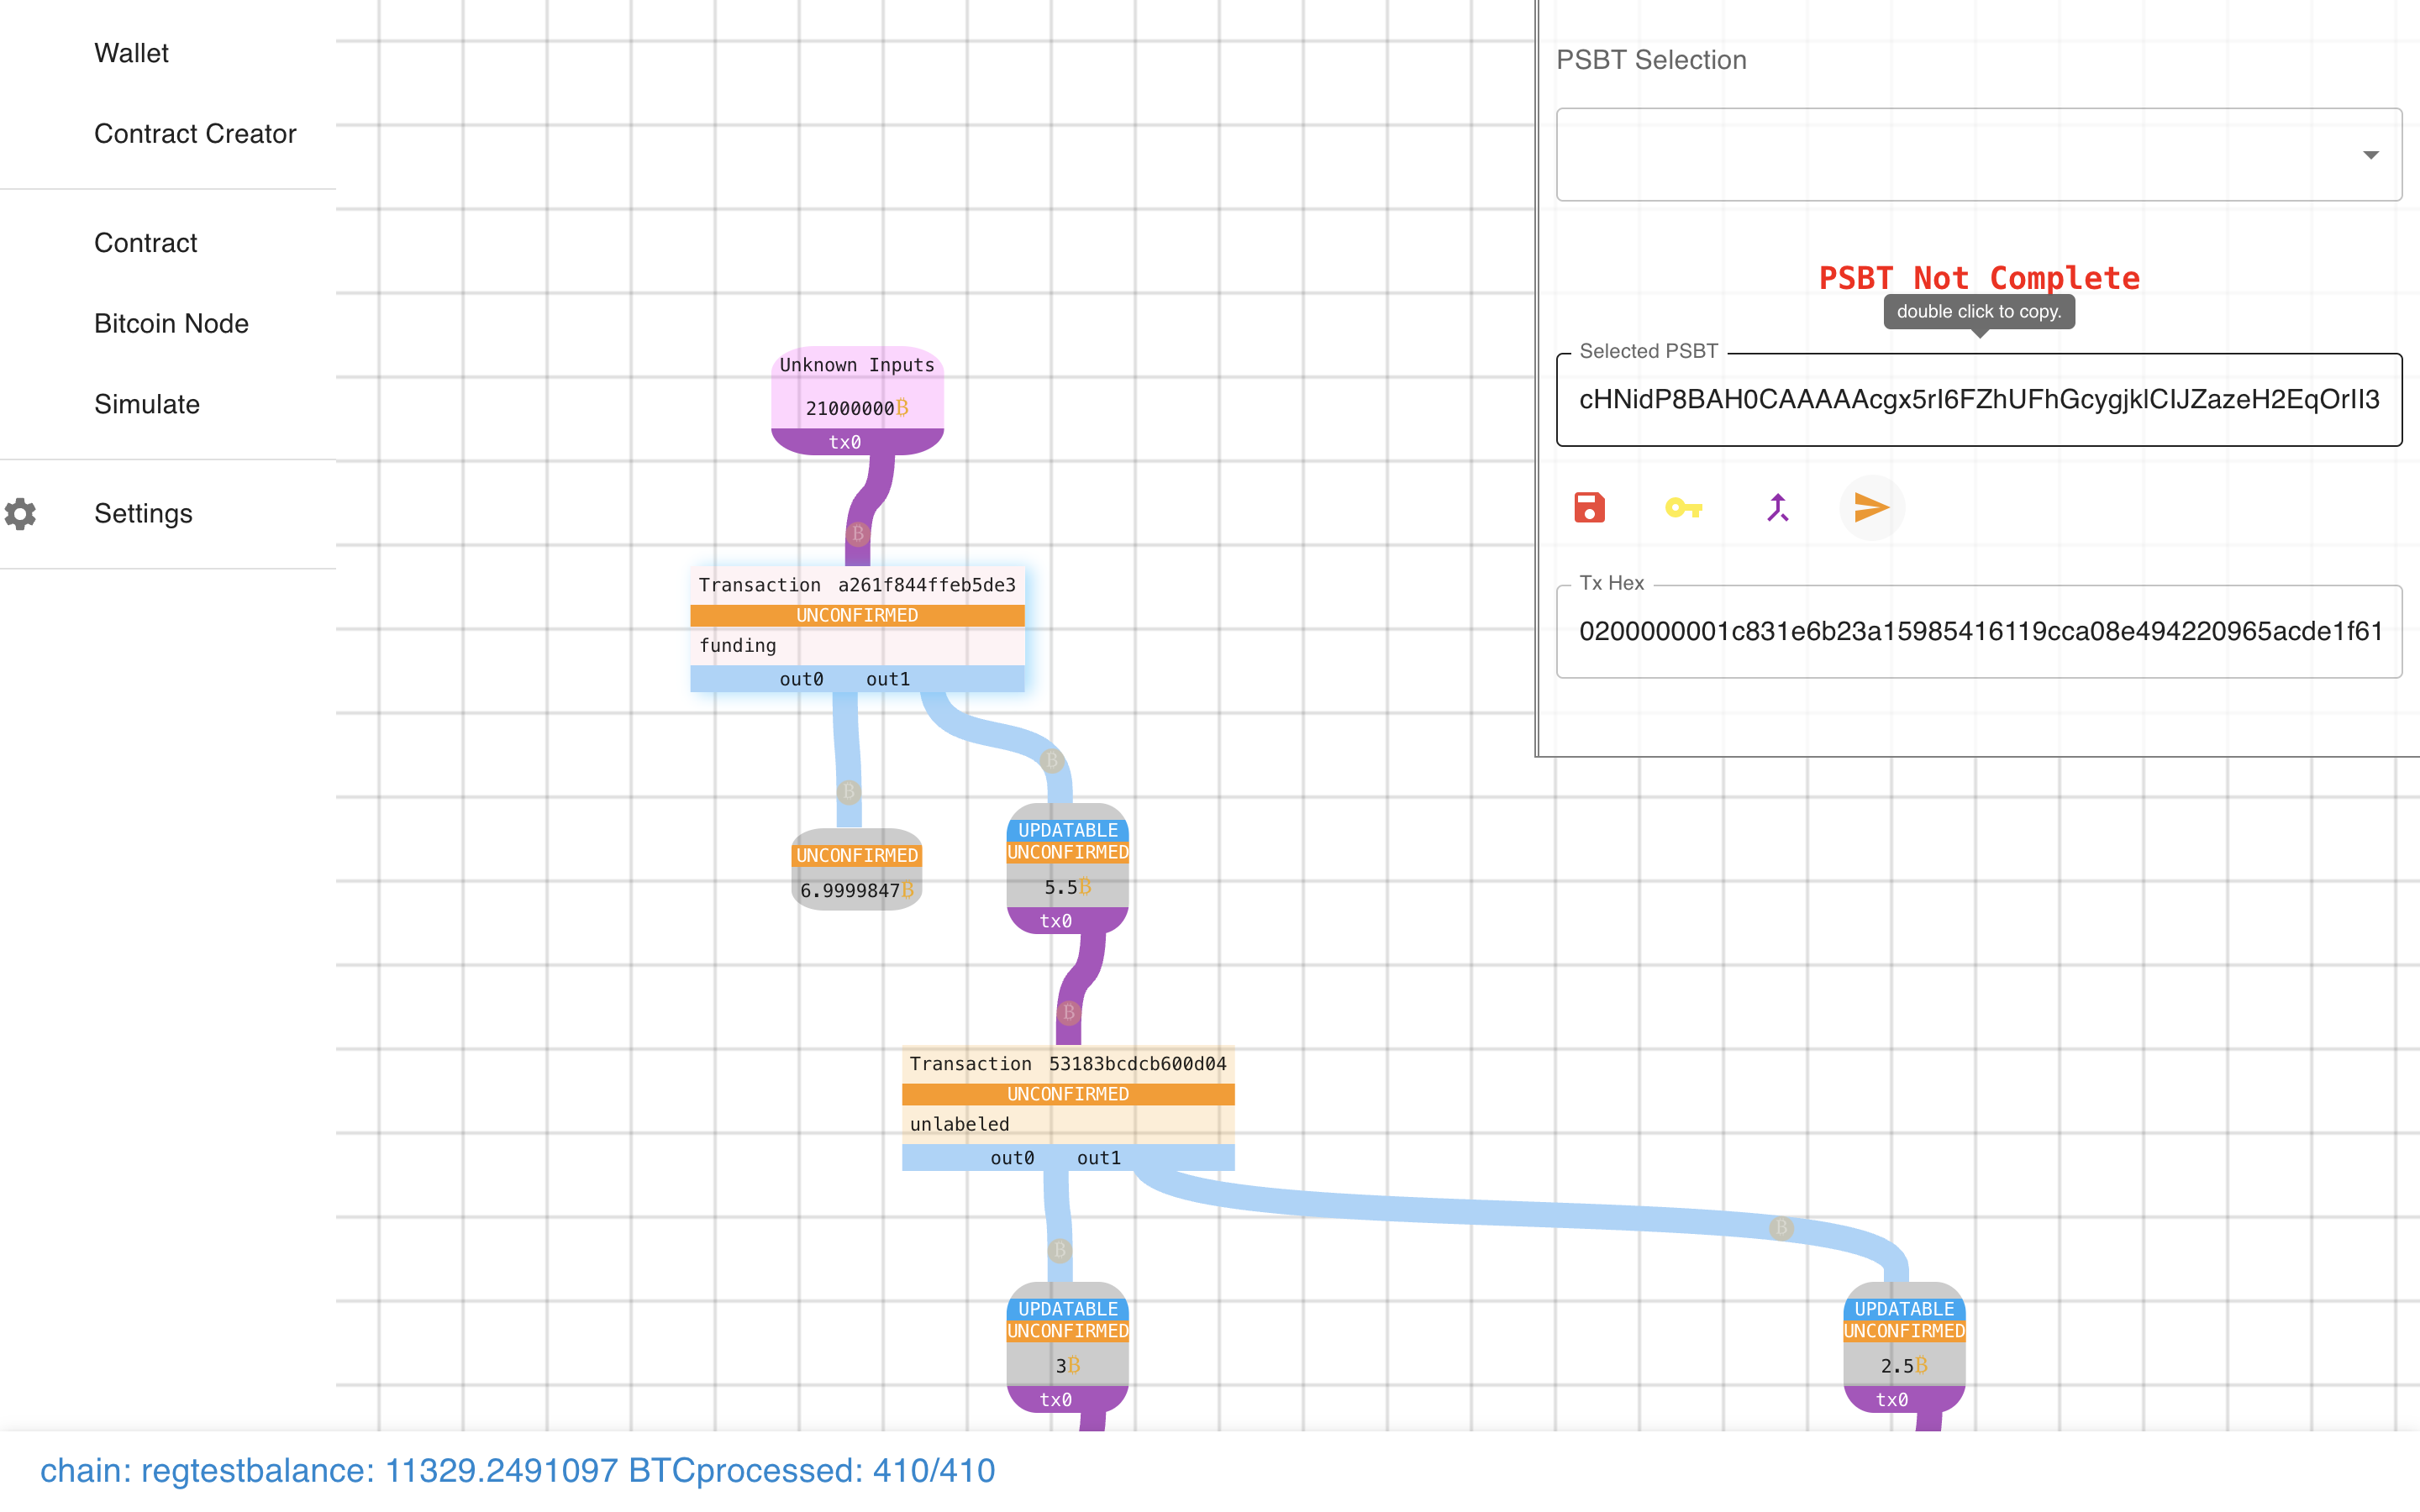 Oops! We need to sign it first…
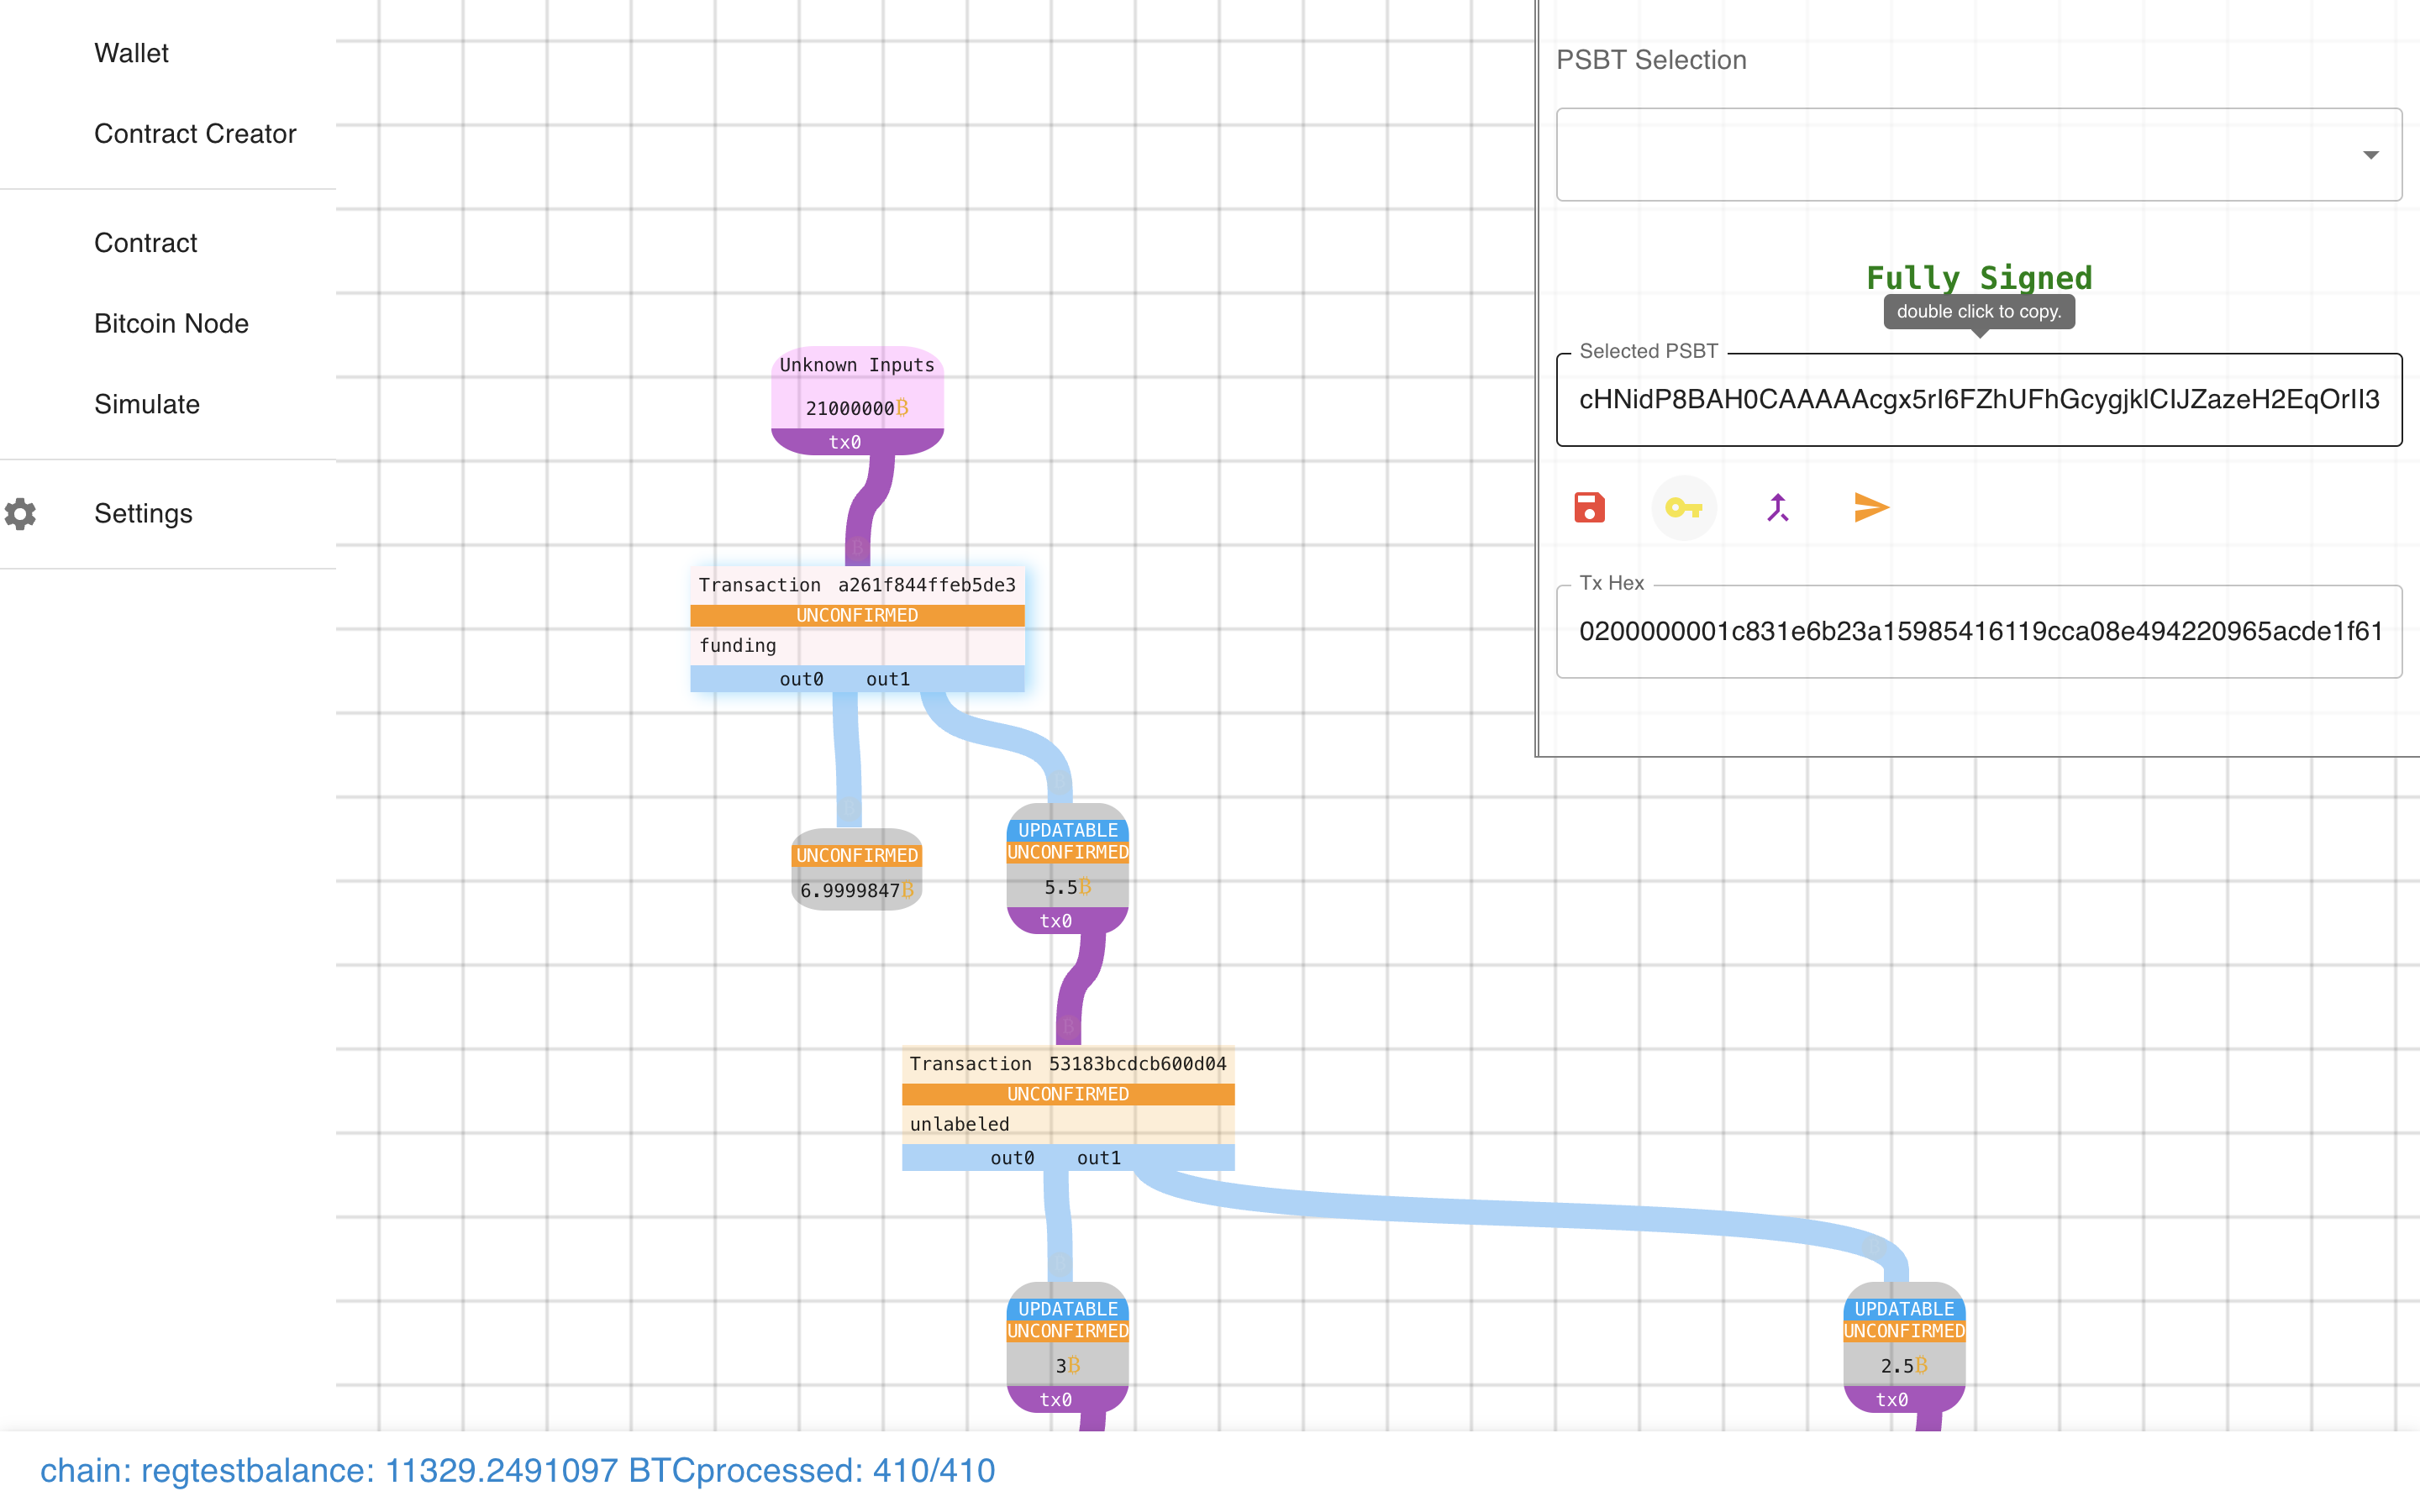 And then we can send it.
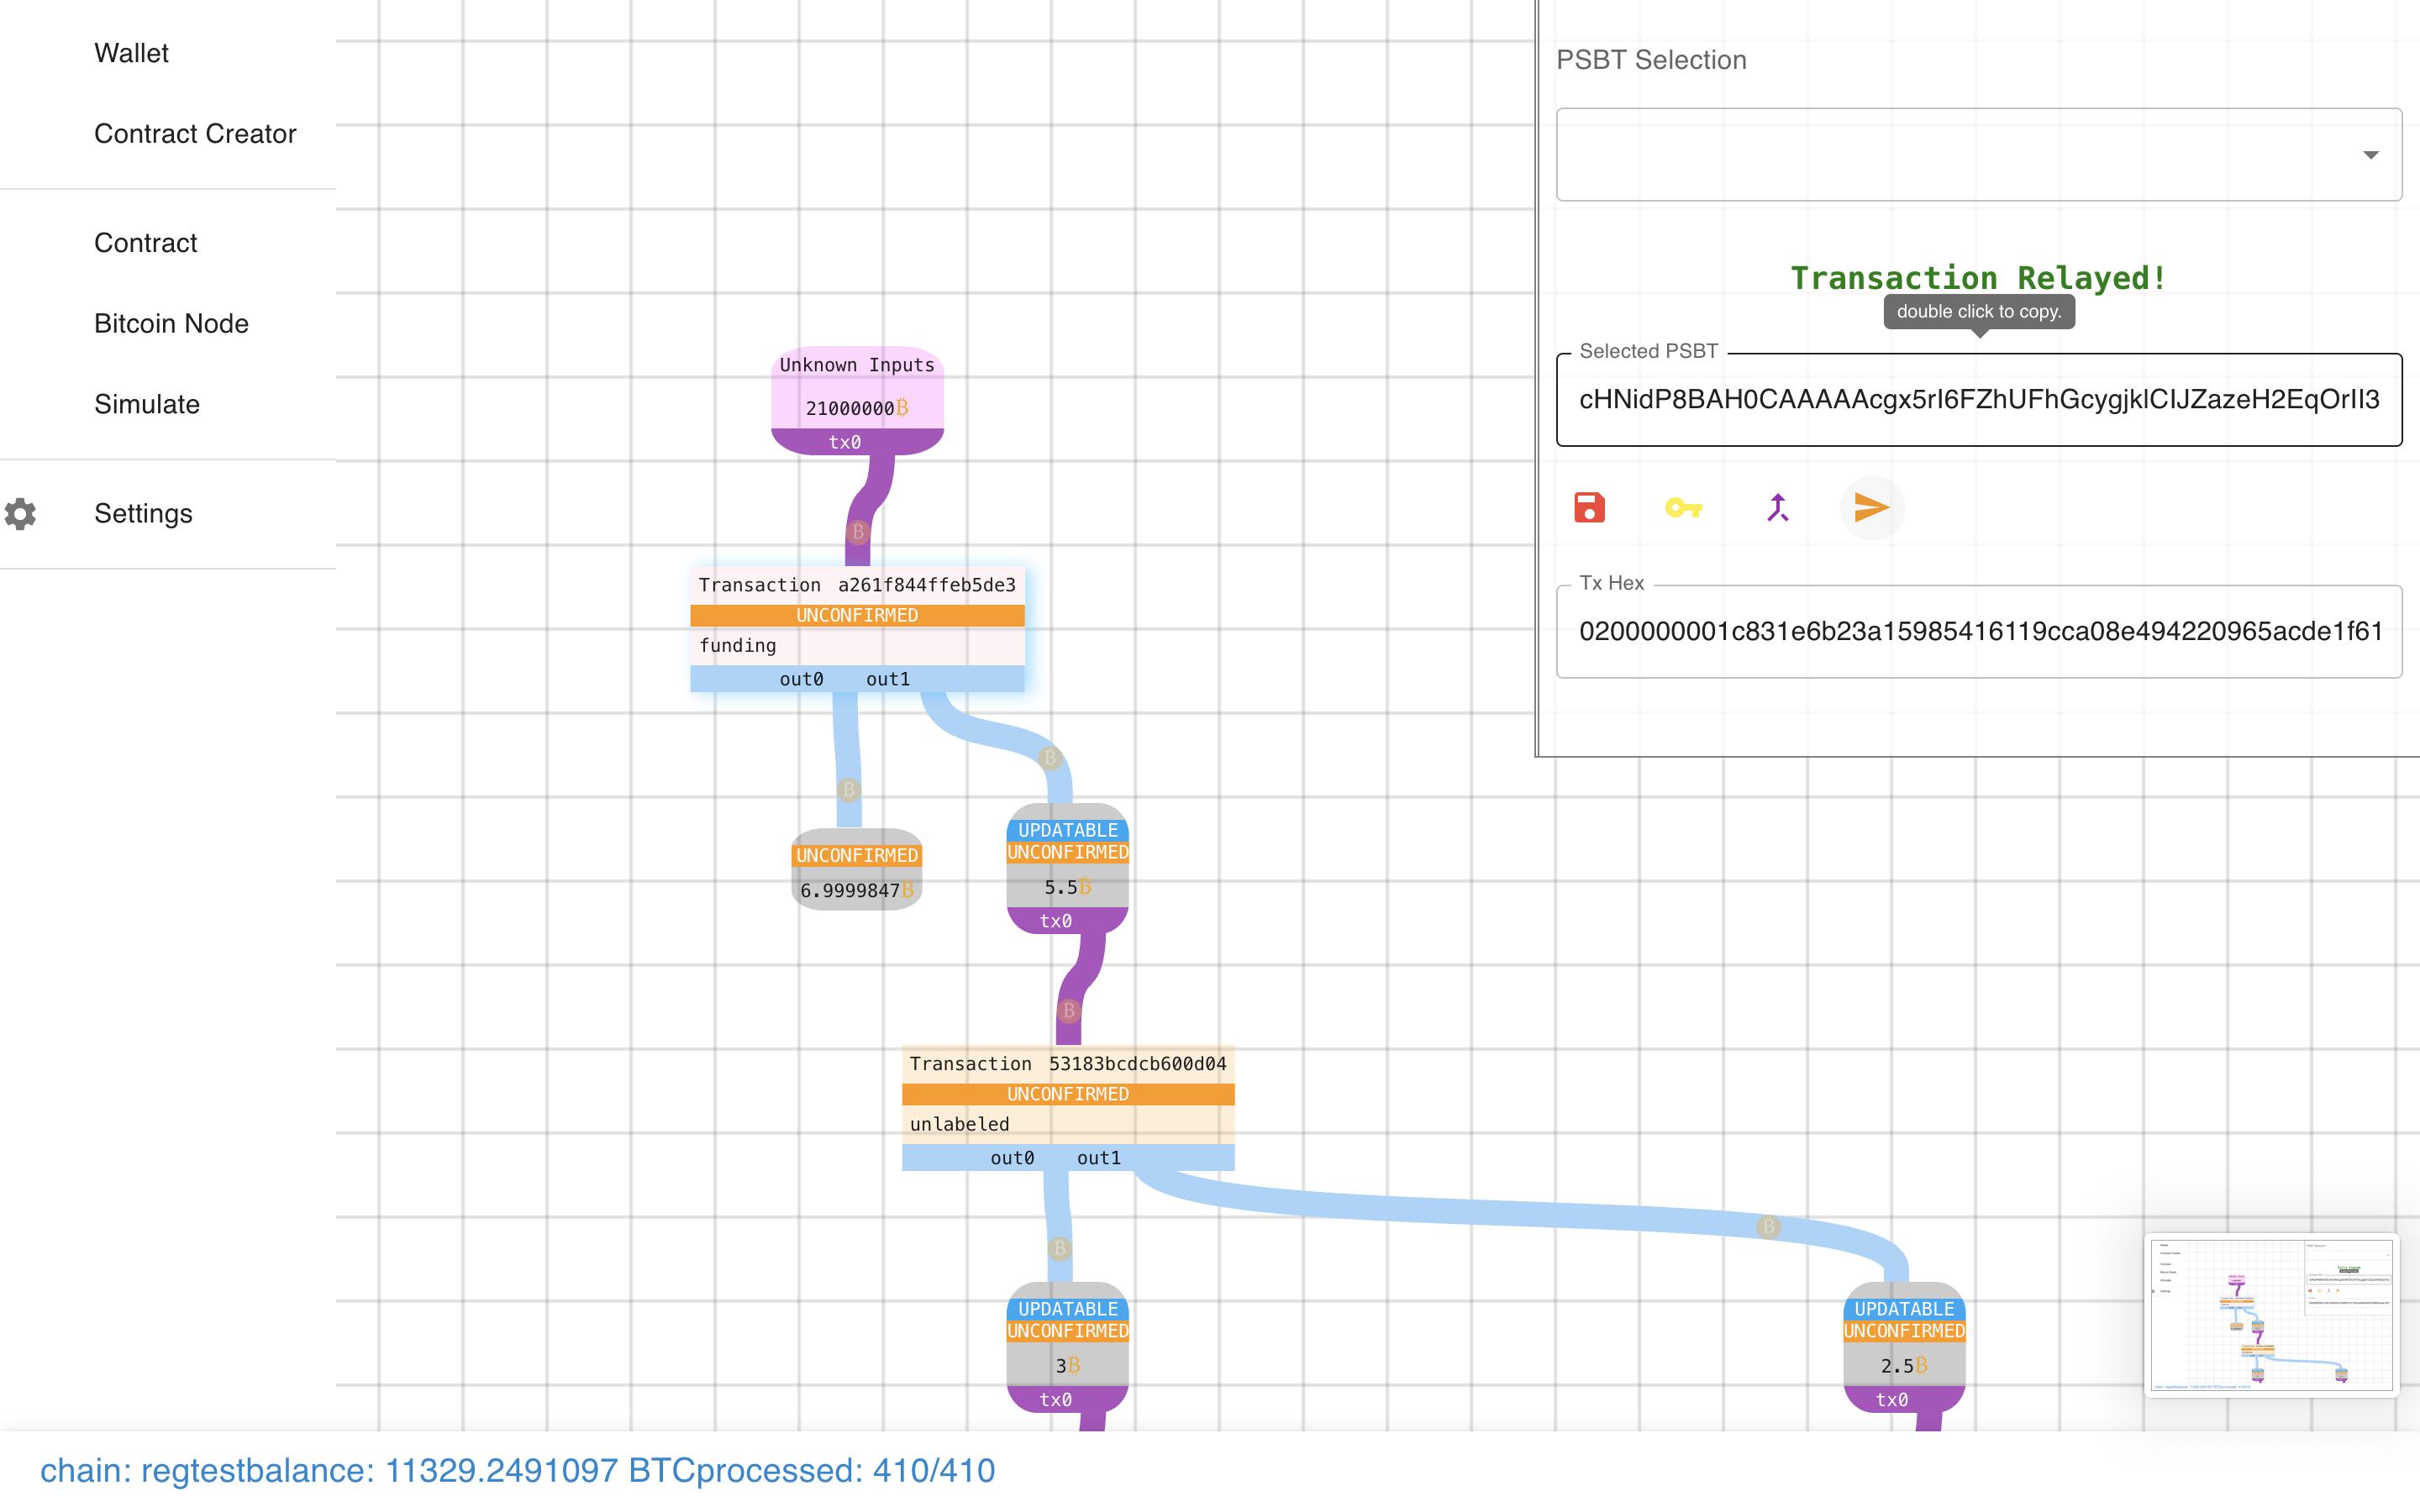 What other buttons do we have? What’s this do?
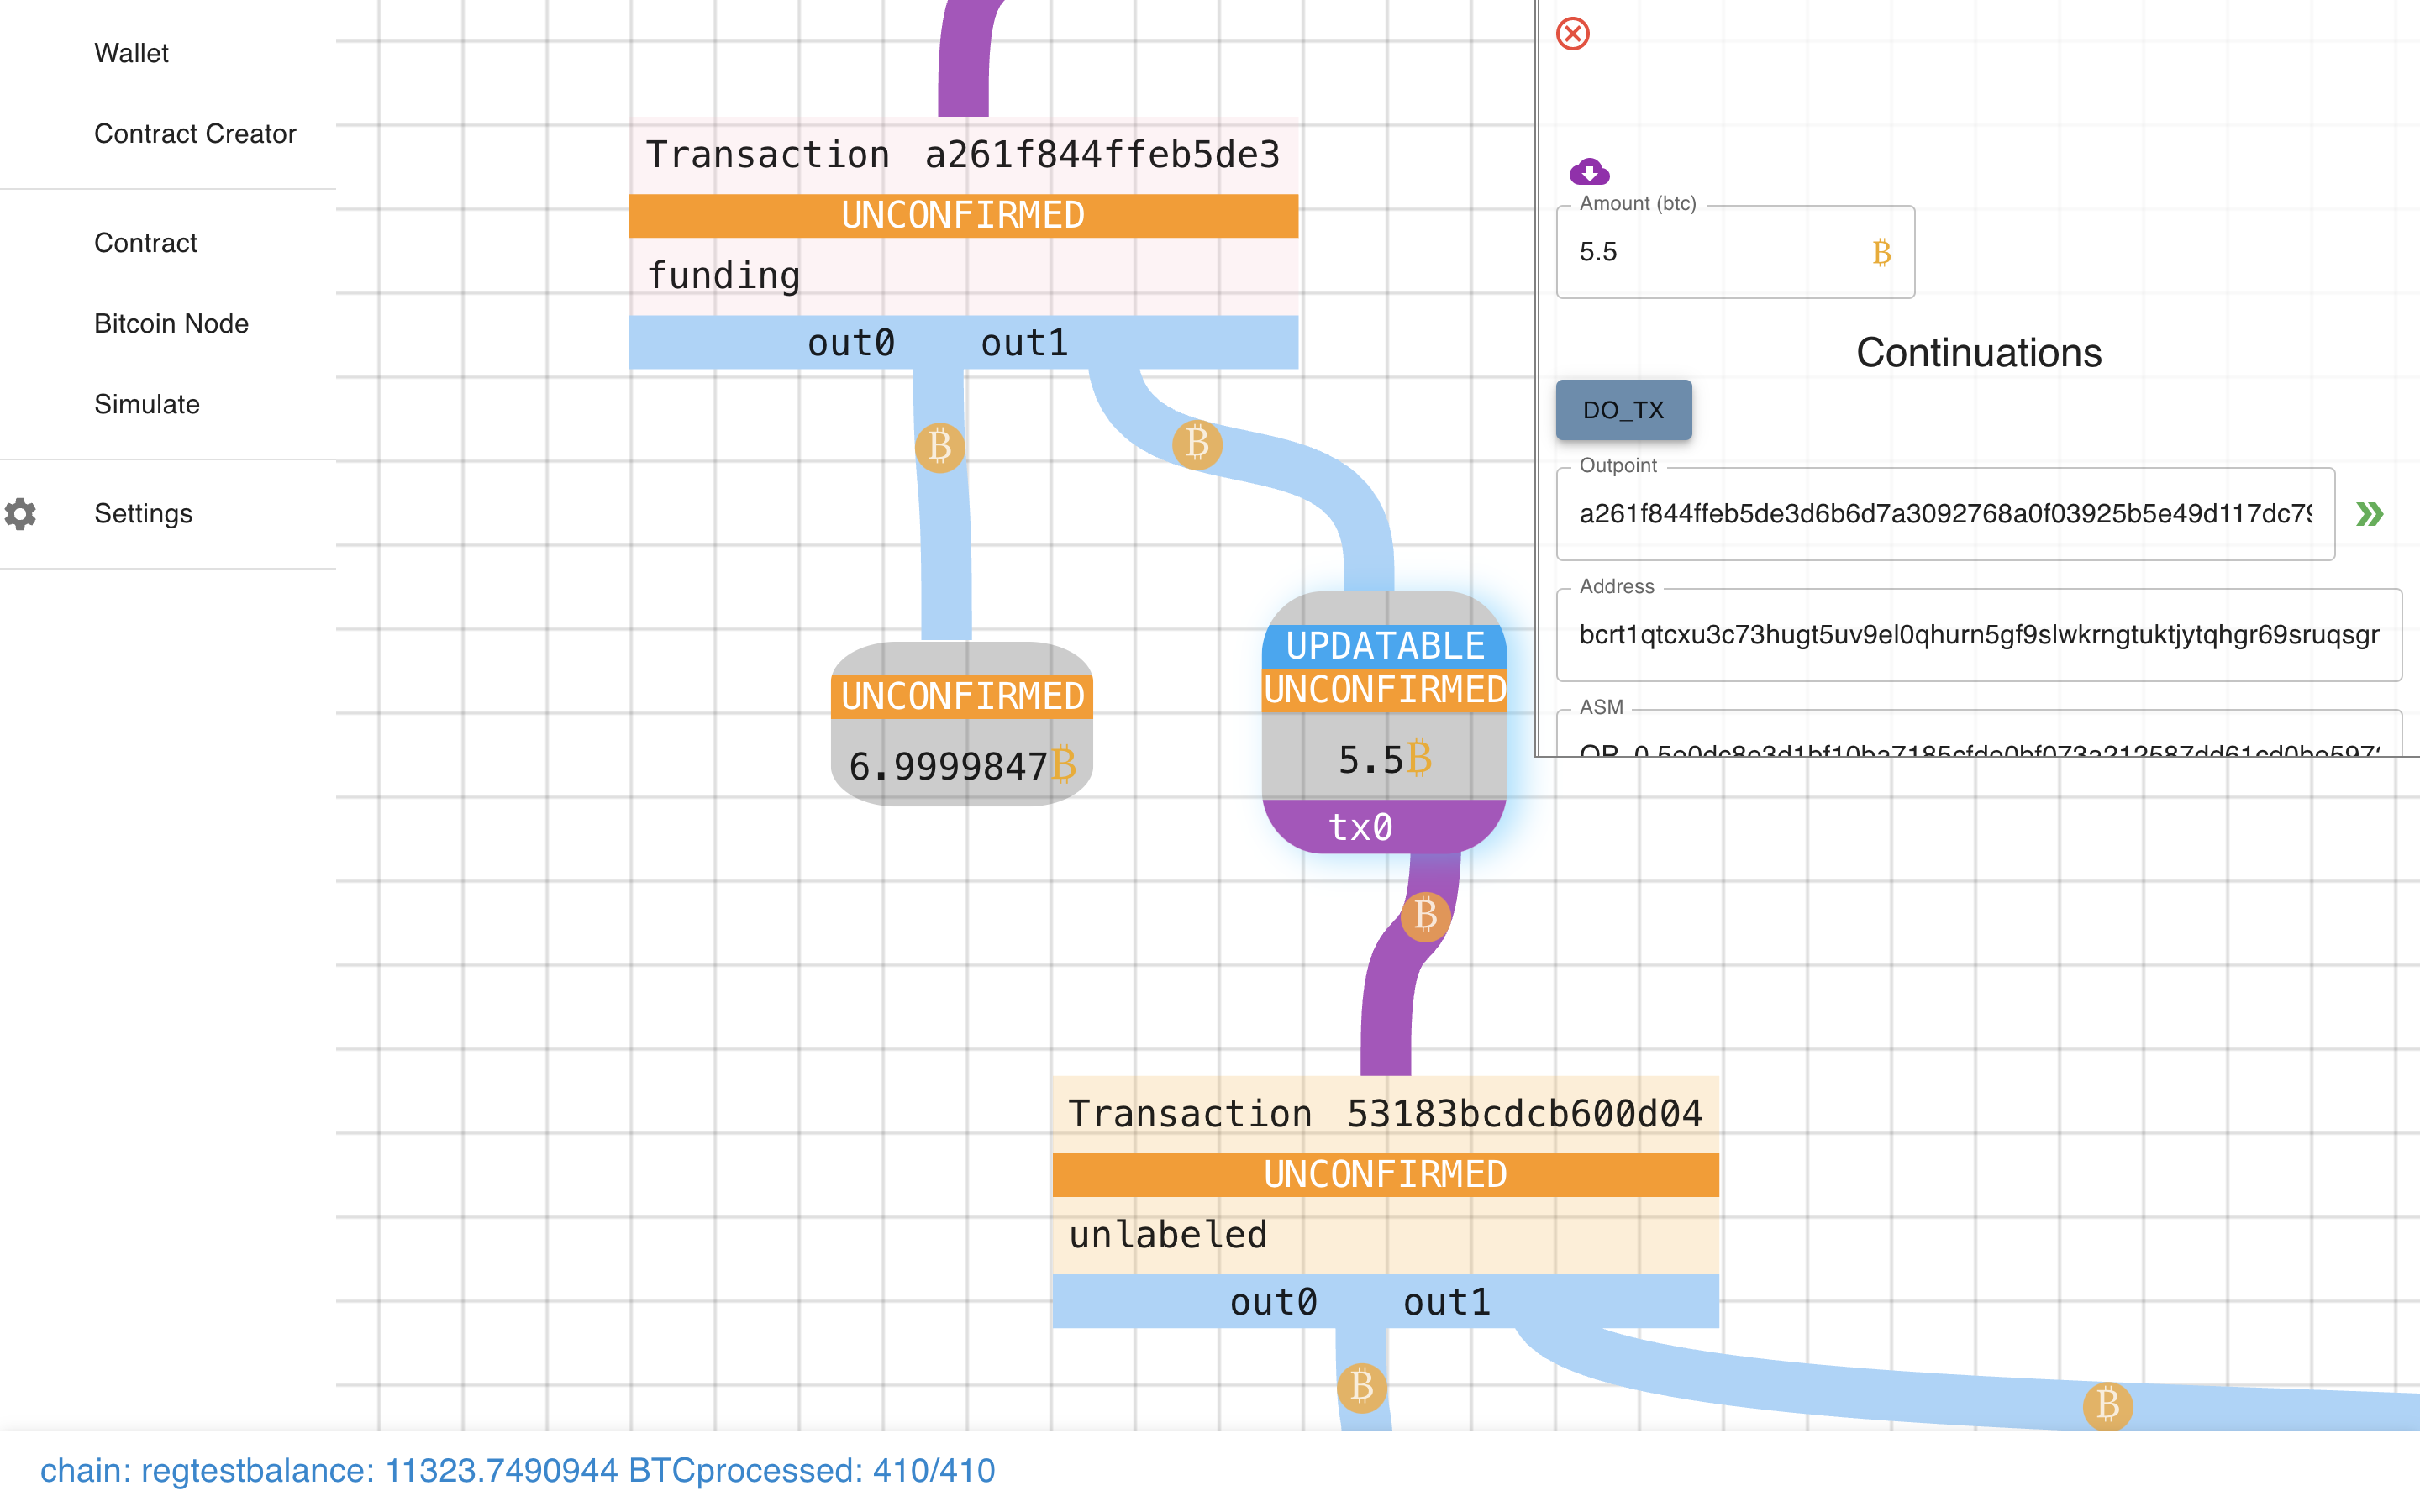
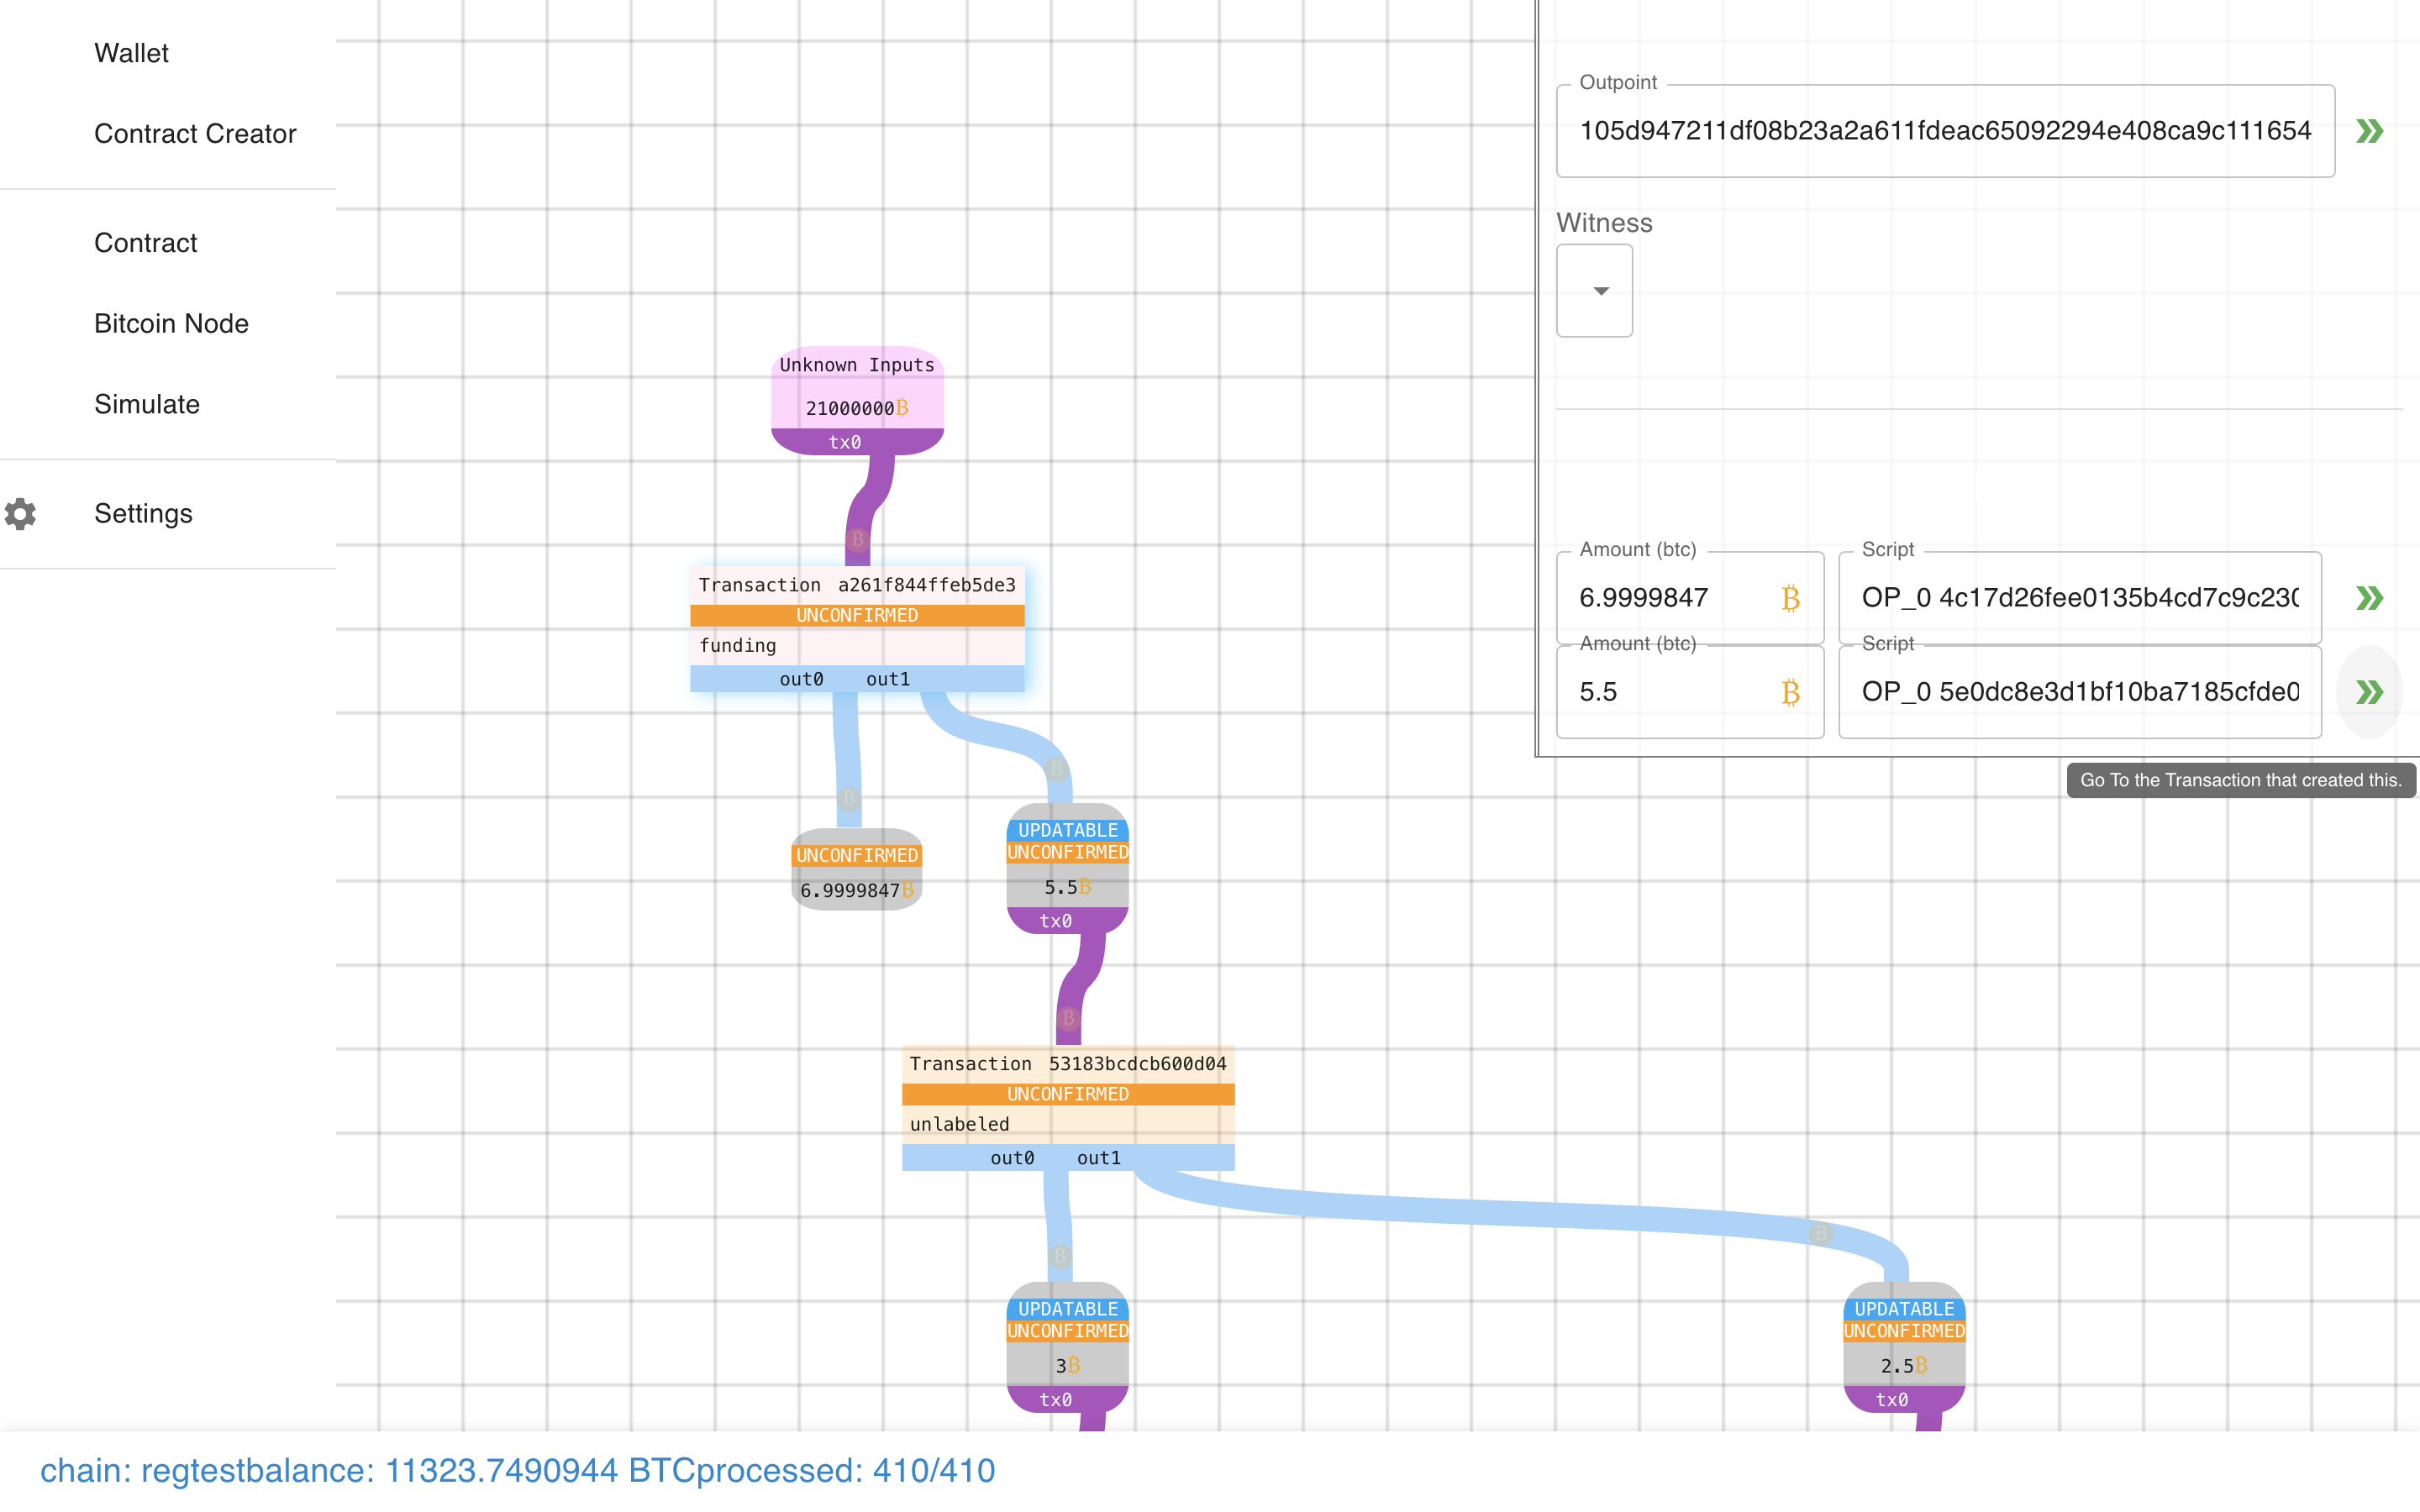 It teleports us to the output we are creating!
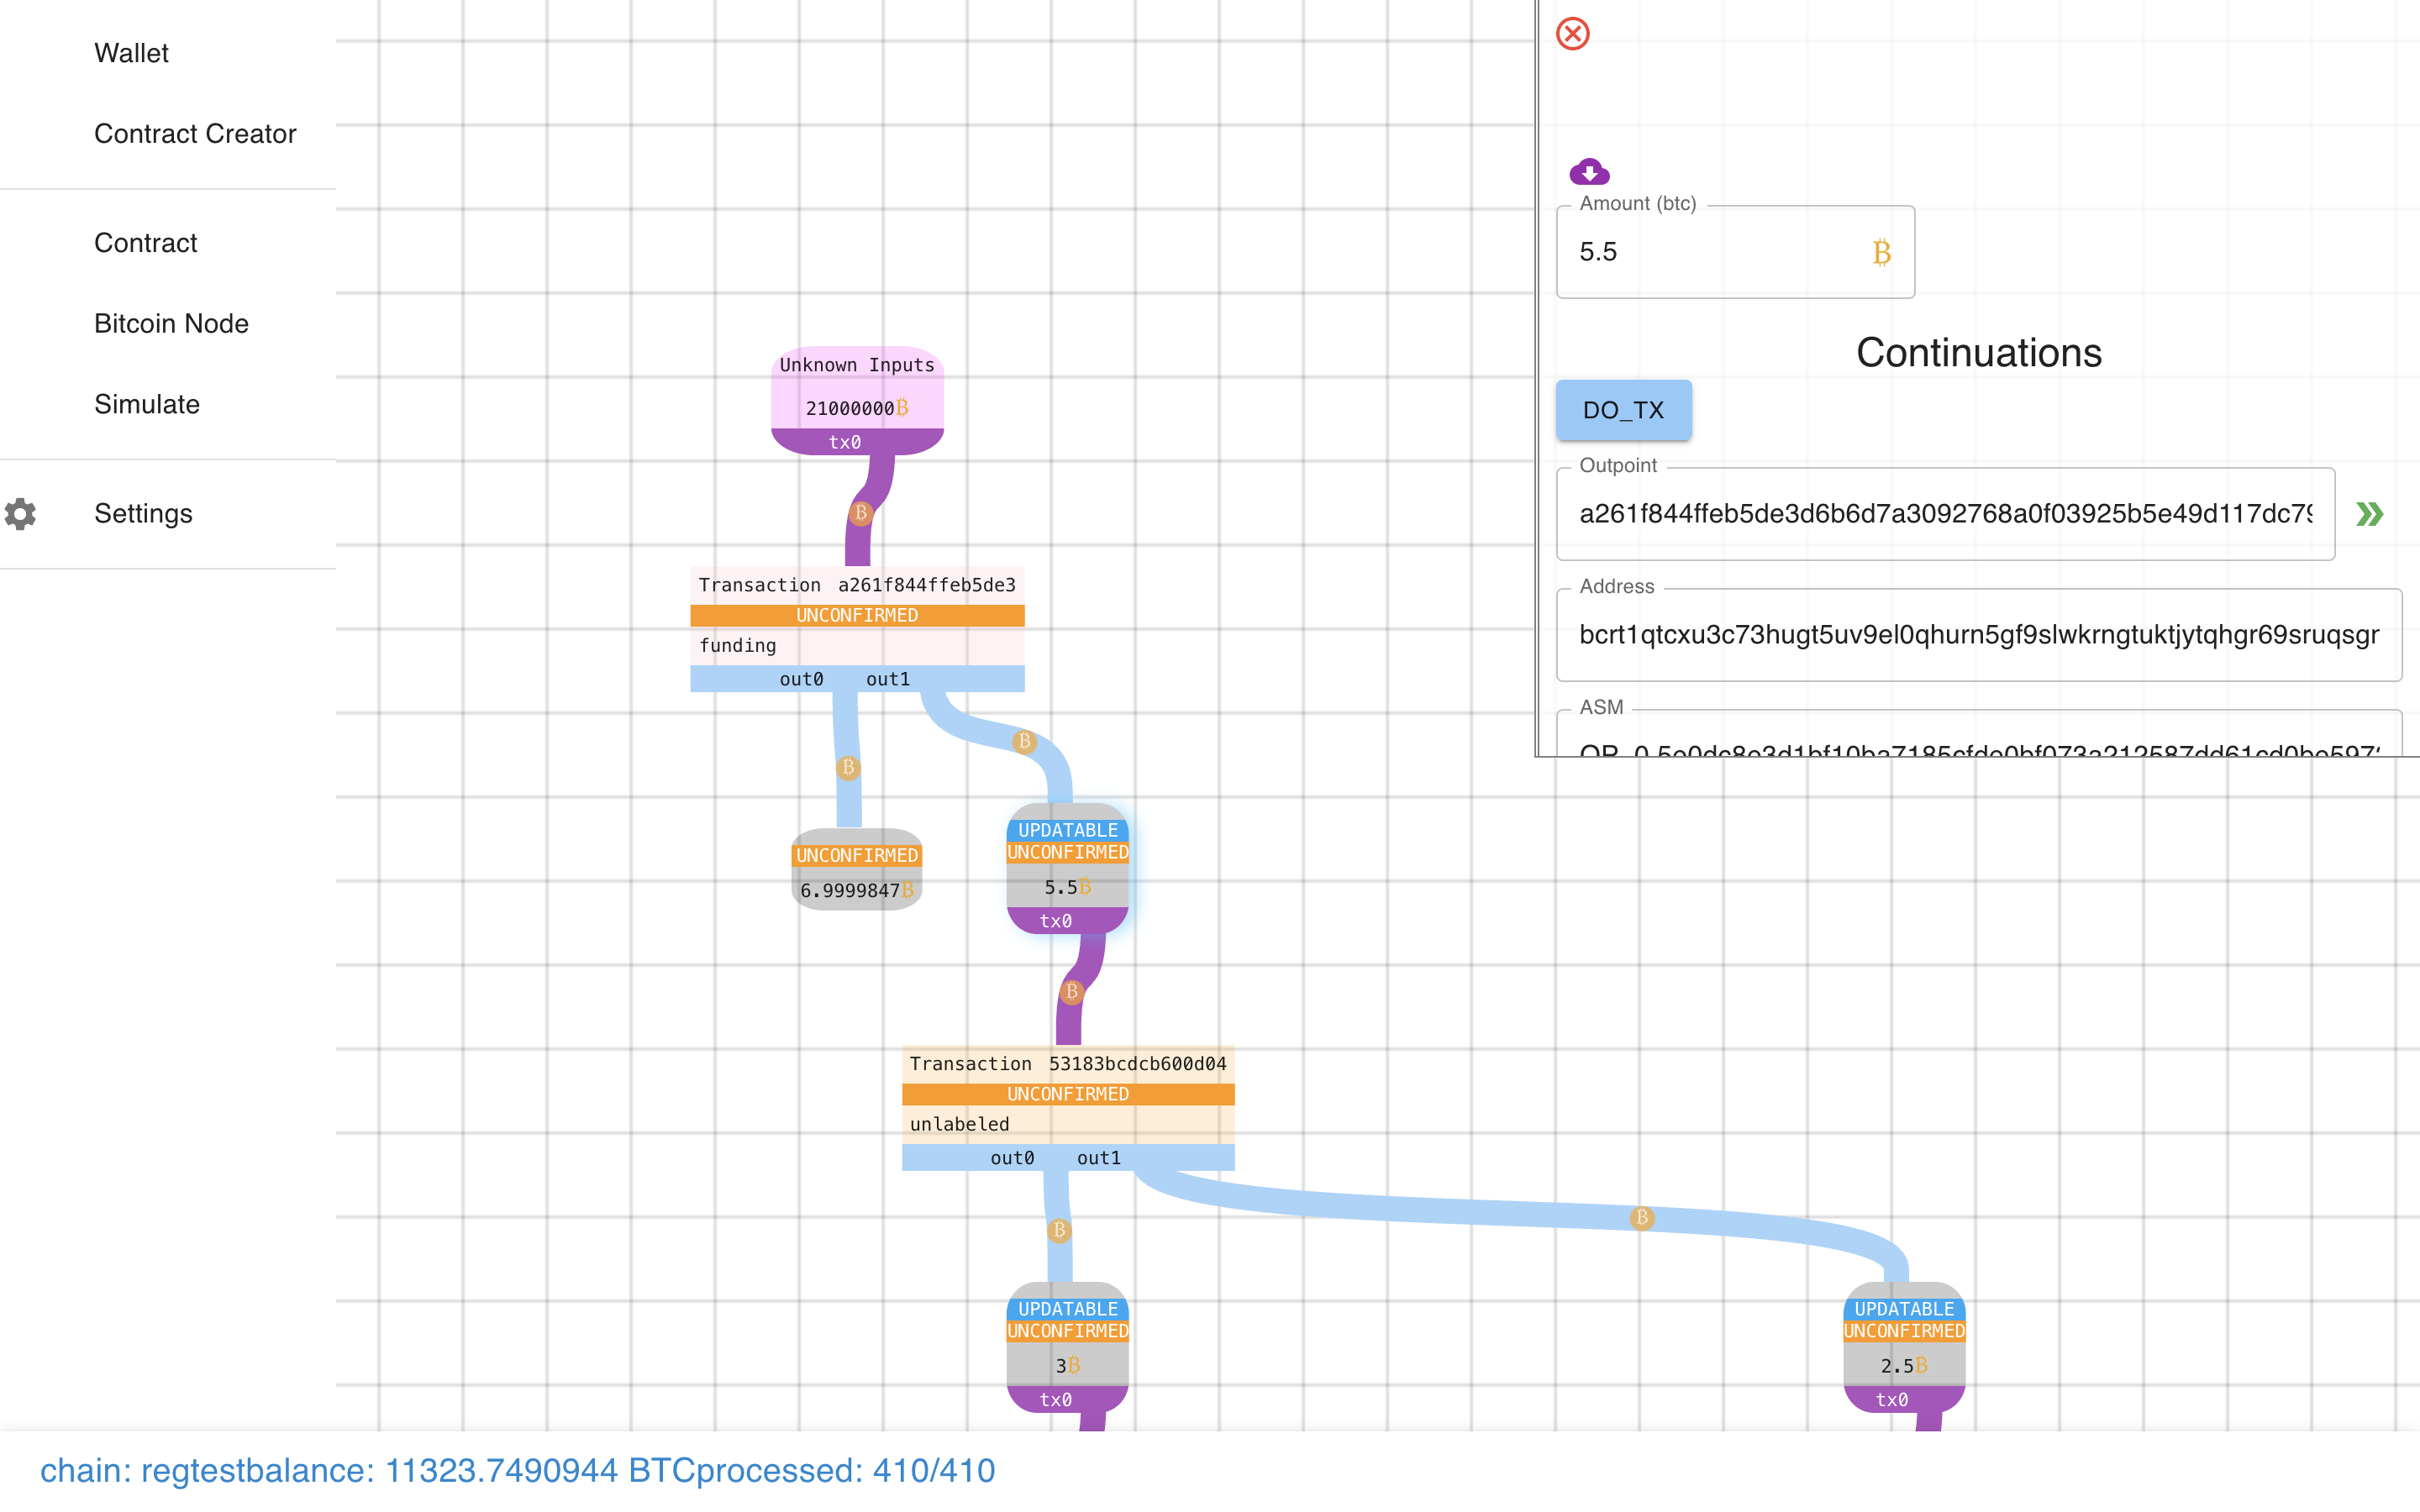 Notice how the output is marked “Updatable”, and there is also a “DO_TX”
button (corresponding to the DO_TX in the Payment Pool). Let’s click that…
Notice how the output is marked “Updatable”, and there is also a “DO_TX”
button (corresponding to the DO_TX in the Payment Pool). Let’s click that…
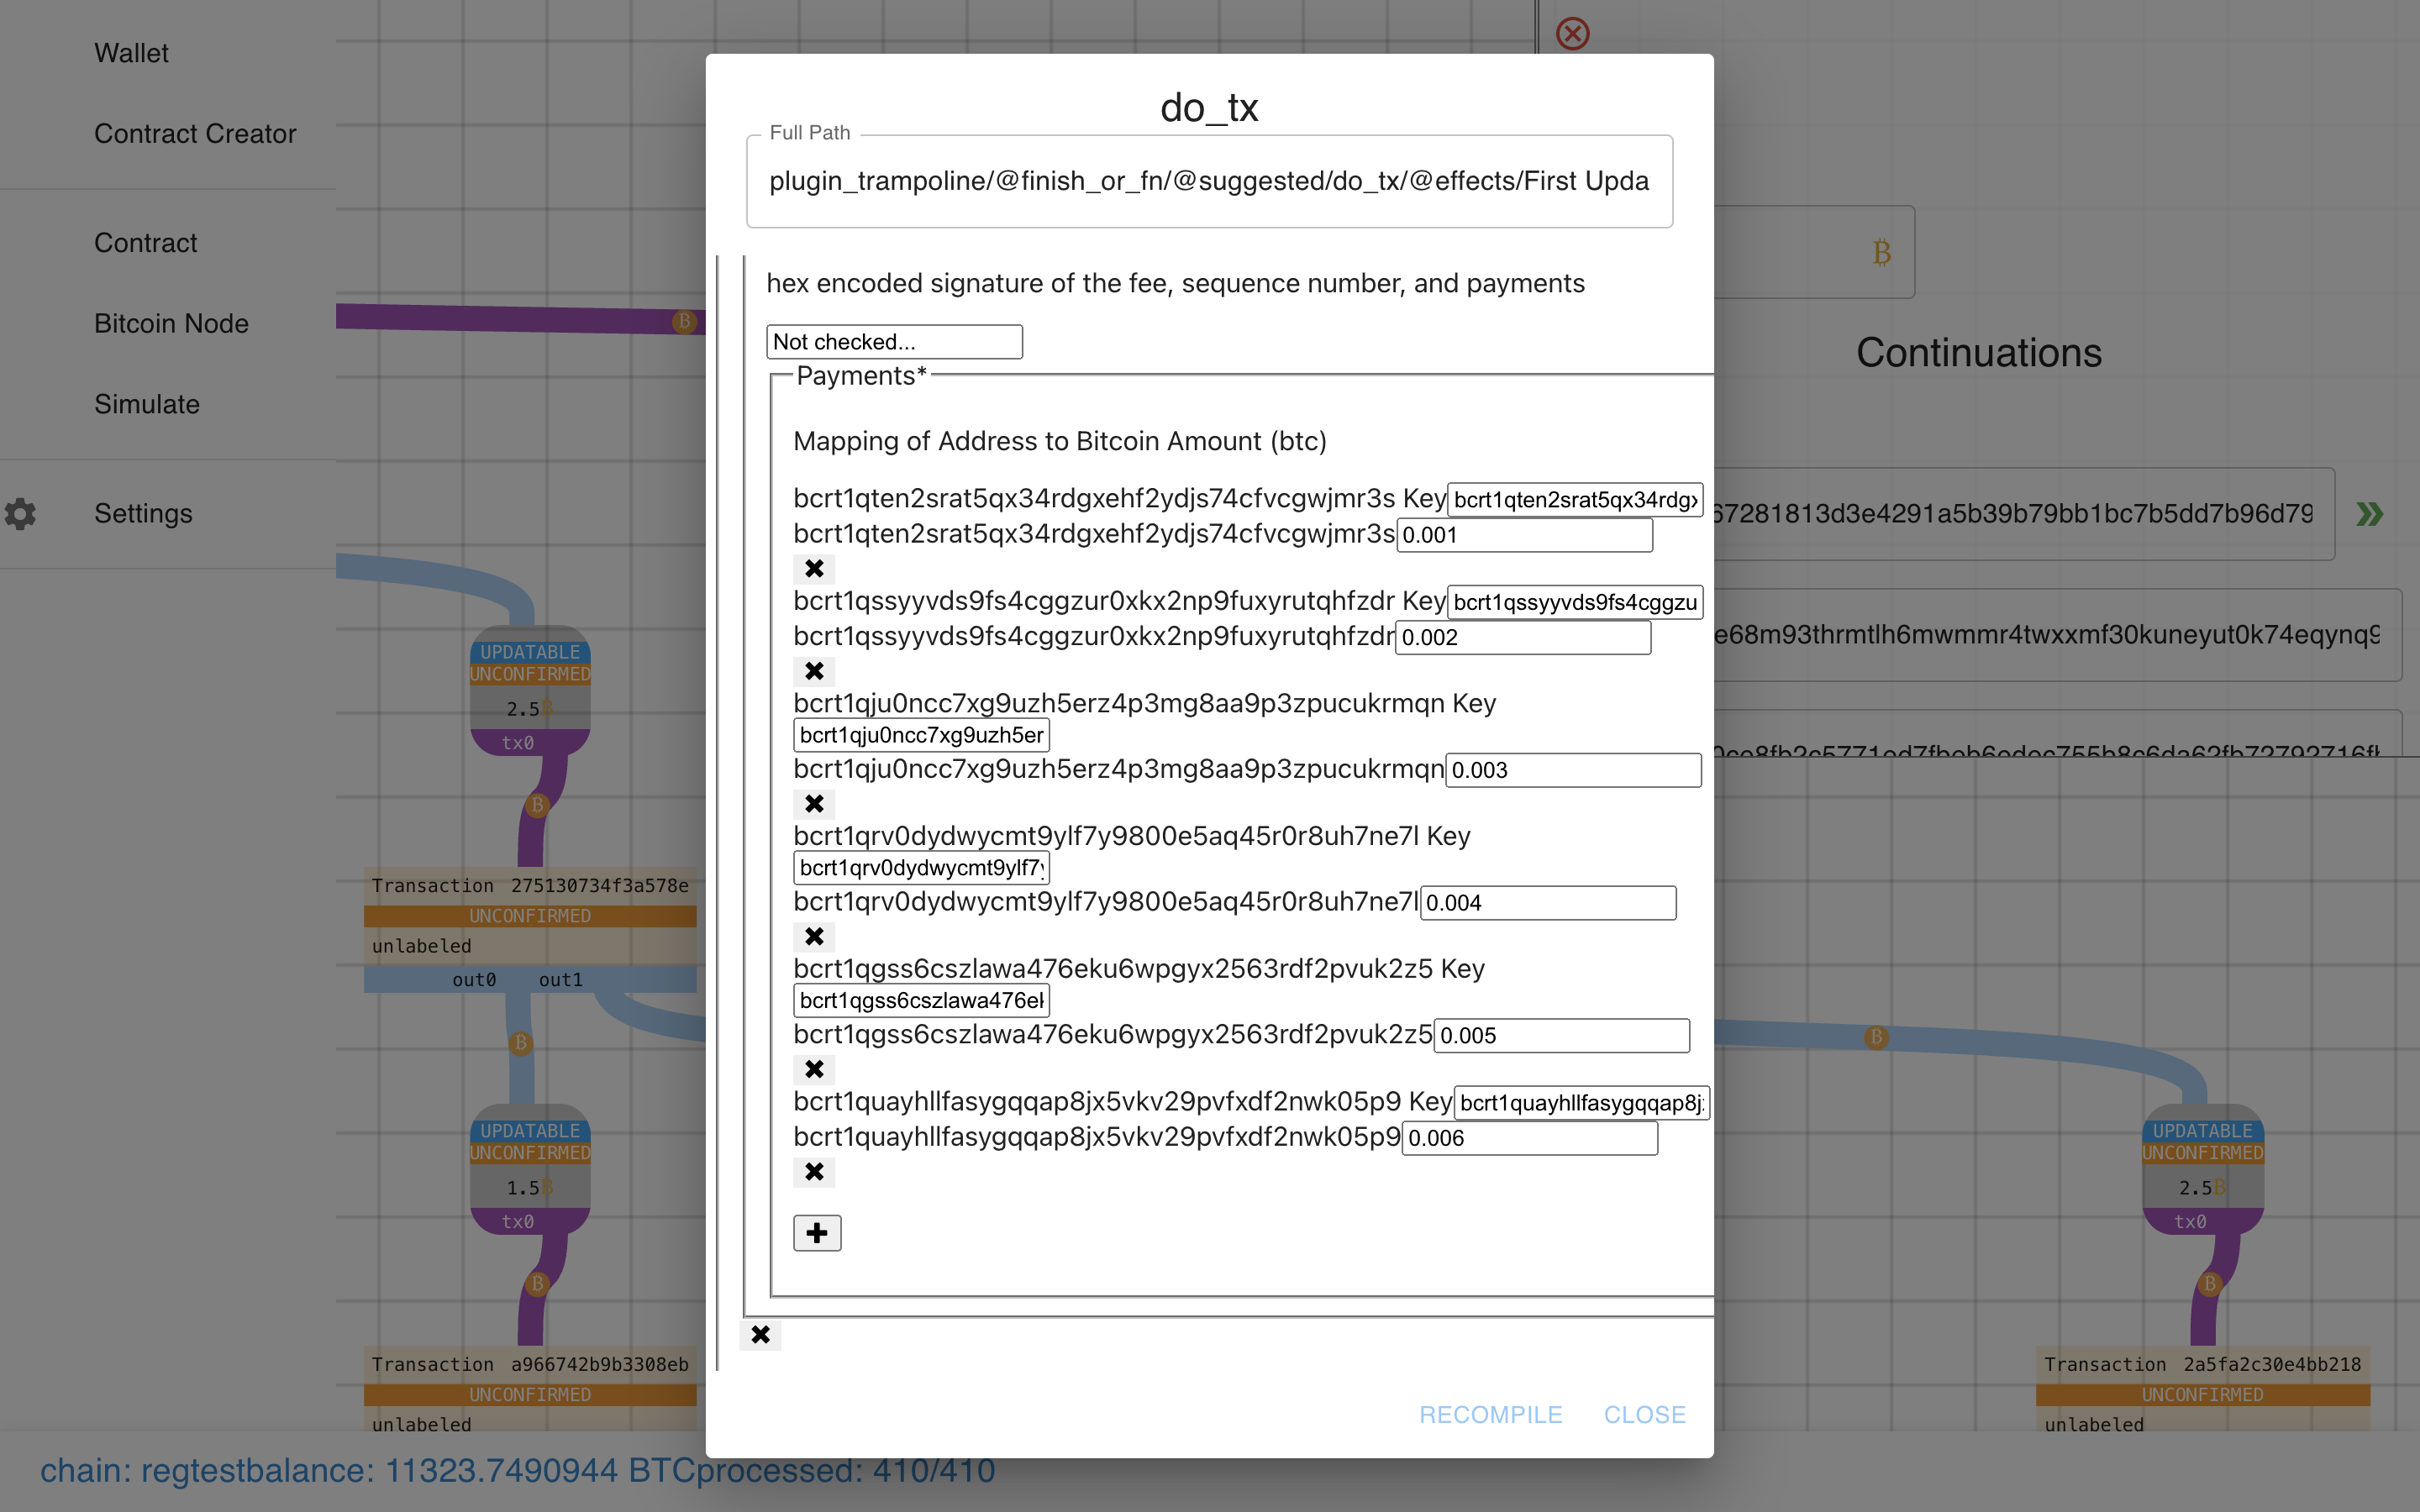
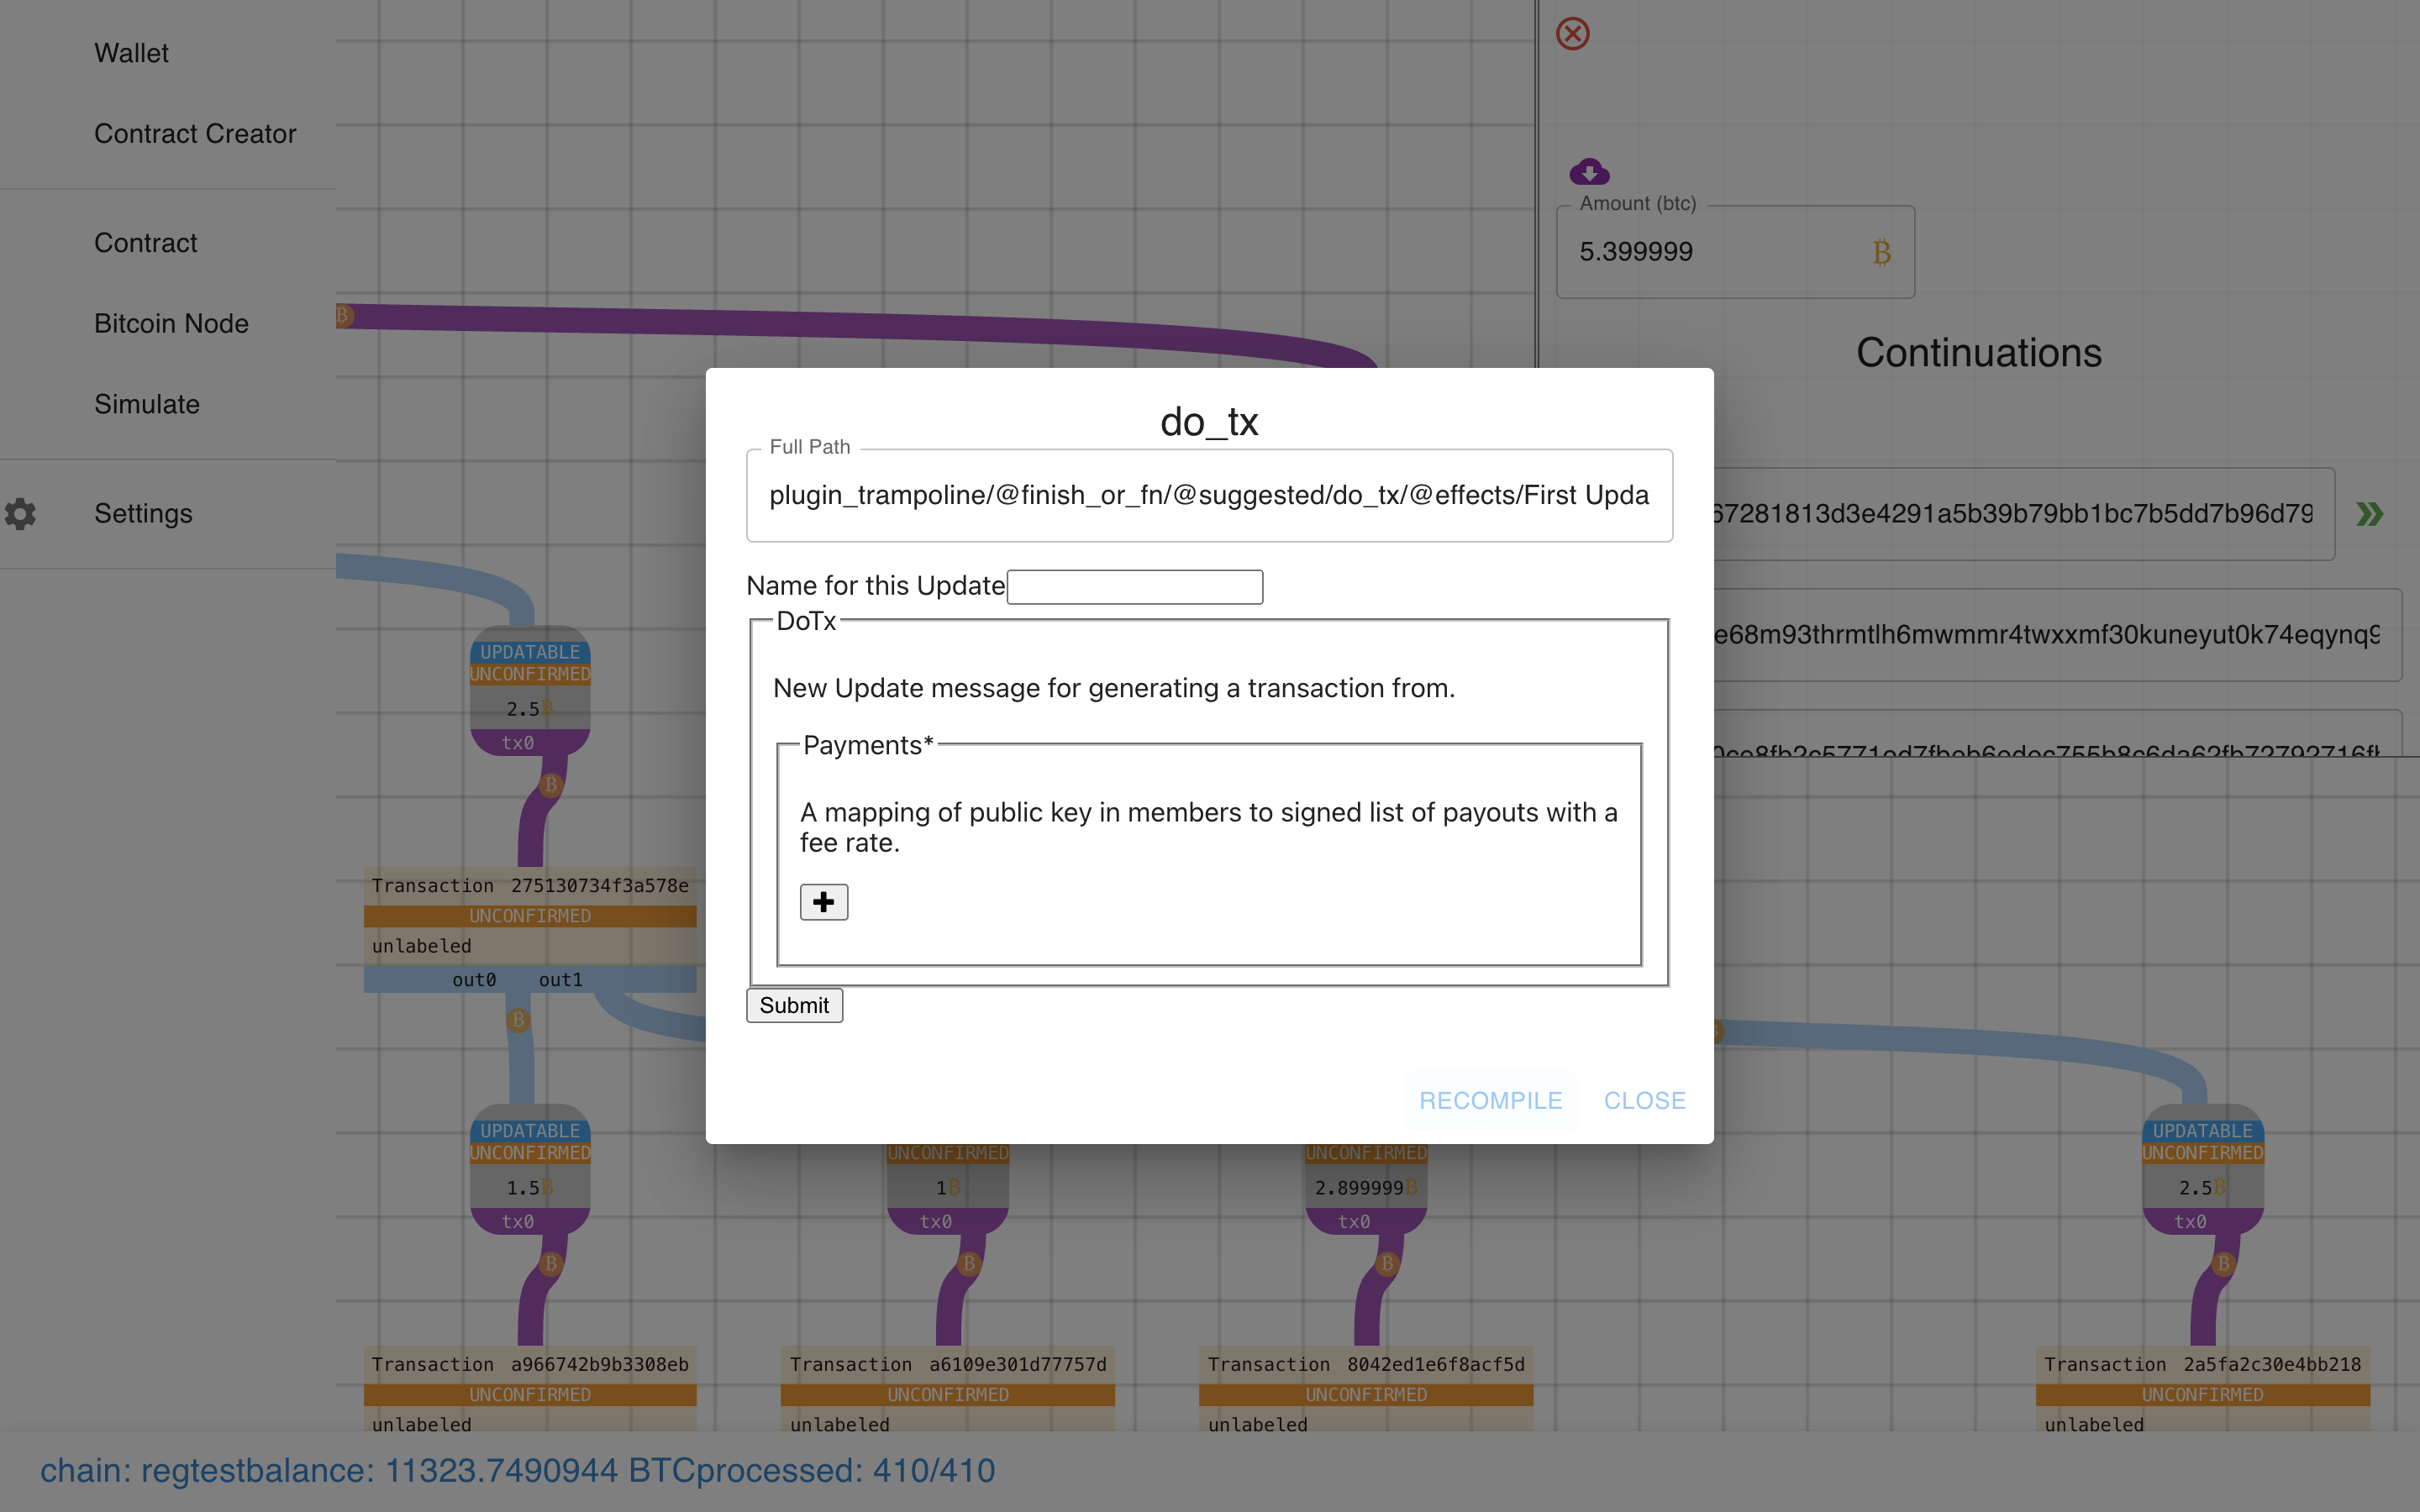
 Ooooh. It prompts us with a form to do the transaction!
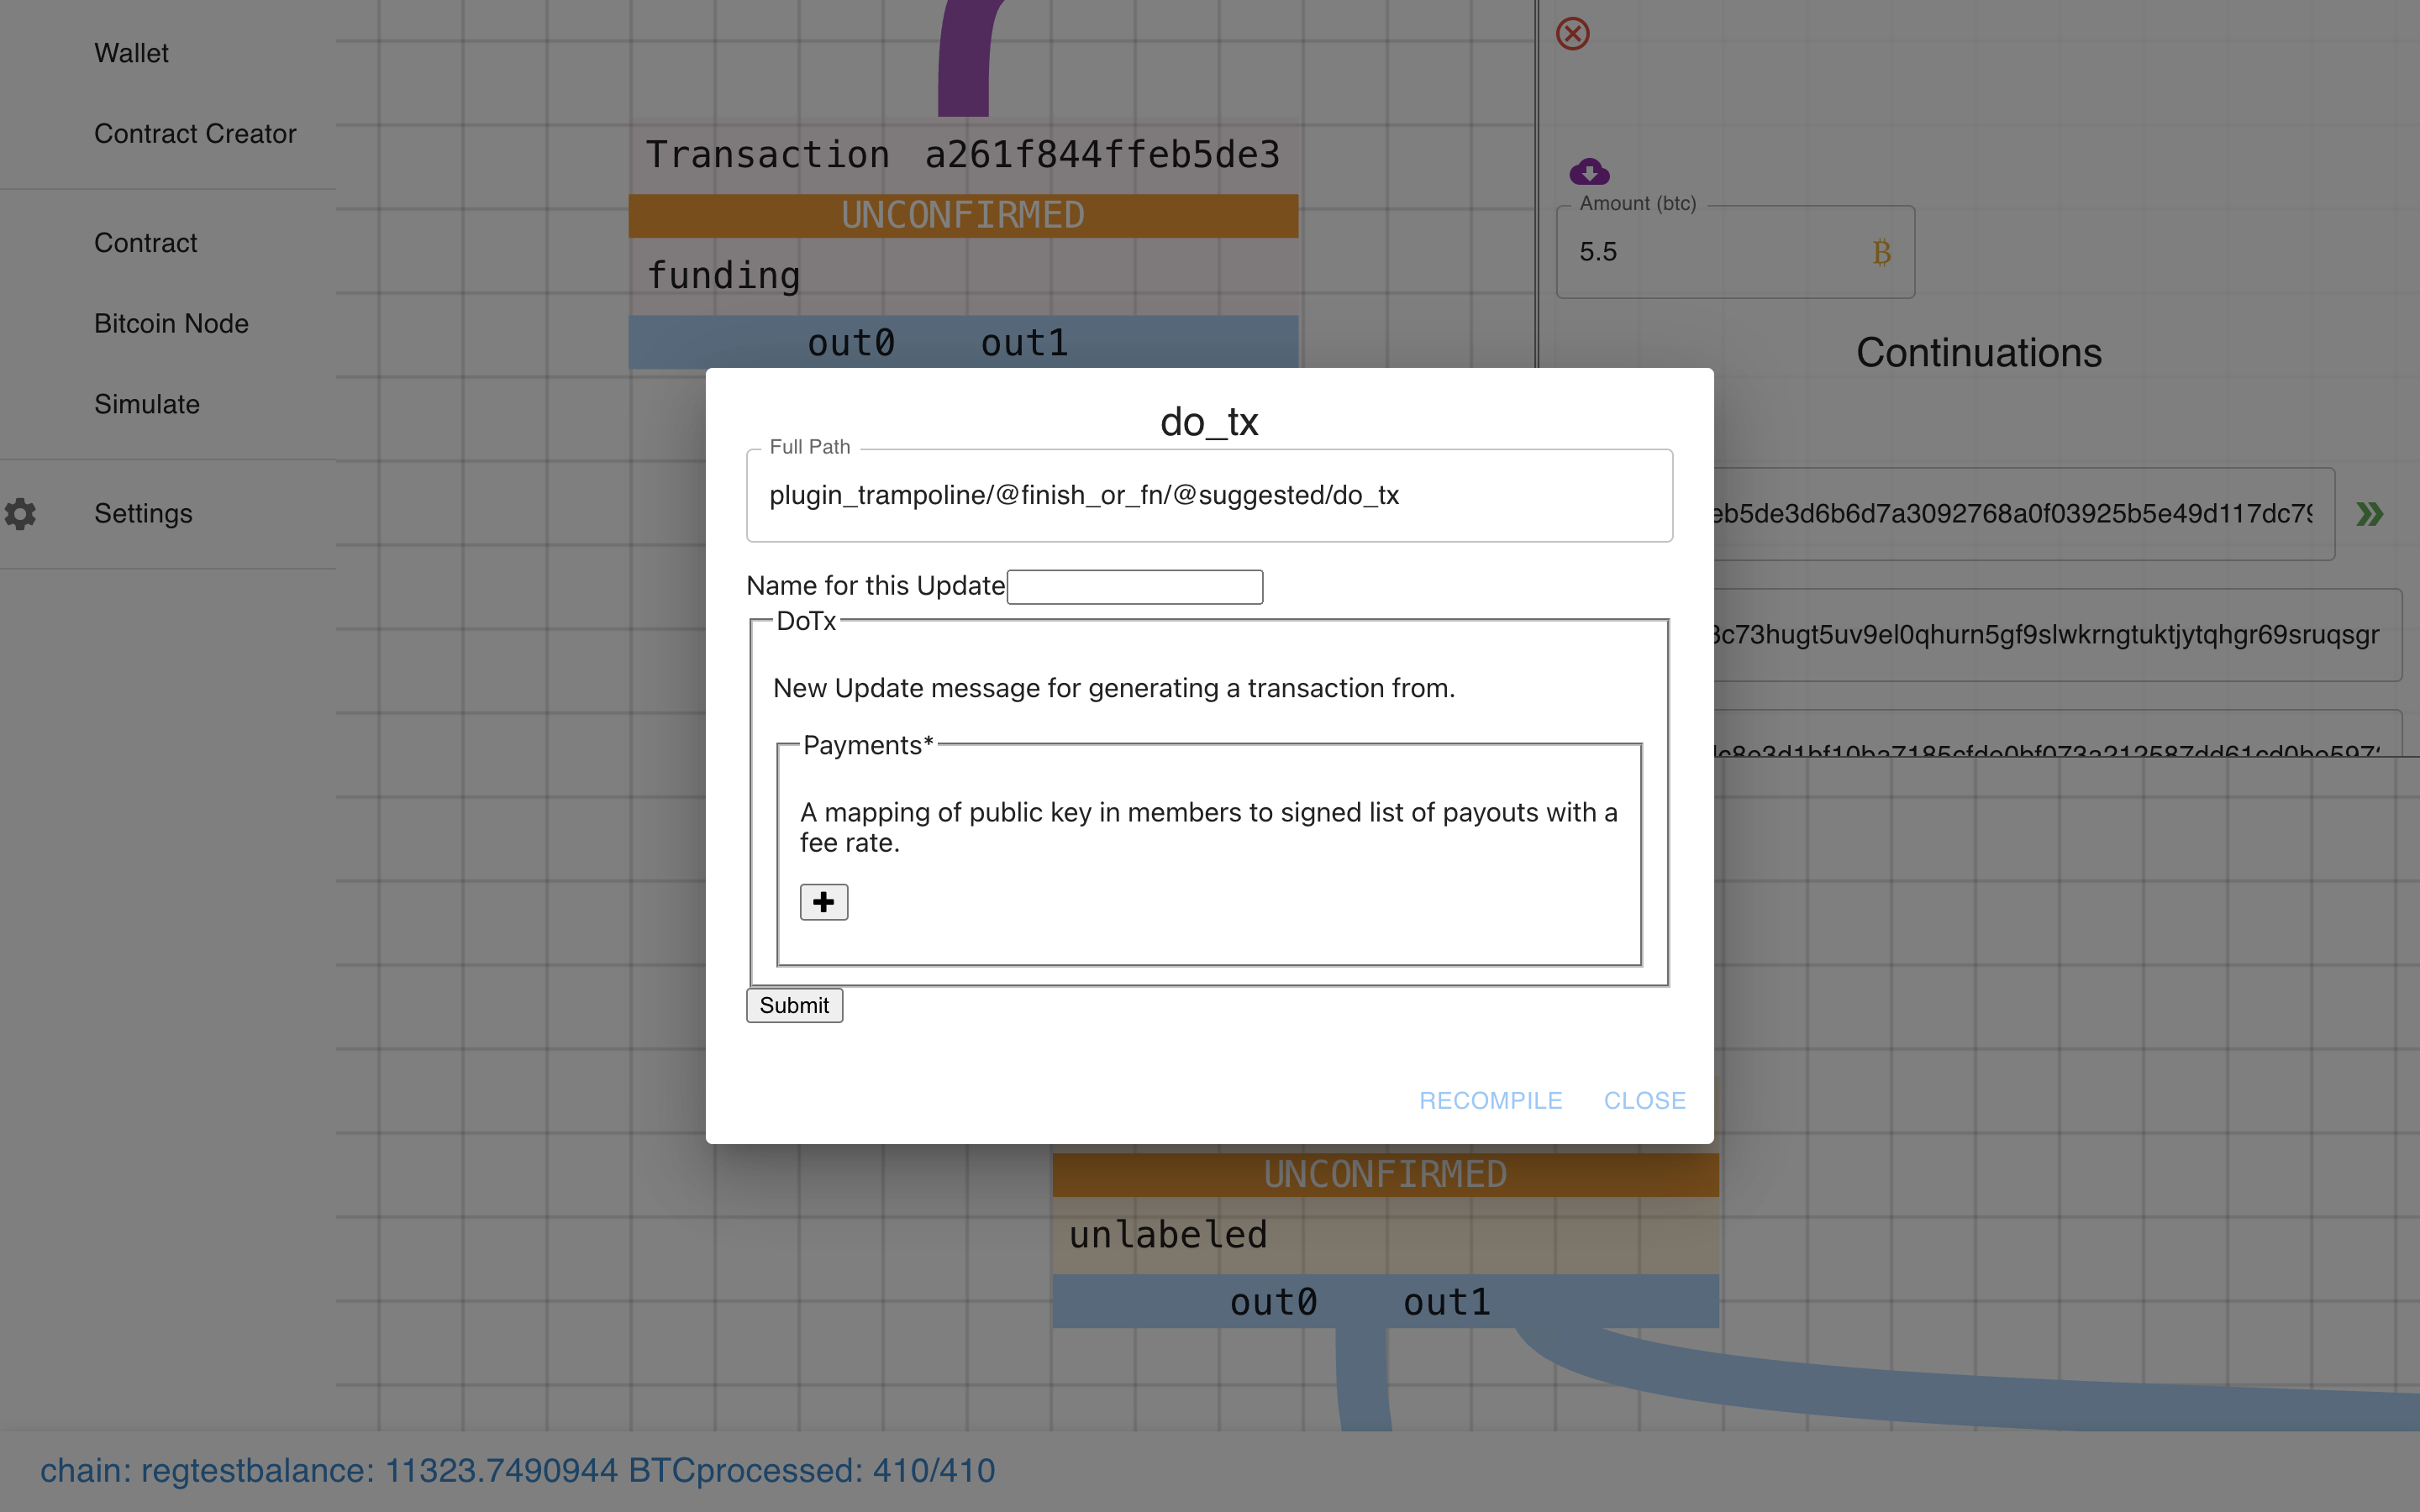 Ok, let’s fill this sucker out…
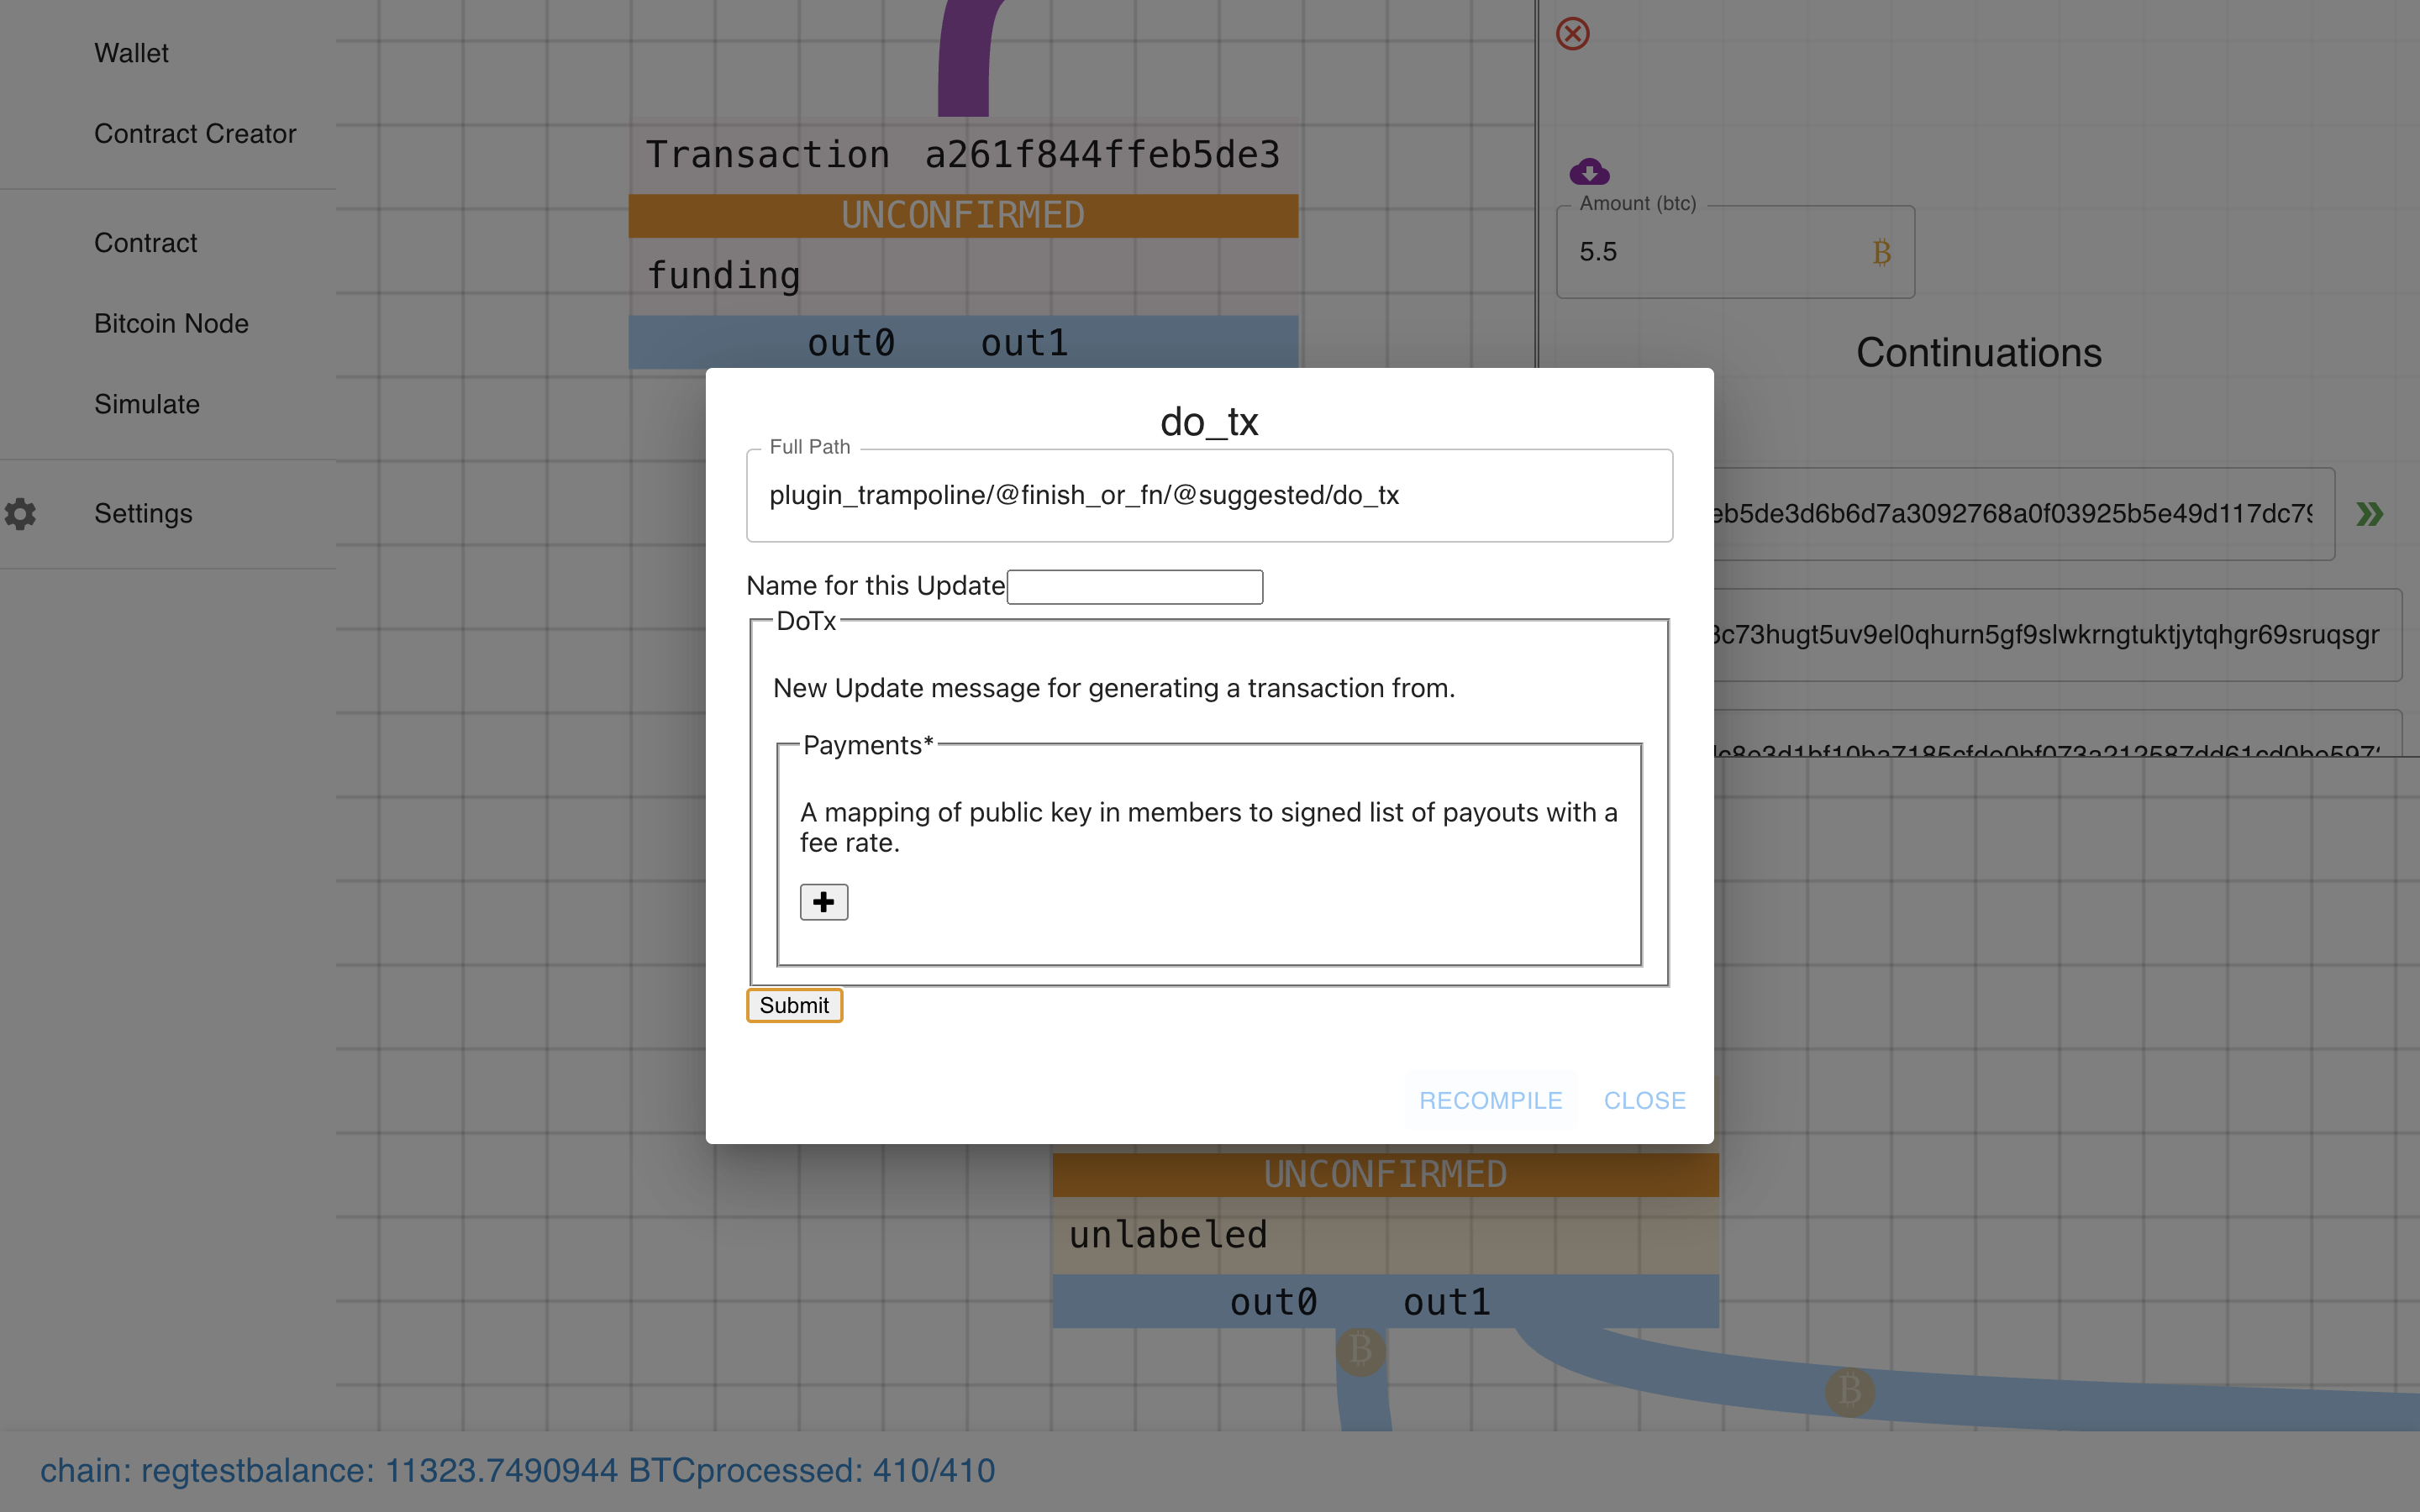
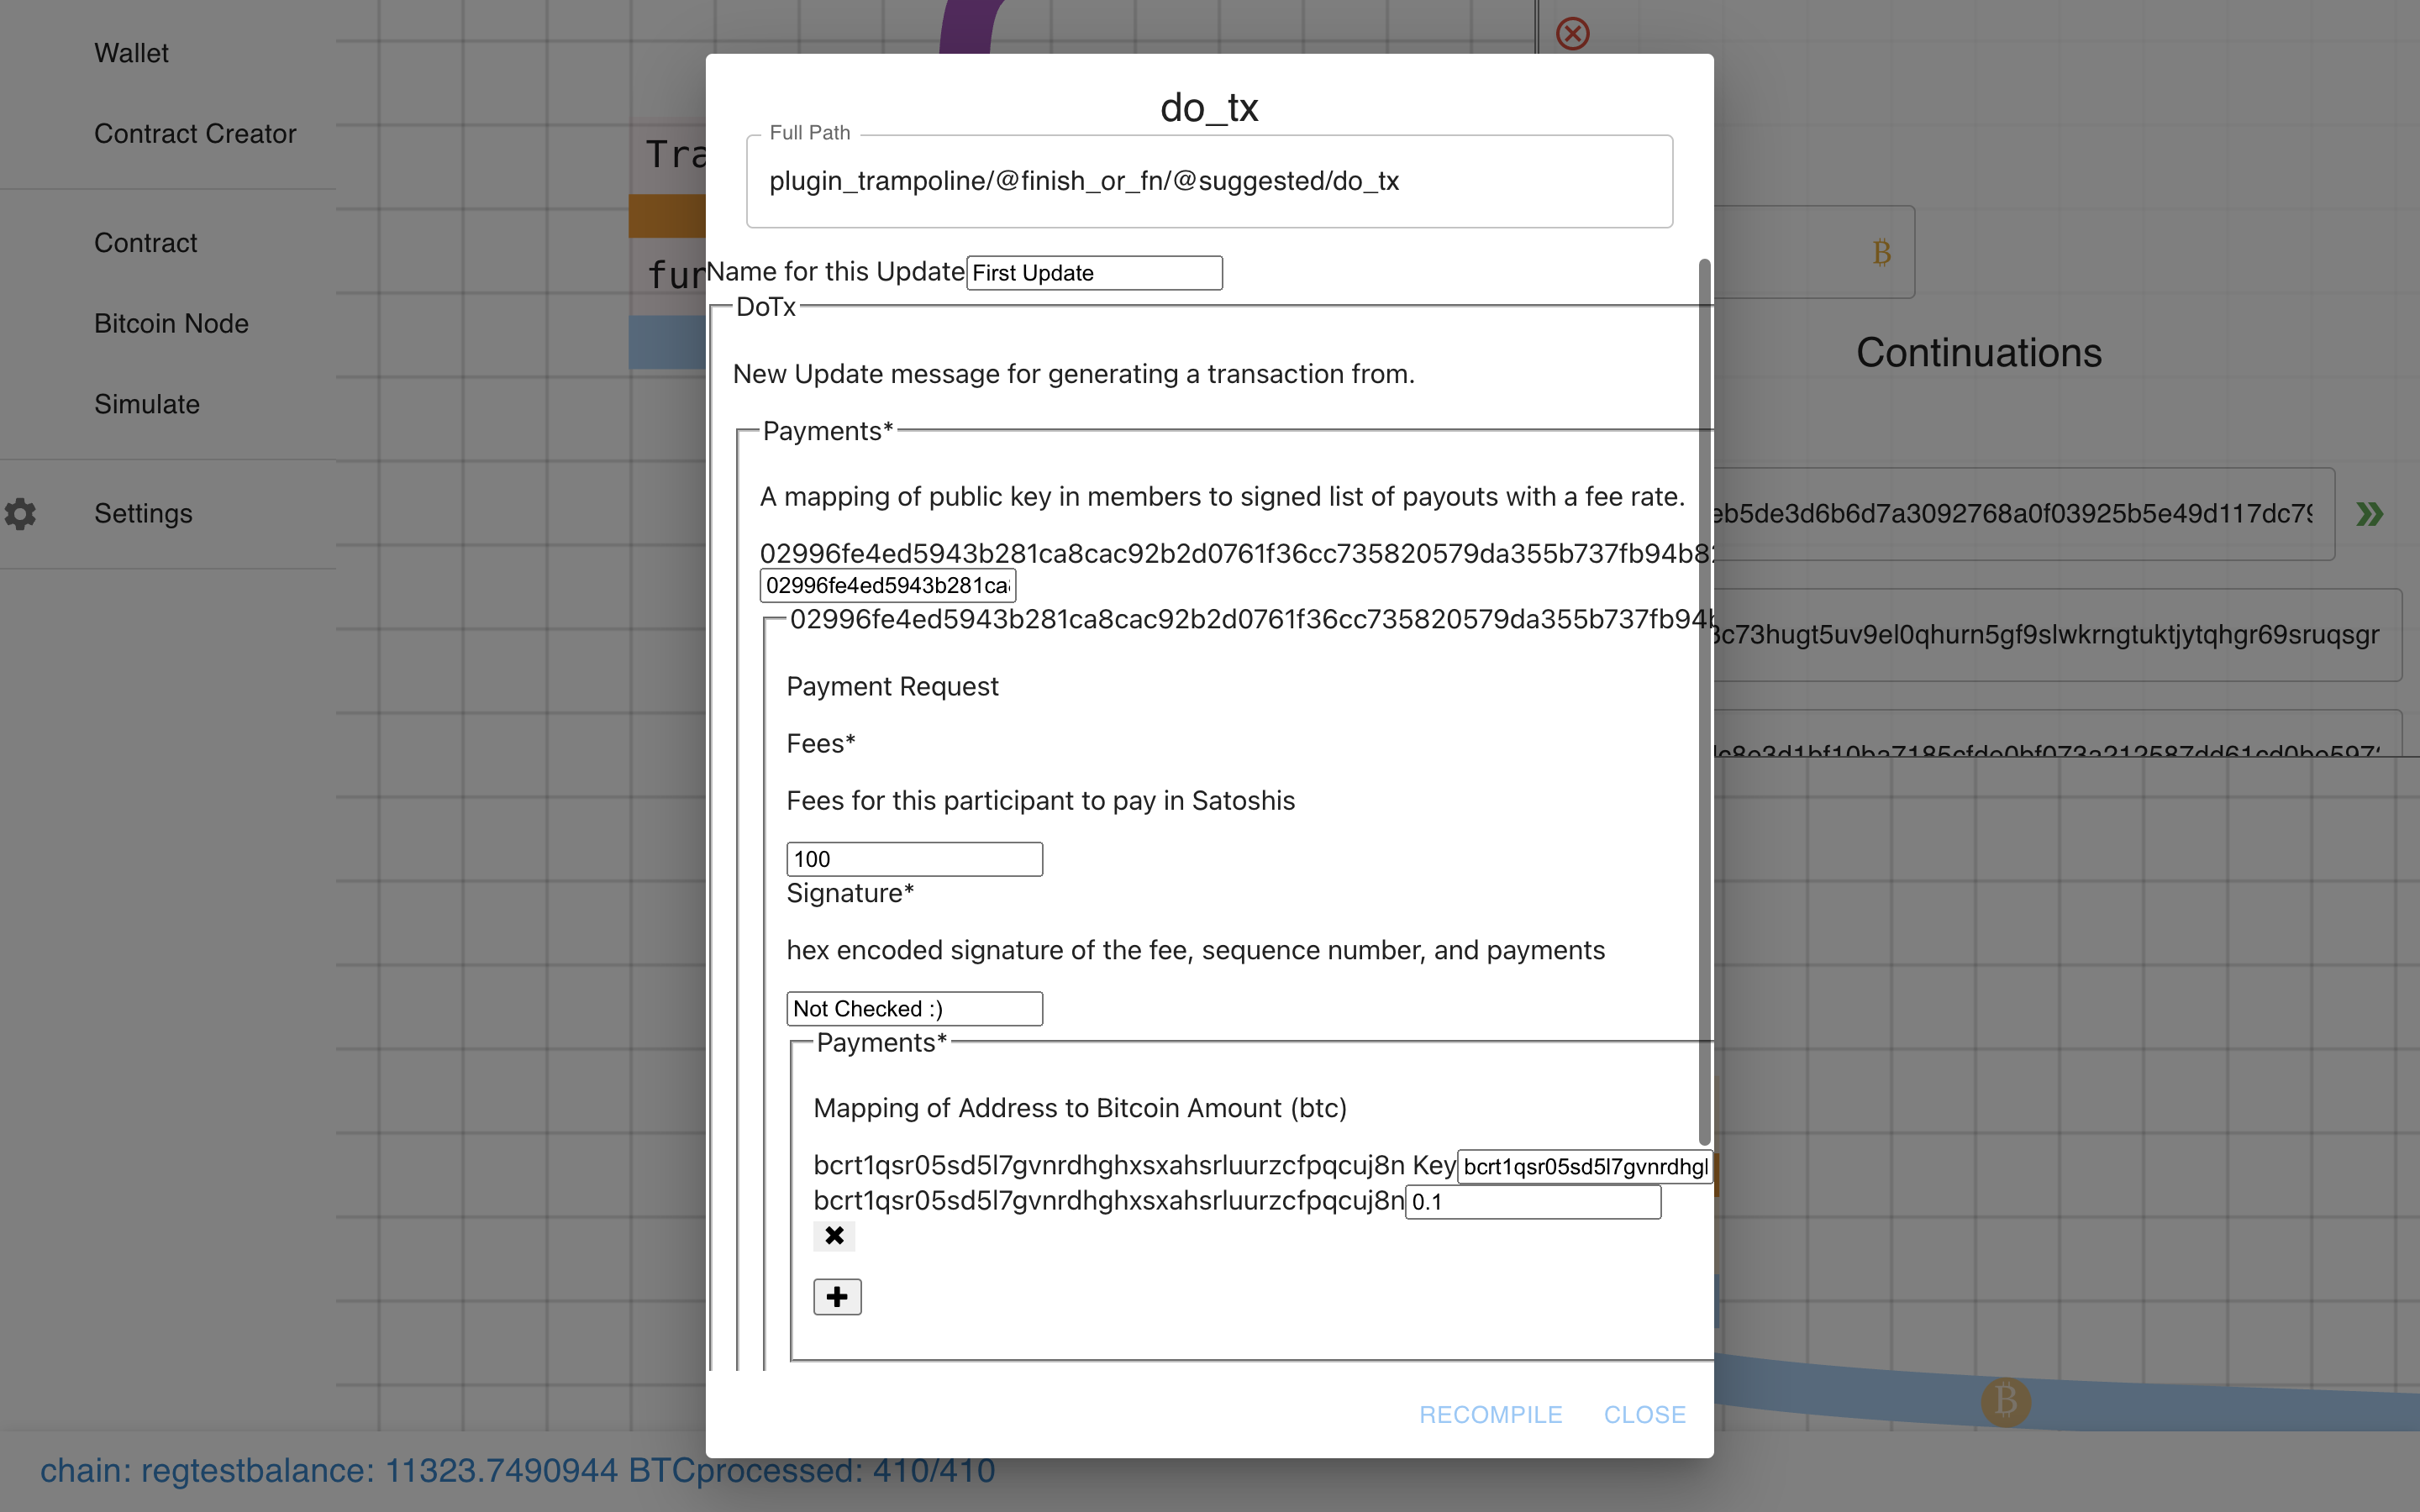 Click submit, then recompile (separate actions in case we want to make multiple “moves” before recompiling).
 I really need to fix this bug…
 Voila!
As you can see, the original graph is intact and we’ve augmented onto it the new state transition.
 The new part has our 0.1 BTC Spend + the re-creation of the Payment Pool with less funds.
 Ok, let’s go nuts and do another state transition off-of the first one? This time more payouts!
 Submit…
 And Recompile1…
 I skipped showing you the bug this time.
Now you can see two state transitions! And because we used more payouts than one, we can see some congestion control2 at work.
It works! It all really, really works!
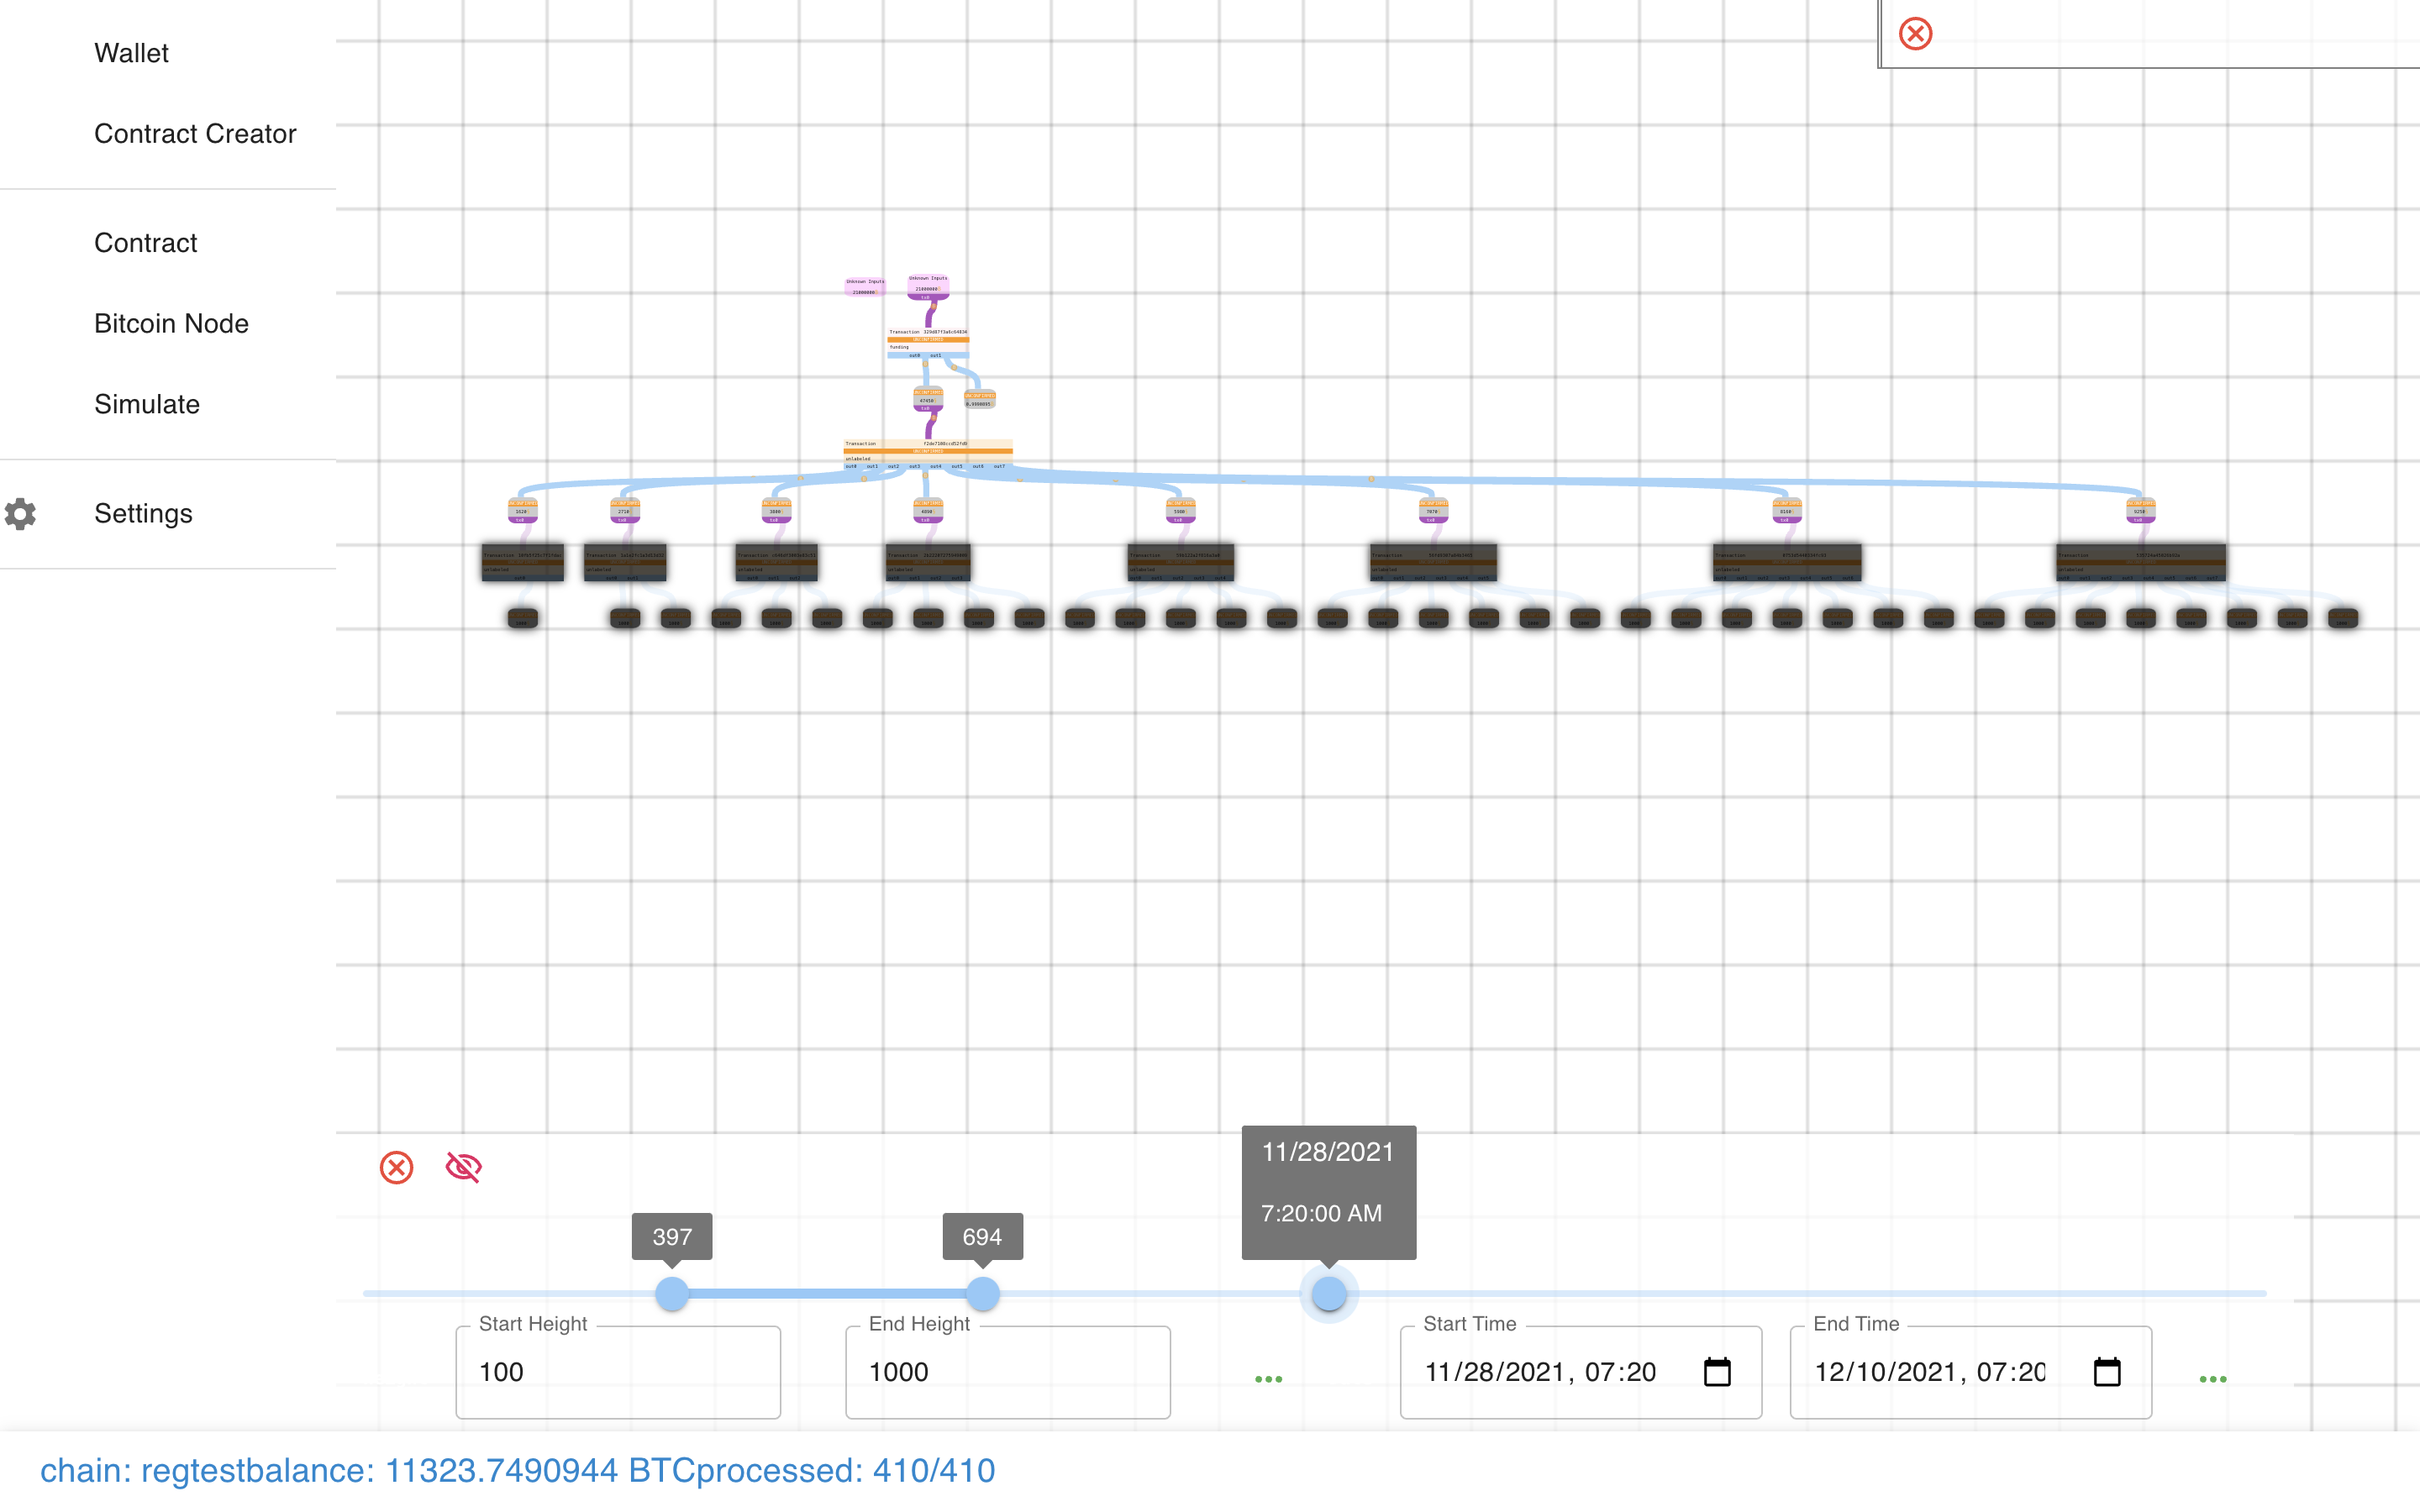
One more thing I can’t show you with this contract is the timing simulator.
This lets you load up a contract (like our Hanukkiah below) and…
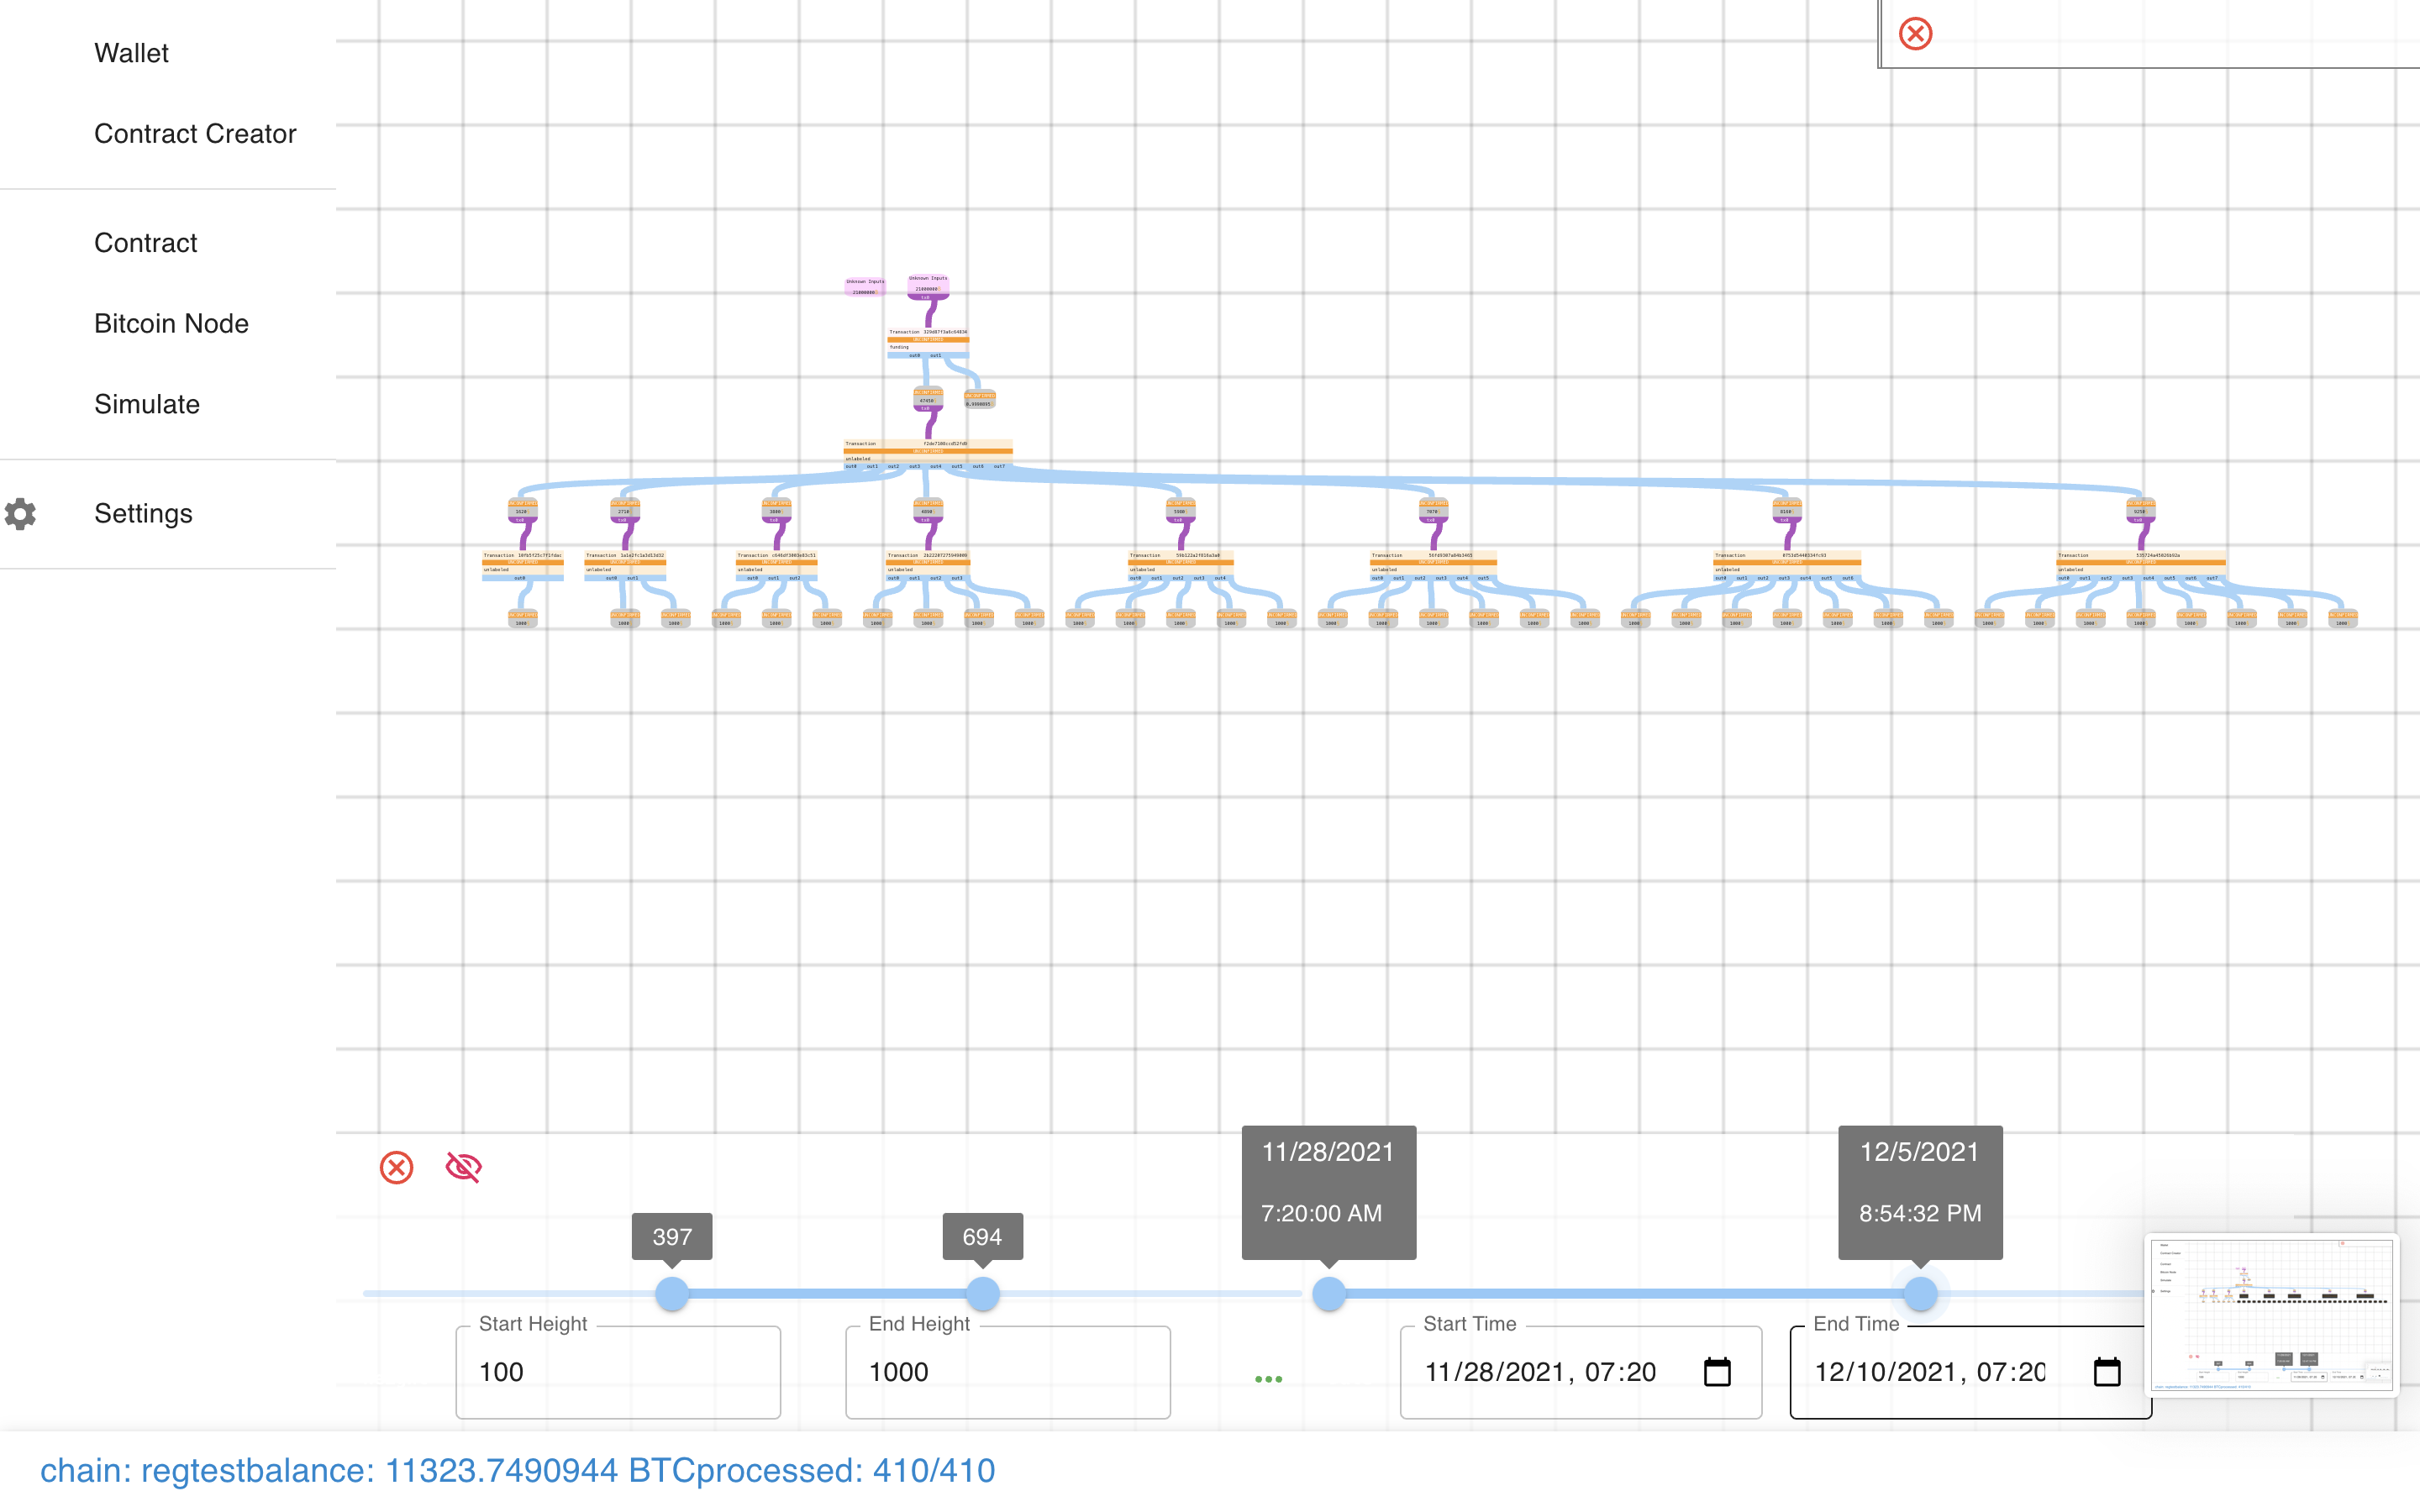 Simulate the passing of time (or blocks).
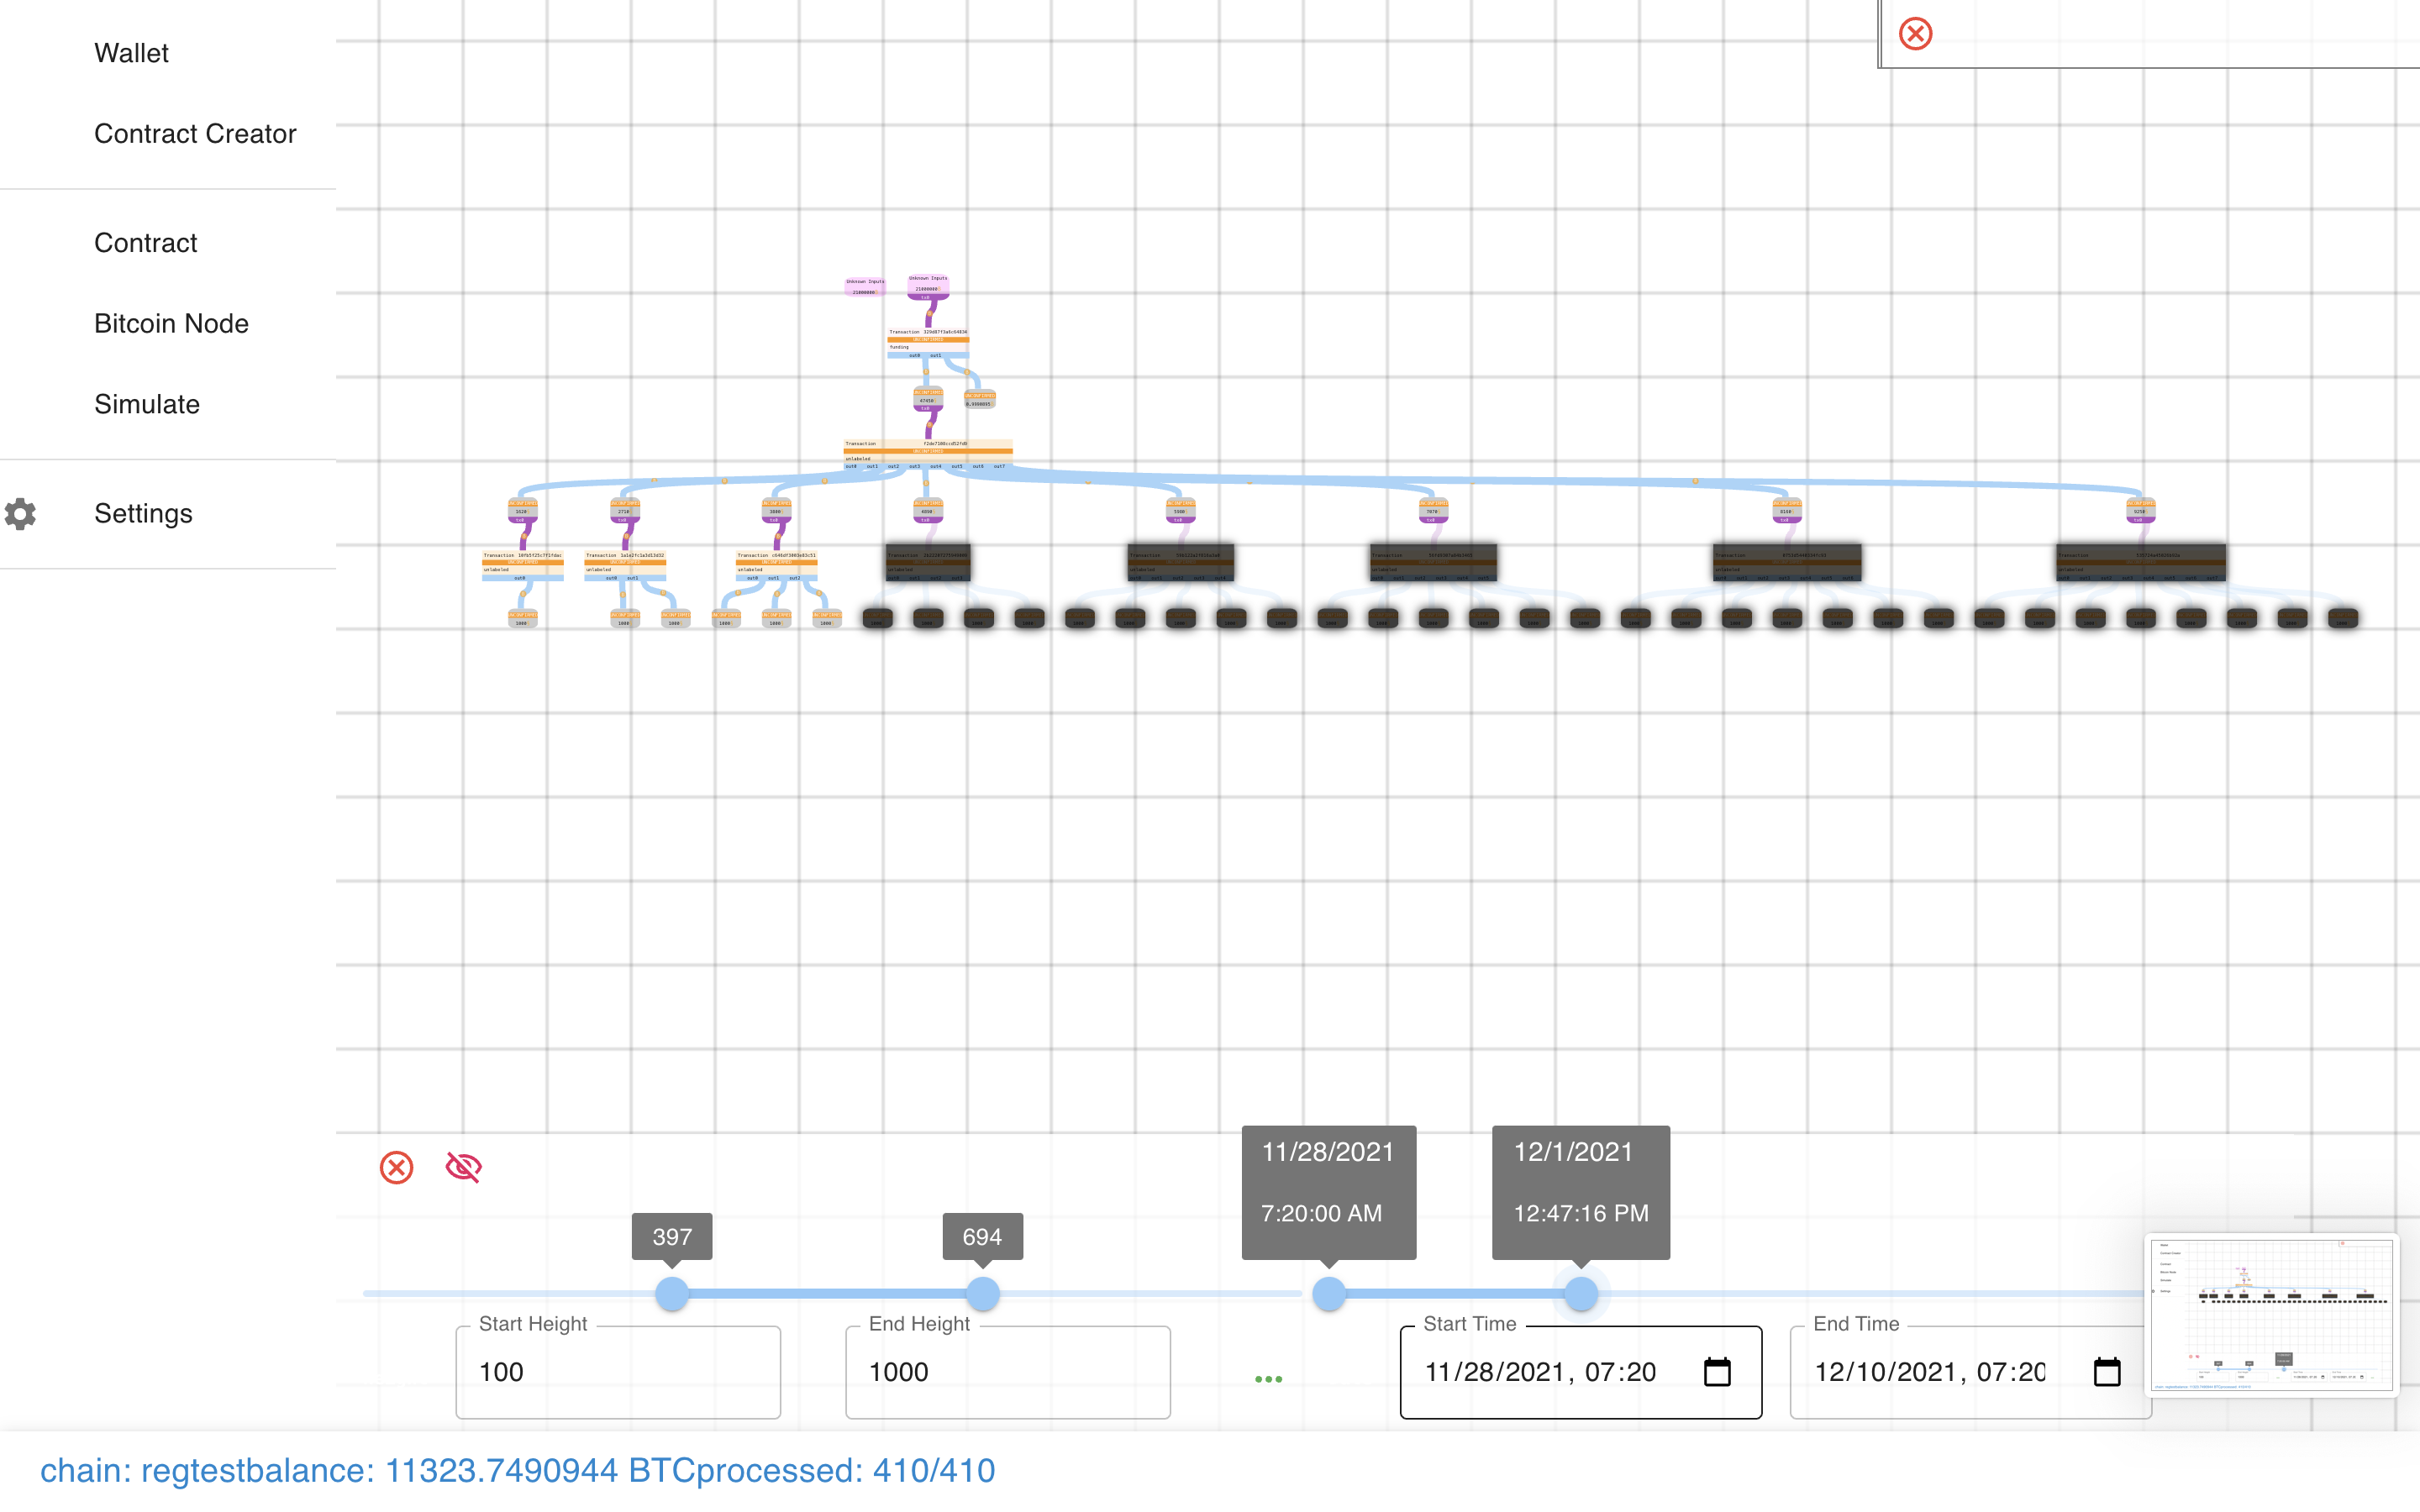 Pretty cool!
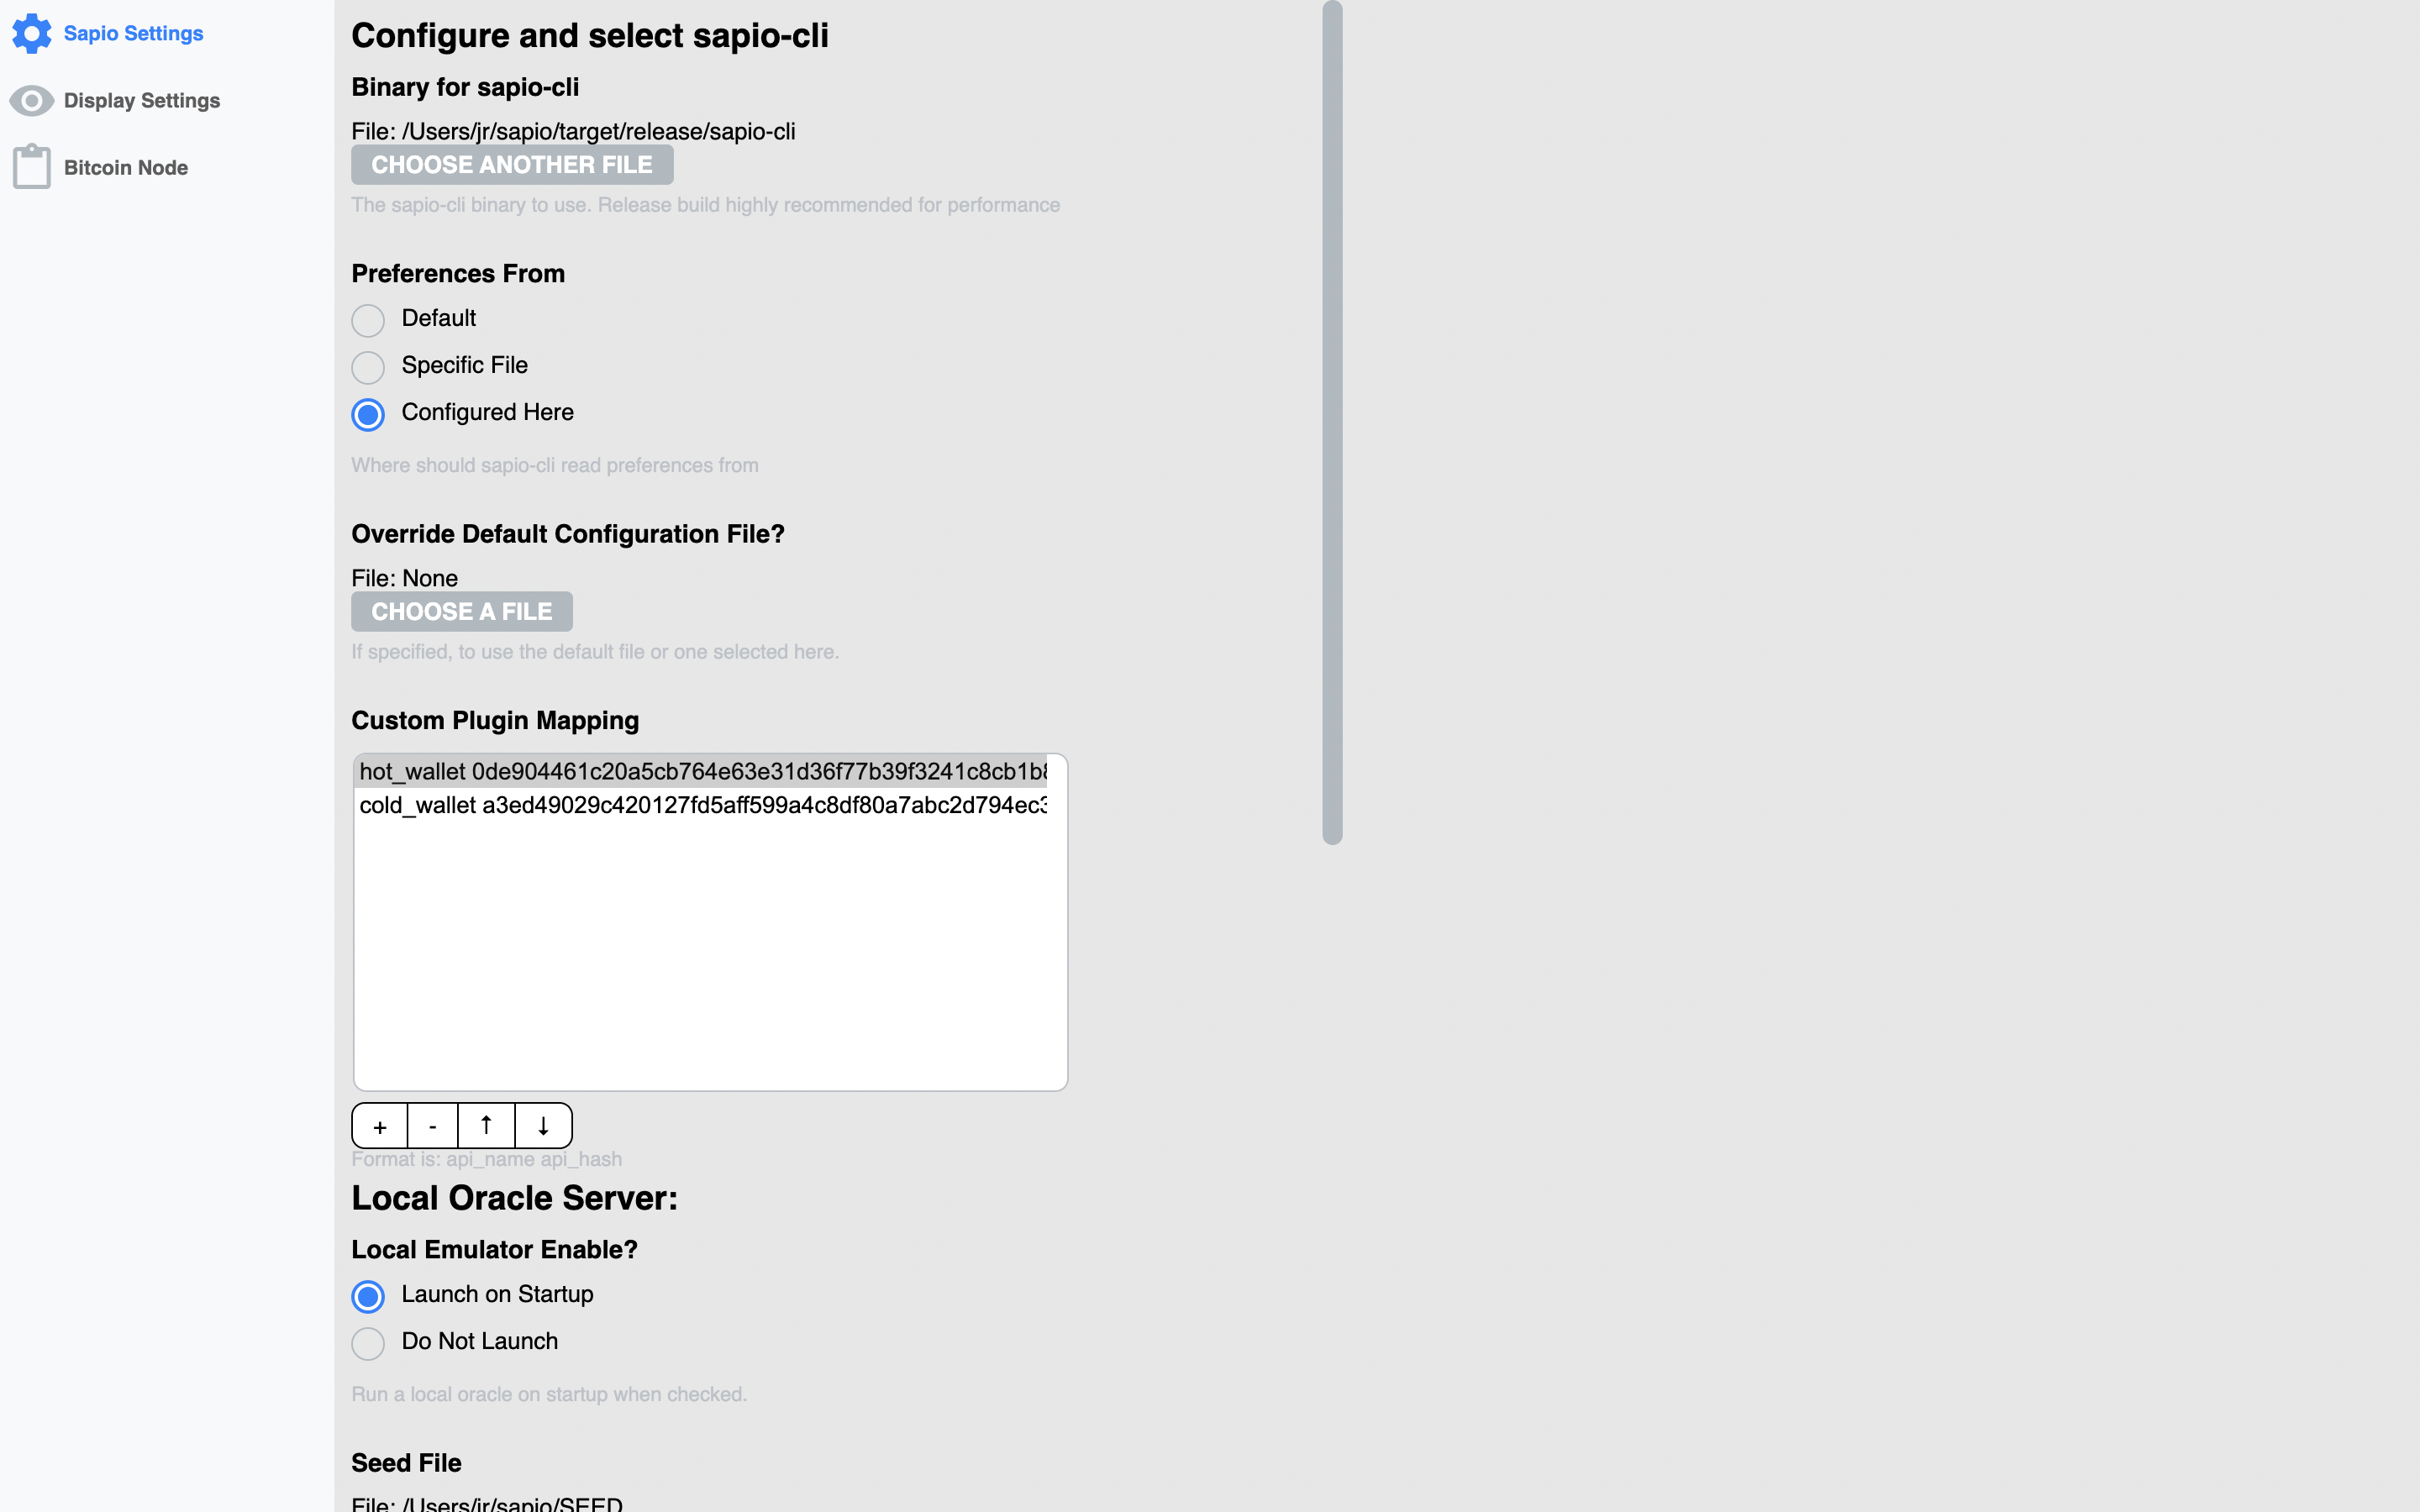
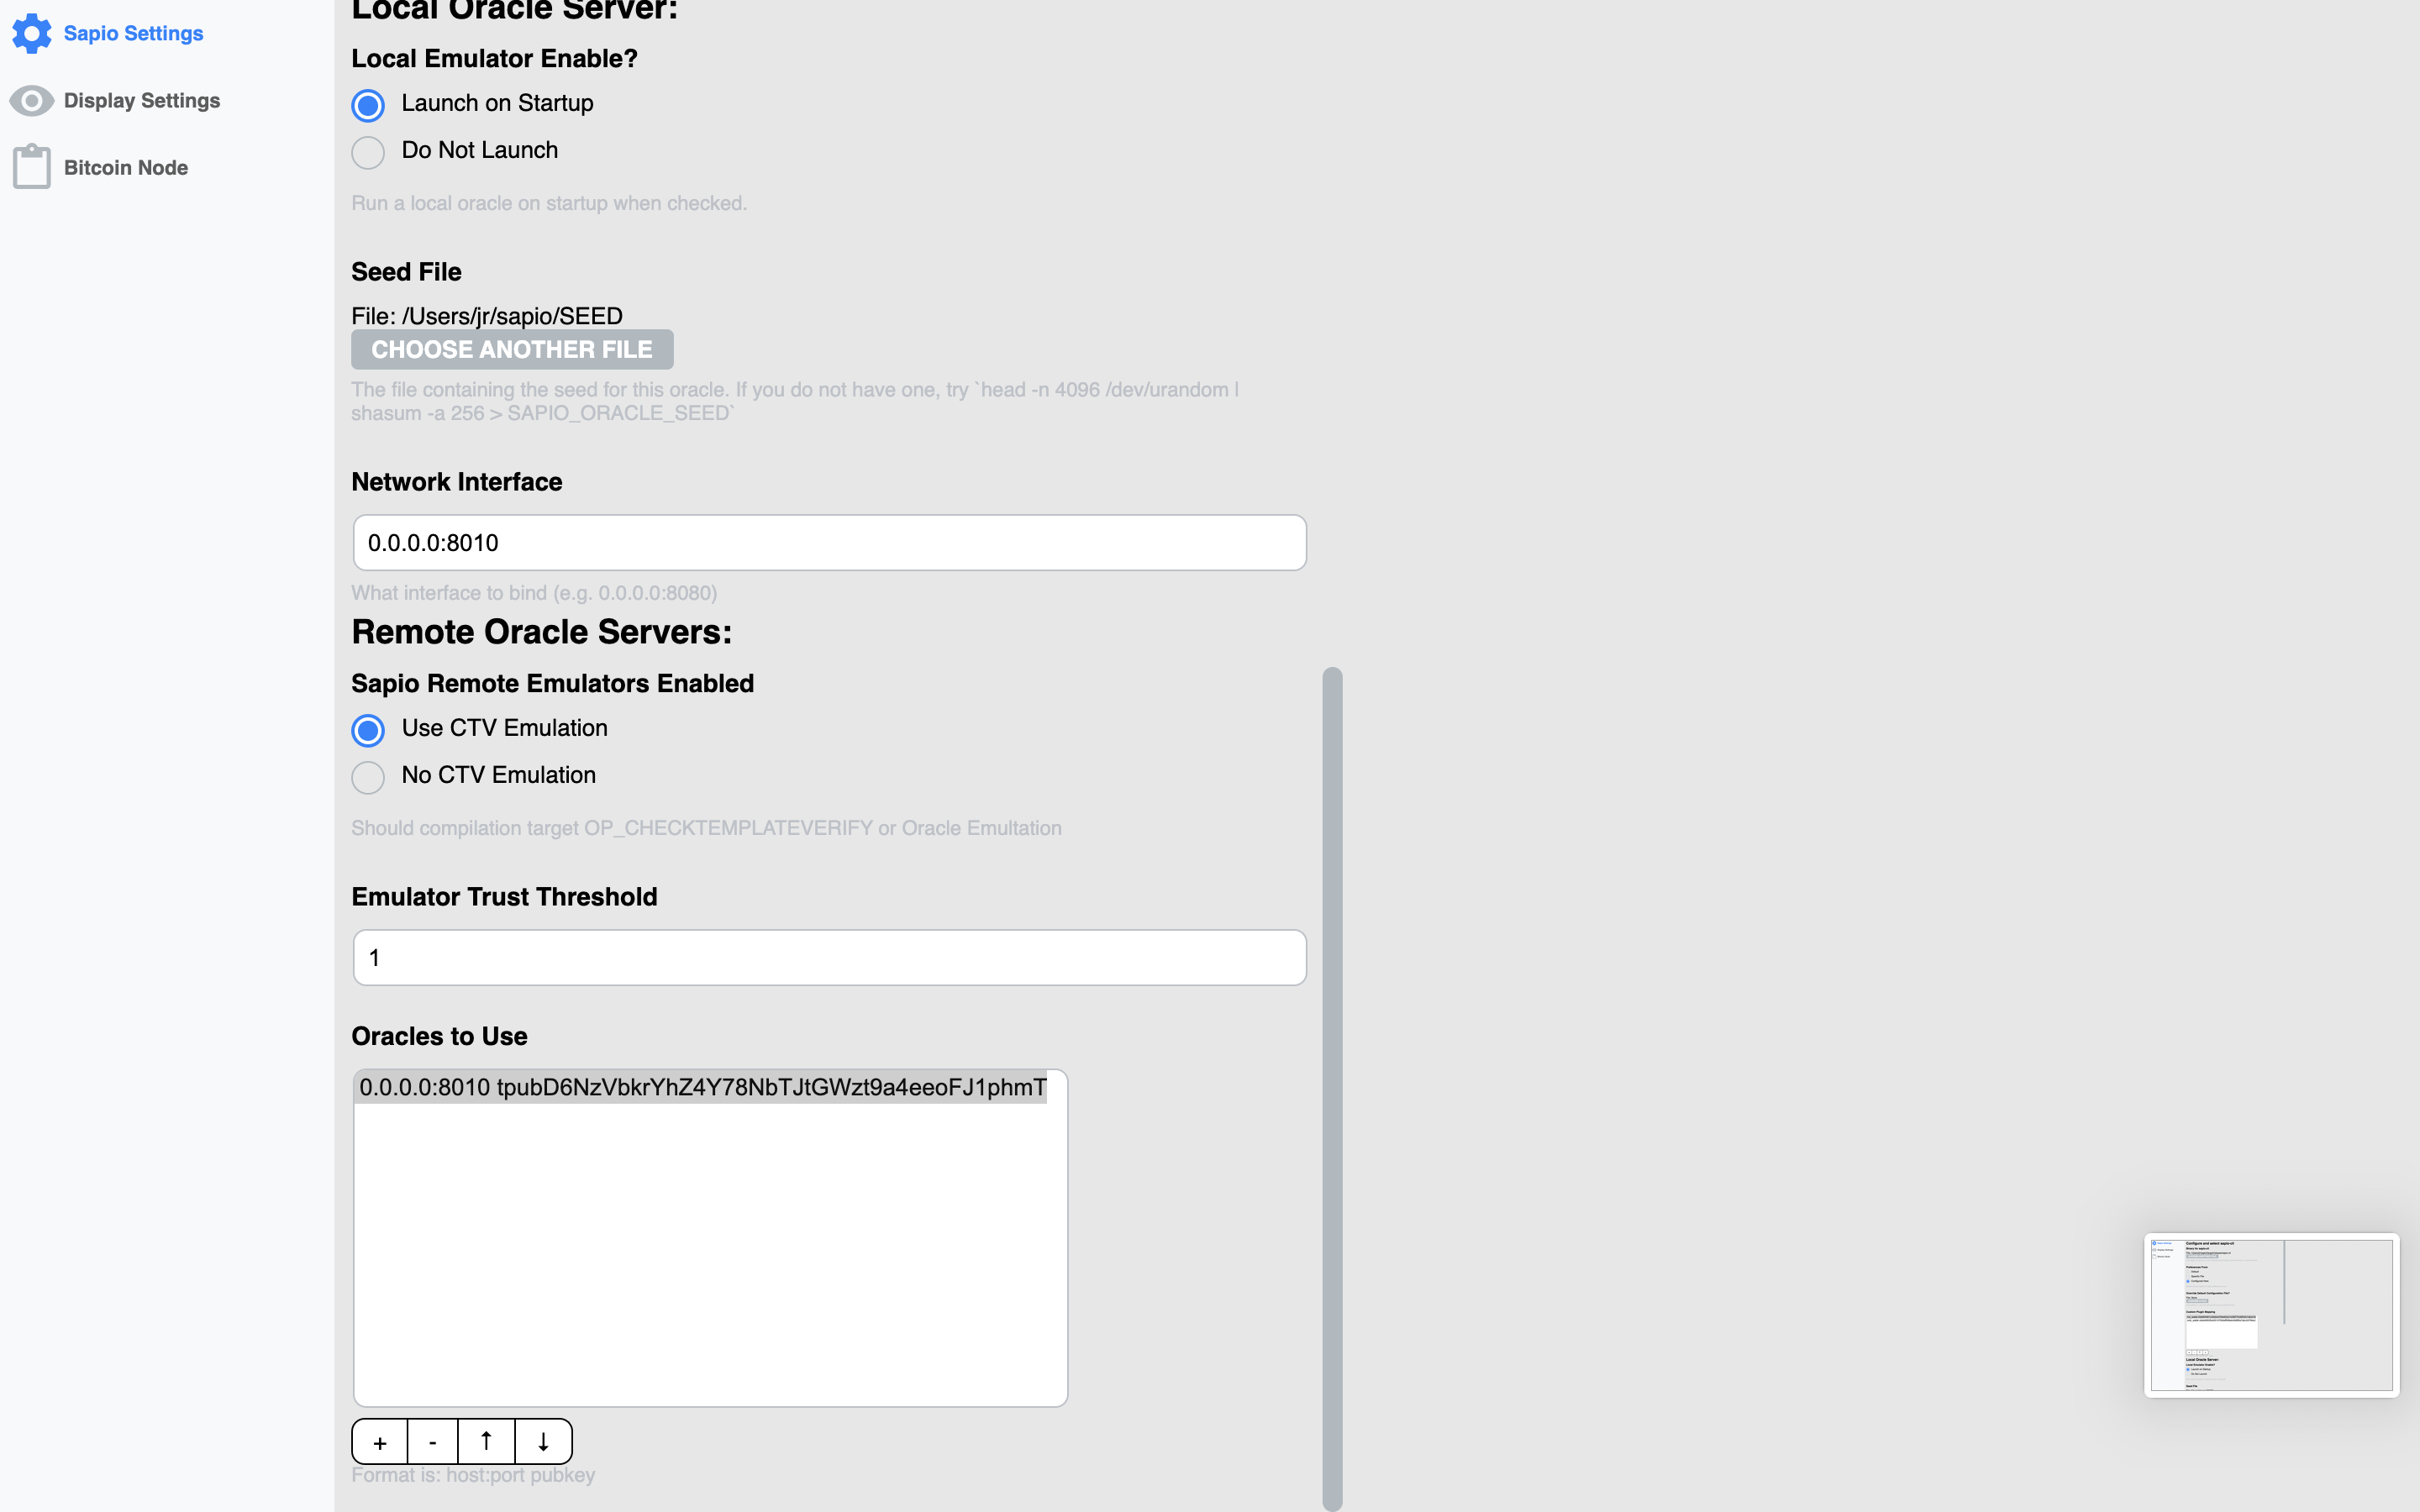
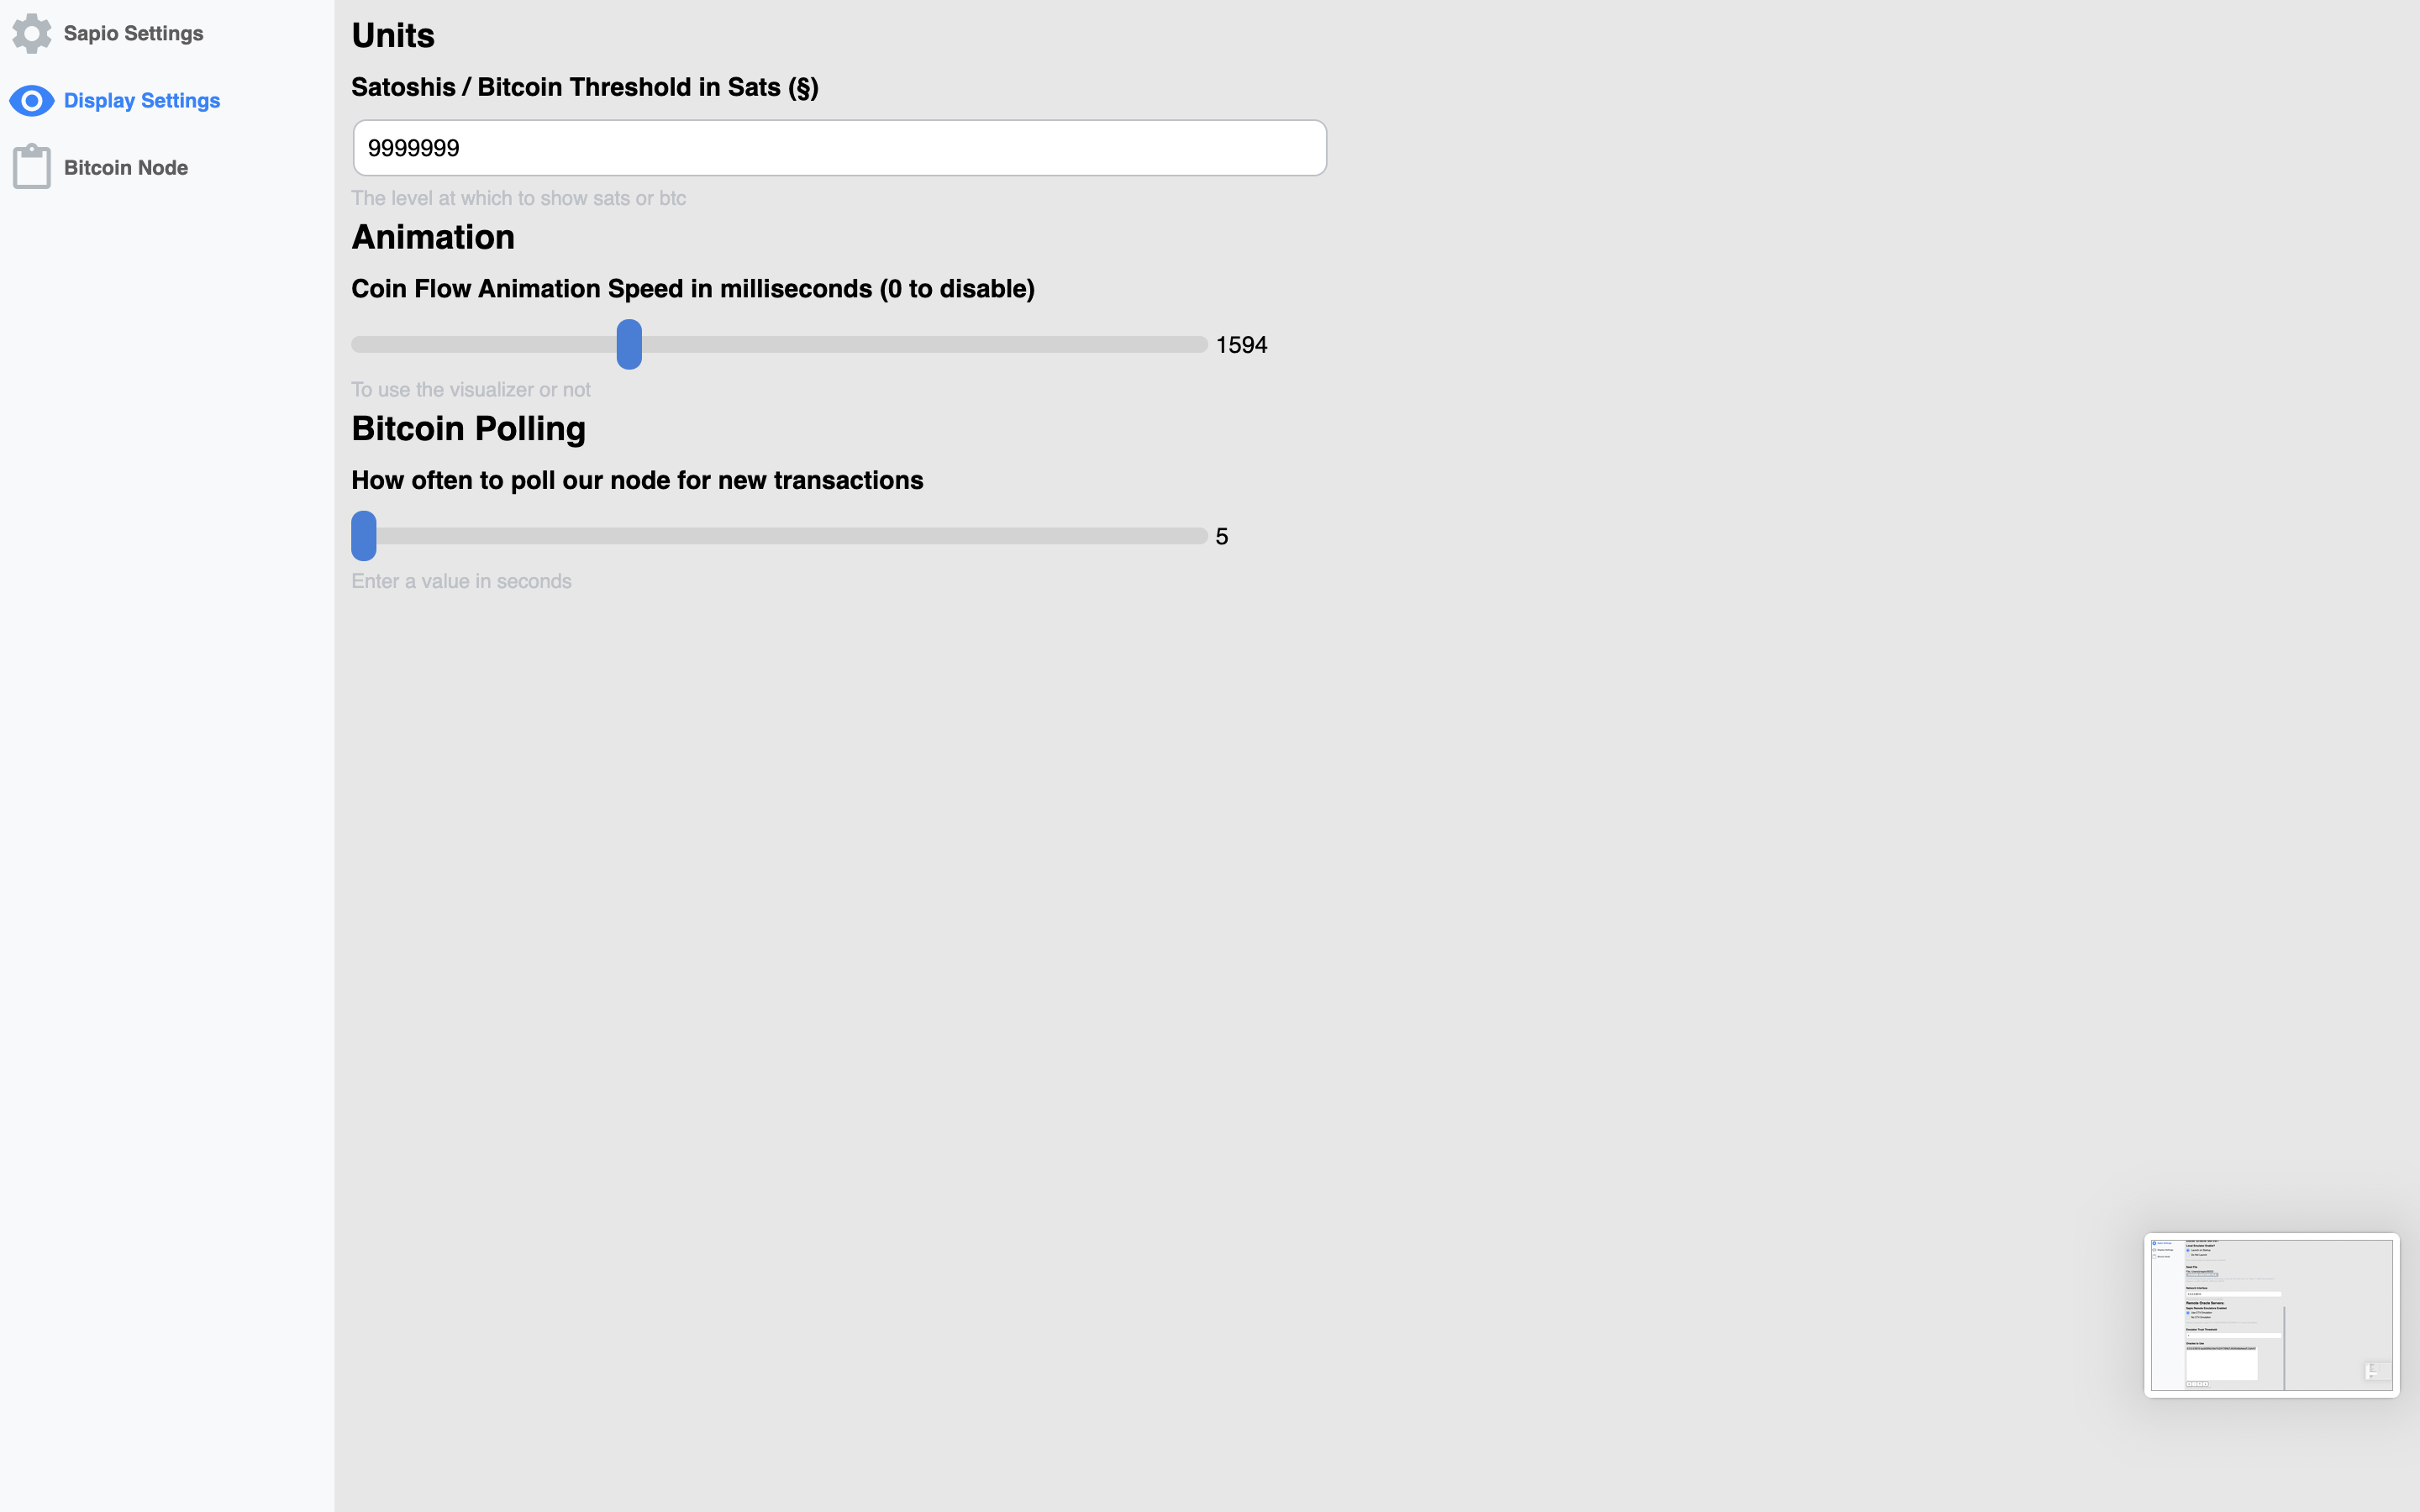
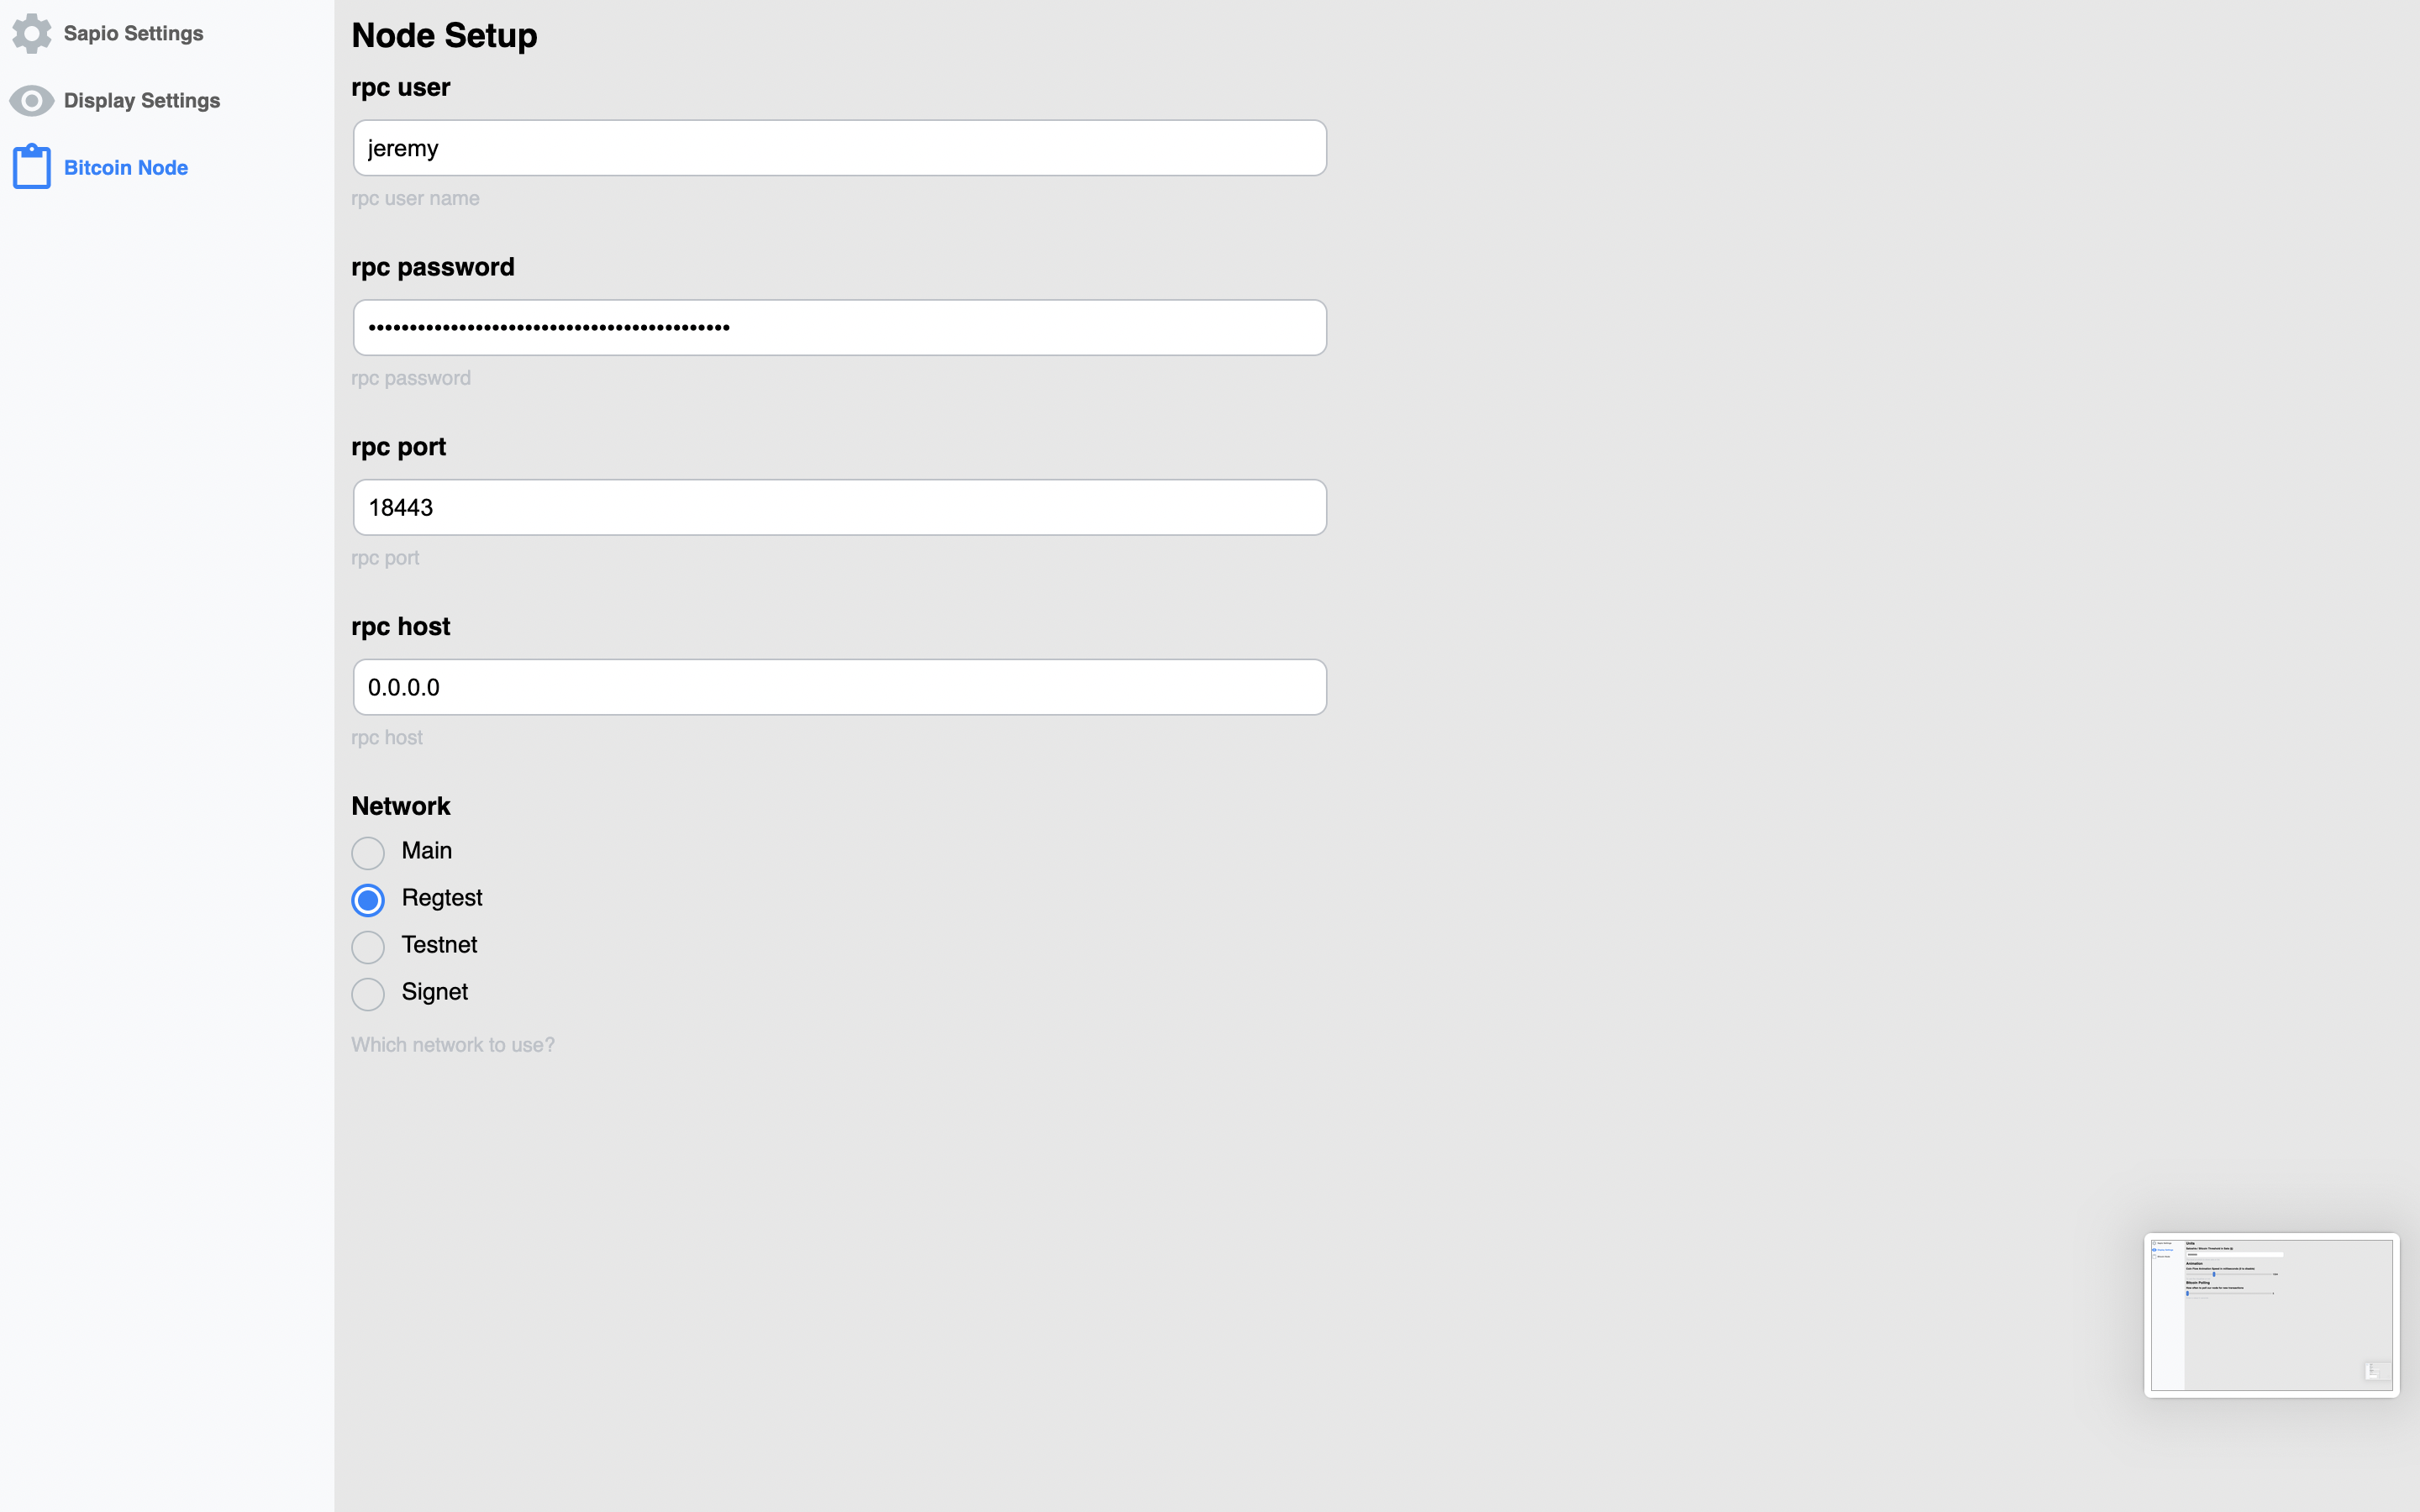
There are also some settings you can configure for display settings, the node,
and for sapio-cli. The first time you run Sapio, you’ll need to get some of
these things configured correctly or else it will be broken. Currently, if you
look here you
can find a template for a script to get everything up and running for a first
shot at it, otherwise you’ll have to do it by hand, or just change your
preferences.json to be similar to mine in the note3.
before you ask…
OF COURSE THERE IS DARK MODE
configured by your local system theme preference
I hope you enjoyed this! There’s a metric fuckload of work still to do to make Sapio Studio & Sapio anywhere near production grade, but I hope this has helped elucidate how powerful and cool the Sapio approach is, and has inspired you to build something and try it out! I’d also be really eager for feedback on what features should be here/are missing.
Lastly, if you’re just excited about this, it’s definitely a project that could use more experienced react/electron/bitcoin contributors, either yourself or if you’re interested in sponsoring :).
-
it was here I noticed a small mistake that I named the updates “First Update” instead of “FirstUpdate” so I had to poke in the JSON and fix it in the interest of time… TODO for me to make invalid inputs invalid! ↩
-
I used the wrong, wonky version of the TreePay by mistake and was too lazy to fix it, my bad :p it should look more tree-y. I’ll fix the actual code in the repo at some point. ↩
-
My config file, if it helps you :)
{
    "sapio": {
        "binary": "/Users/jr/sapio/target/release/sapio-cli",
        "oracle-local-enabled": true,
        "oracle-remote-enabled": true,
        "oracle-remote-oracles-list": [
            "0.0.0.0:8010 tpubD6NzVbkrYhZ4Y78NbTJtGWzt9a4eeoFJ1phmTVxZNSAiVkVWW5GYixSobuXTQtzFDcSWPoXhtiDUu4n6sChuNKVXZ9UL4LvxnU1WG4Y7pxV"
        ],
        "oracle-remote-threshold": "1",
        "plugin_map": [
        ],
        "configsource": "here",
        "oracle-seed-file": "/Users/jr/sapio/SEED",
        "oracle-netinterface": "0.0.0.0:8010"
    },
    "display": {
        "sats-bound": "9999999",
        "animate-flow": 1594,
        "poll-node-freq": 5
    },
    "bitcoin-config": {
        "rpcuser": "jeremy",
        "rpcpassword": "hunter2"
        "rpcport": "18443",
        "rpchost": "0.0.0.0",
        "network": "regtest"
    }
}