25 Feb 2017

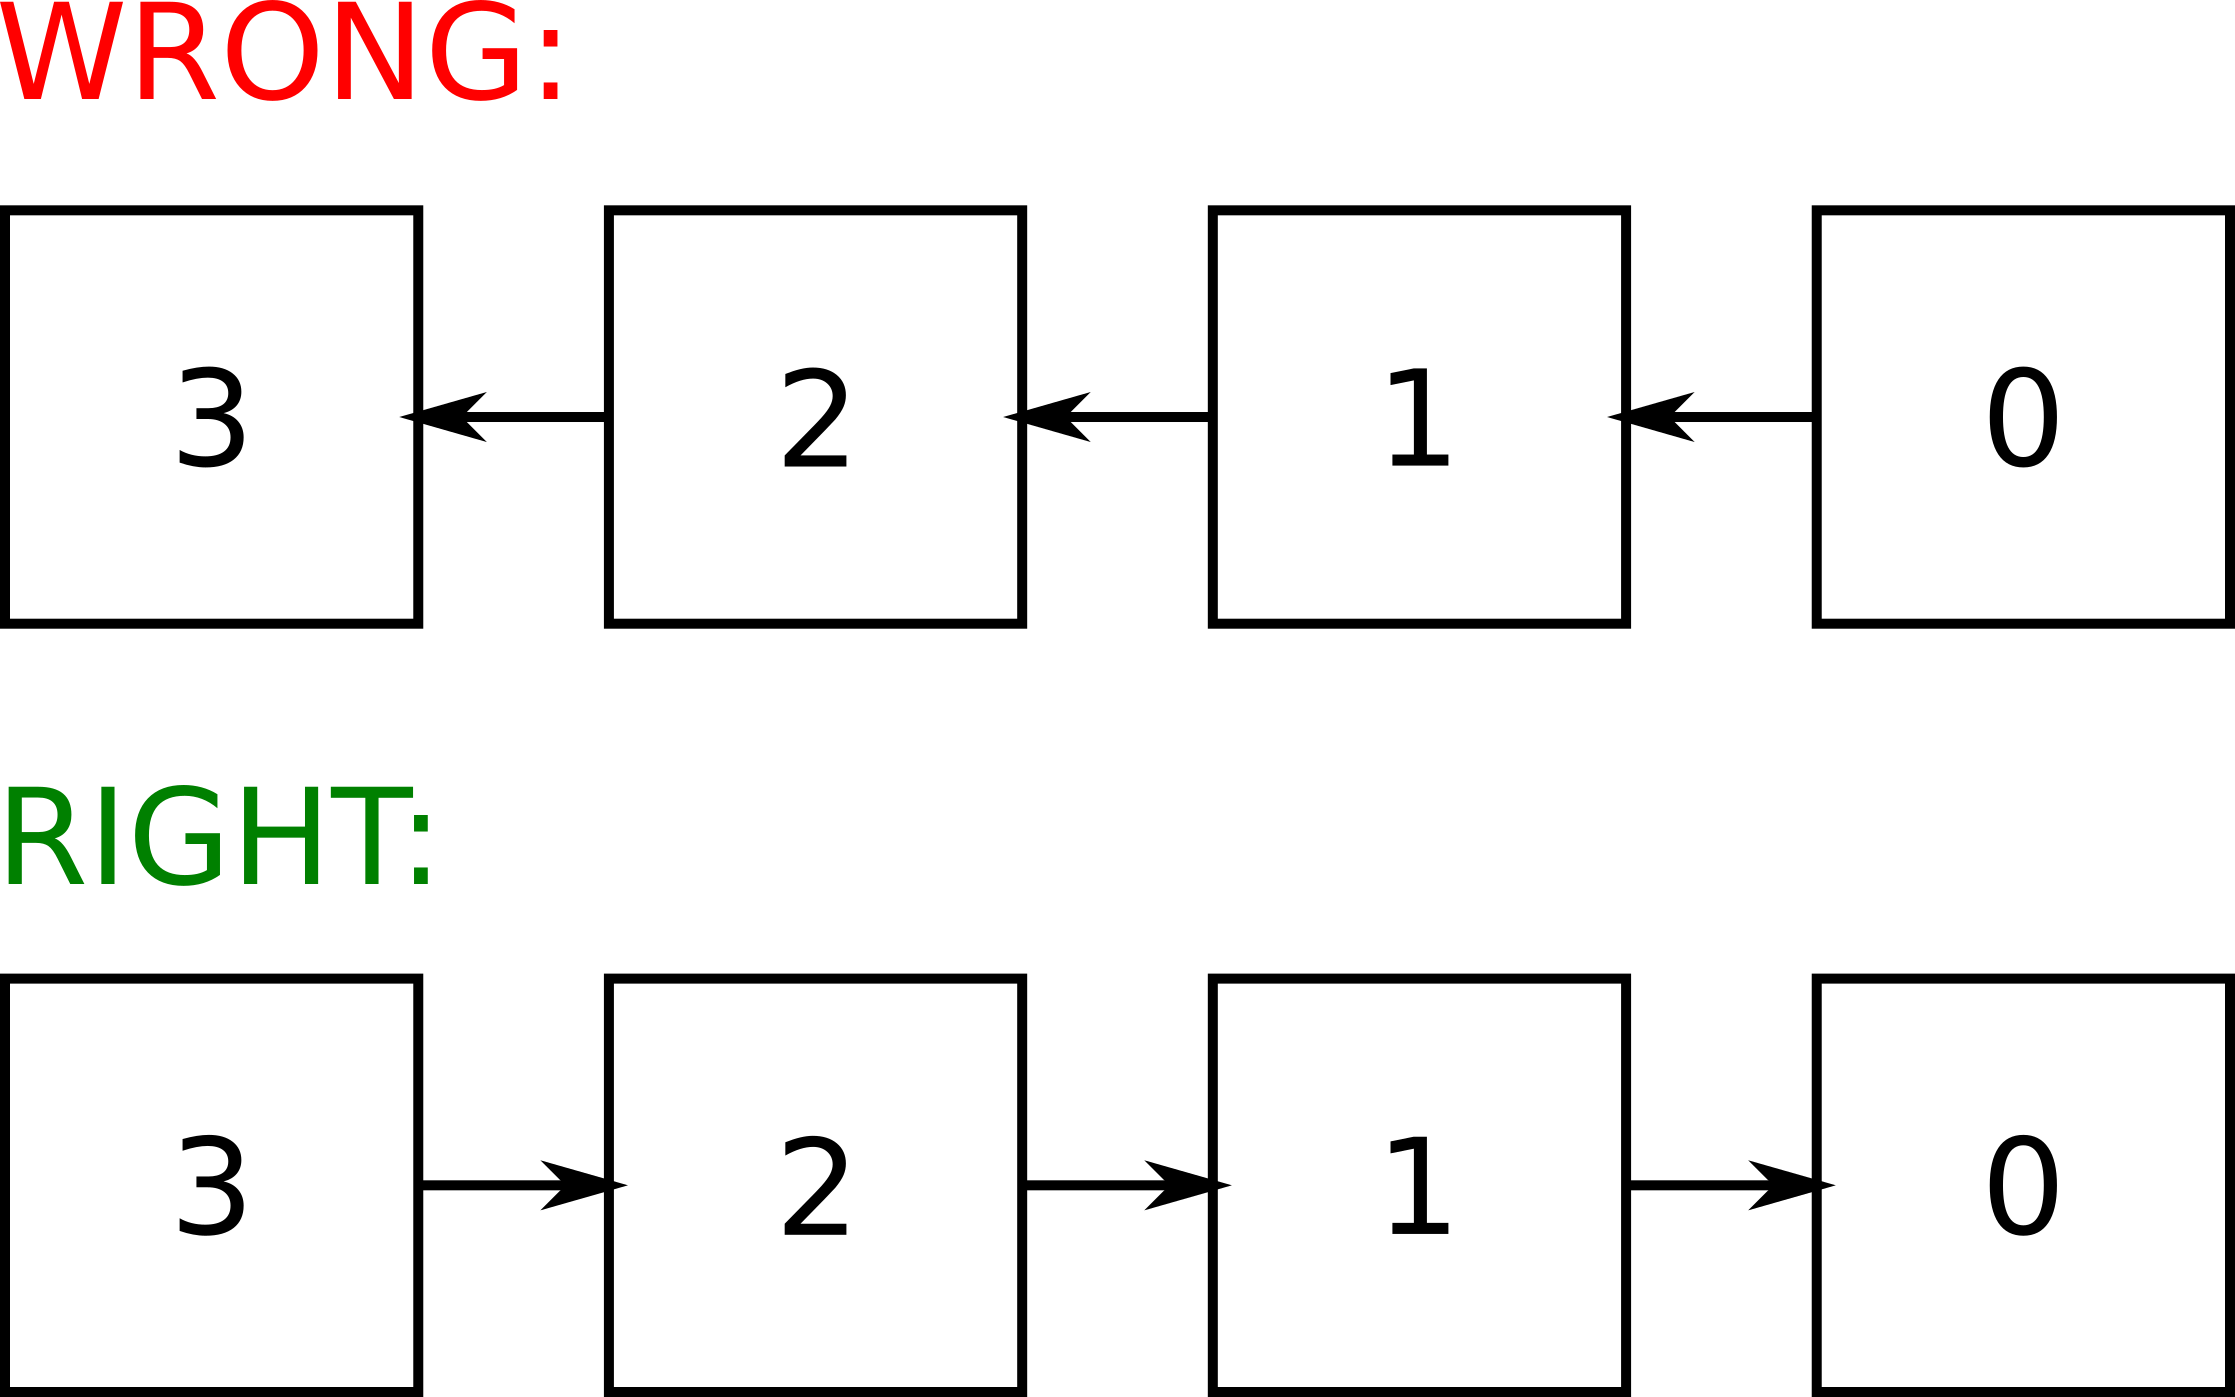
One of my major pet peeves in presentations about the blockchain is that most
people seem to draw the arrows/pointers in the incorrect direction.
Pointers should point from newer blocks to older blocks. This is because in a
blockchain, each block is immutable so it would be impossible to update older
blocks to point to newer ones. This is also in line with most singly linked
list representations. Because it can be confusing, it’s always best to include
reference heights for extra clarity.
09 Feb 2017
| This post got backlogged, so just putting it up unfinished. Will backfill pictures when I find them later. |
I took a few day reprieve from Tokyo to visit the Kansai prefecture.
While there, I visited Osaka and Nara. I was feeling a little bit unwell so
I skipped Kyoto/Kobe, but will be looking forward to visiting when I’m next
in Japan!
Getting to Kansai
I decided to take an early morning Shinkansen (i.e. a bullet train) from Tokyo
to Osaka on Tuesday morning. Because my hotel stay was officially over, I
stayed the night in a “Manga Kissaten”. For the uninitiated, a Manga Kissa is
basically a somewhat skeevy 24/7 pay-per-hour library with free drinks and
private booths. I had heard that they were a reasonable place to stay – I
think I had a particularly bad one, the air was smoke filled, the drinks were
just OK, there was no shower in the morning, and they didn’t dim the lights
past midnight (these are all problems I’ve heard higher-end Manga Kissaten do
not suffer). Blearly eyed, I made my way to the train station and purchased a
ticket, and boarded the first train to Osaka.
![Shinkansen! Shinkansen!]()
Osaka
Upon arriving in Osaka I made my way down to a place called Spa World in an area
called Dotonbori-Mae. Unfortunately, they were overbooked/expensive so I looked
elsewhere nearby. After comparing the offerings across the street, I found a
really nice backpacker’s hostel where I was able to secure a private room
(Japanese style) for about $13 USD a night.
![Selfie in the hostel]()
From the hostel I decided to just walk the length of the city, starting from the
hostel all the way to Umeda. As a straight shot, this is about 4 miles, but I
wandered around so it was longer.
For lunch I ate okonomiyaki (a Japanese “pizza” that’s a little closer to a
omelette). It is served on a hot griddle, yum!
![]()
Later that night I went to the Don Quixote. DQ is like a wacky Walmart/Spencer’s
Gifts hybrid. It has everything from groceries to a sex shop. A few floors up
there was an (unrelated?) arcade/casino. I bought some chips and started playing
games. After playing for about an hour (and not doing very well), I went to cash
out my remaining tokens. I found out that tokens are not actually exchangeable
for anything. I asked some other players if they could help me exchange, and
they agreed because they thought you could cash out too. When they found out
they couldn’t, they seemed to be a little off put, but I gave them my tokens so
they were happy. What was weird is they even had a bank for the tokens…
![Token bank]()
Nara
I really enjoyed my visit to Nara. The deer are so kawaii!
In Nara you can find the Tōdai-ji, or a temple featuring a huge bronze Buddha
(the largest bronze statue in the world and the largest Buddha in Japan). The
Tōdai-ji temple is also one of the largest wooden buildings in the world.
28 Jan 2017
I’m visiting Japan for two weeks to help teach BC-2 at
Digital Garage.
I’m very excited to have the chance to explore Tokyo and hope to make many new
friends while out here!
Hopefully I can fill in a few details about my trip as I go…
23 Aug 2016
I’m hoping to start blogging more frequently – consider this the first post.
I’m going to fill in some back-dated posts though.
finally...
03 Jun 2016

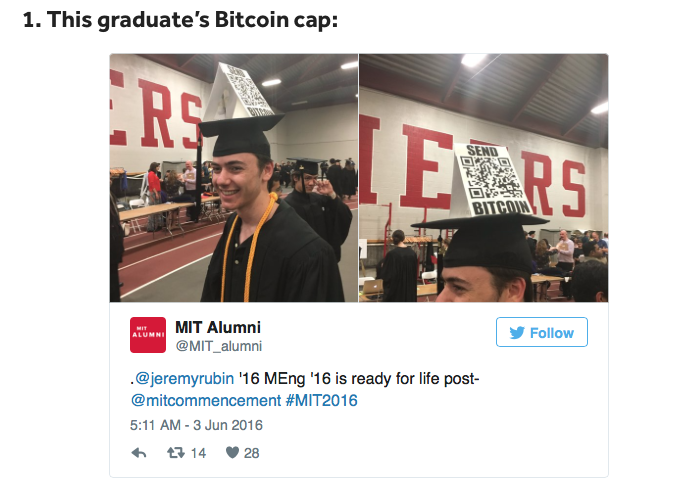
Well, I did it: I graduated MIT with my S.B. and M.Eng in 4 years! And
apparently I was the most
joyously nerdy.

